While making Opera Cake from scratch will have you spend a hefty chunk of time in the kitchen, I swear it’s so decadent, it’s totally worth the effort.
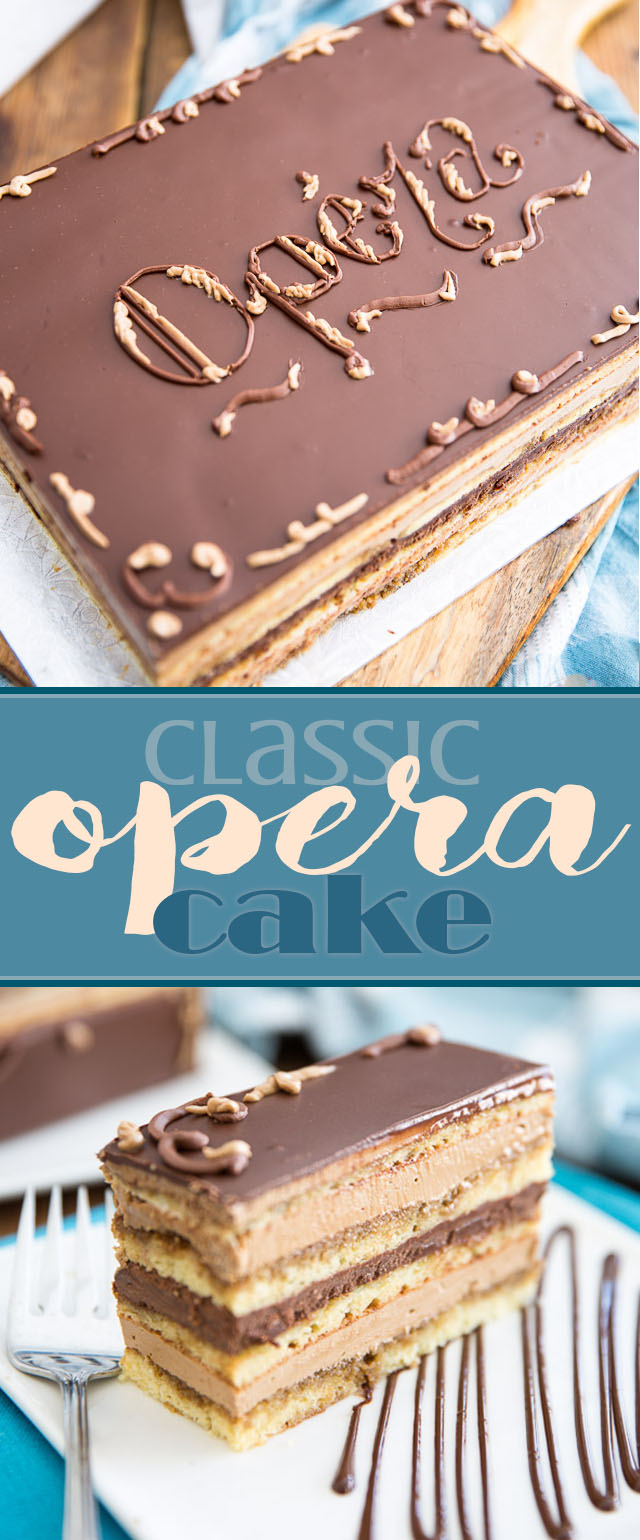
If you’ve ever had Opera Cake in the past, even if it was just this “one” time, then I’m sure that this classic French dessert needs no introduction to you… I’m positive that you remember the experience full well.
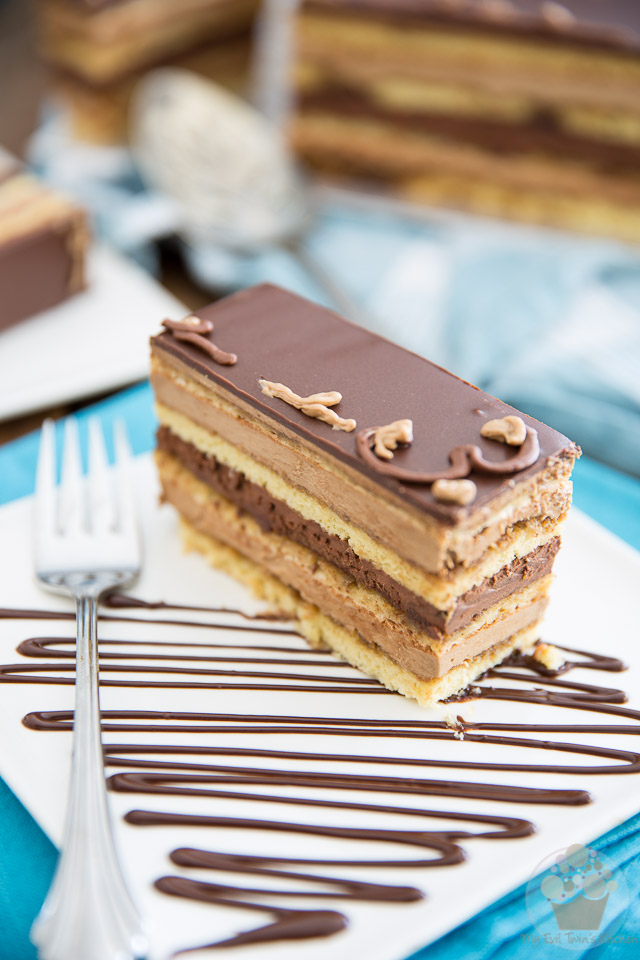
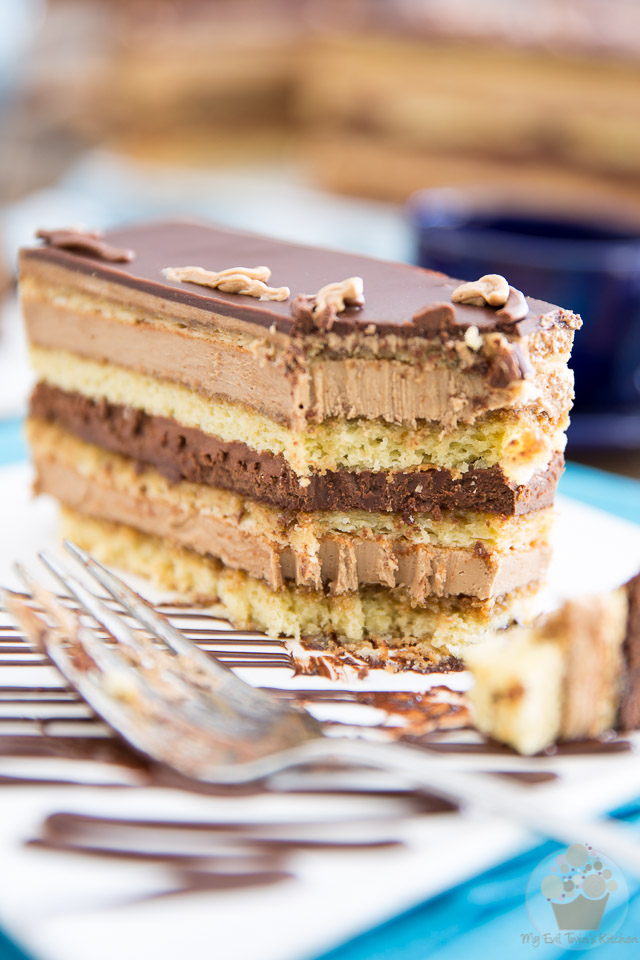
For those who are not familiar with this delicacy, let me fill you in on it: you’re looking at pure bliss, pure heaven, pure perfection. We’re talking thin sheets of delicate Joconde almond cake drenched in a sweet coffee syrup, topped with layers of melt-in-your-mouth coffee buttercream and silky smooth, super intense dark chocolate ganache. A luscious layer of soft and buttery, dark chocolate glaze finishes off this heavenly treat.
I’m not gonna lie to you, making Opera Cake from scratch will demand SERIOUS time and effort on your part, and I do mean serious. But, while it will have you spend a hefty chunk of time in the kitchen, I swear it’s so decadent, it’s totally worth all the hard work.
You’ll need to plan on several hours of active prep work and even more hours of resting / cooling time. In fact, I personally prefer to make this cake over the course of 2 days – I’ll usually bake the cakes and make the buttercream on day one and save the rest of the steps for day two. However, if you’re patient and get started real early, you could definitely pull it off in a single day.
Whatever you decide to do, be warned: this is definitely the kind of dessert that will have you spend a lot of time in the kitchen. But I can guarantee you one thing: just one bite from the finished product will have you forget aaaaaall about the hard work.
Since the recipe has so many steps to it, this post will be crazy long, so I’ll try and keep the talking to a minimum. Also, I skipped a couple of step-by-step pictures where I felt it could be done, or else there would’ve been way too many… but I’ll do my best at explaining the steps as clearly as I can.
Ready? Let’s do this!
STEP-BY-STEP INSTRUCTIONS & PICTURES
MAKE THE JOCONDE CAKE
Start your mise-en-place by preheating your oven to 450°F
Then, grease a 13″ x 18″ rimmed baking sheet and line it with a piece of parchment paper cut so it fits perfectly inside it. Make sure that the parchment paper adheres evenly to the entire surface of the pan, especially around the edges.
Have a second piece of parchment paper of the exact same size ready to line the pan a second time, or prepare another pan in the exact same way if you’re lucky enough to have access to two baking sheets.
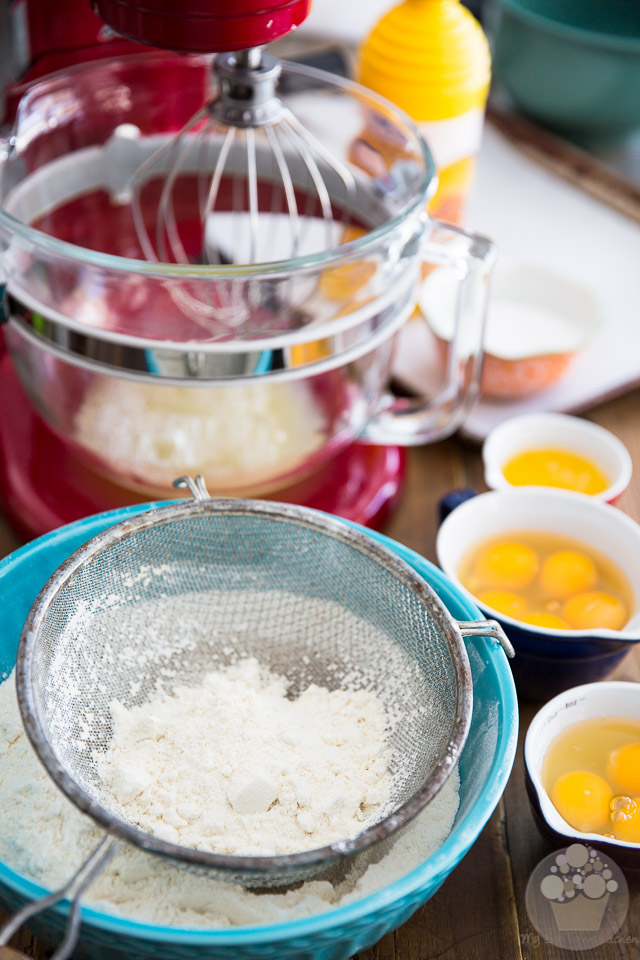
Sift the almond flour, powdered sugar and flour together over a large mixing bowl; reserve.
Crack your eggs into 2 separate containers: combine 3 eggs in one of them and 5 eggs in the other.
Melt the butter in a small bowl and have your corn syrup handy.
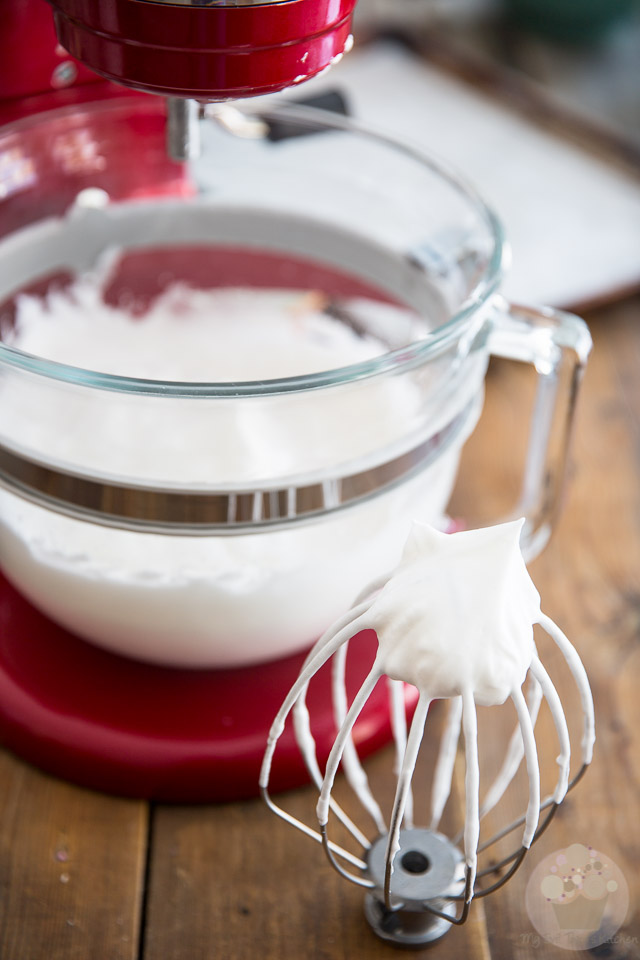
Combine the egg whites, granulated sugar and cream of tartar in the bowl of a stand mixer equipped with the whisk attachment. Beat on high speed until light and fluffy and stiff peaks form, about 4 to 5 minutes. Transfer to a bowl and reserve.
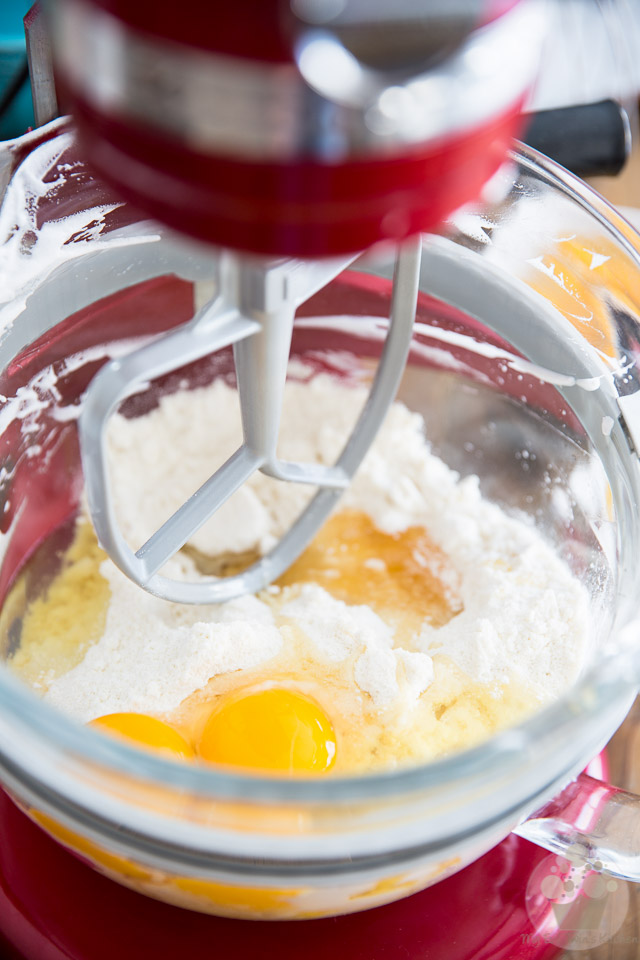
In the bowl of that same stand mixer (no need to rinse or wash the bowl, really), combine the almond flour, powdered sugar, flour, corn syrup and 3 of the eggs.
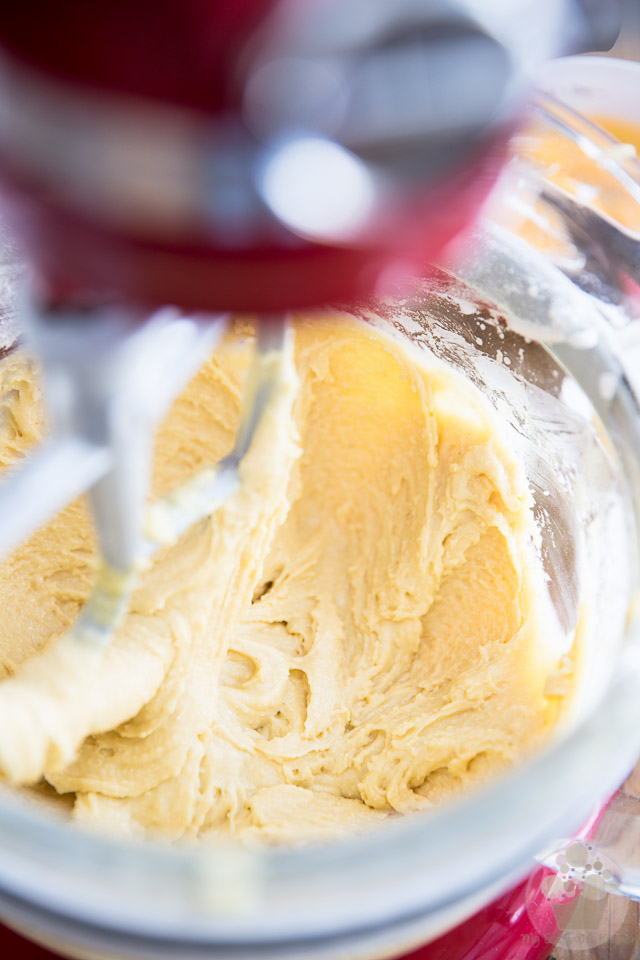
Give that a good beating on medium speed using the paddle attachment until well combined; the batter will be kind of thick and sticky at this point.
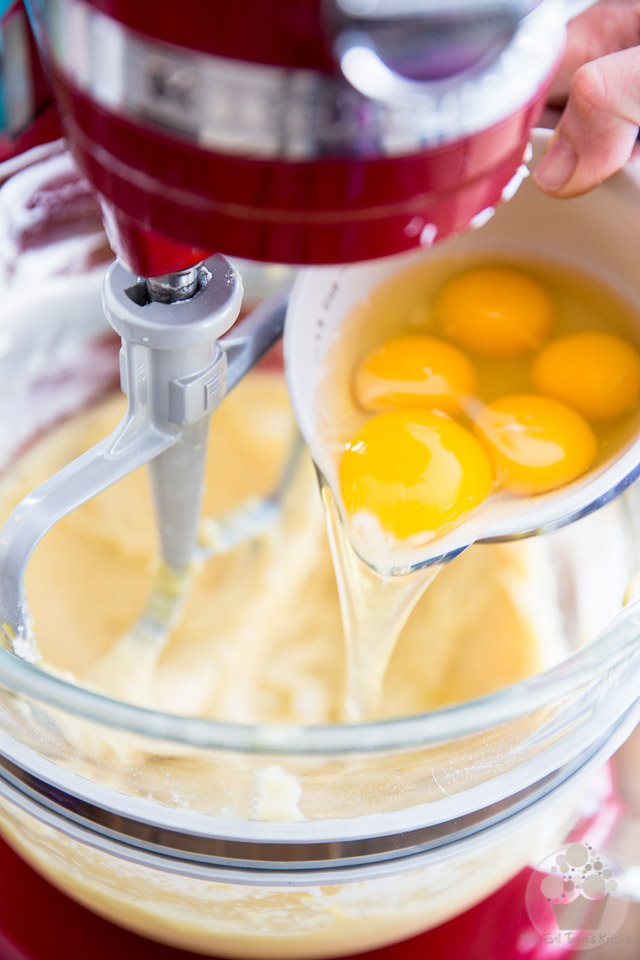
Add 5 more eggs, one at a time, beating until fully incorporated between each addition…
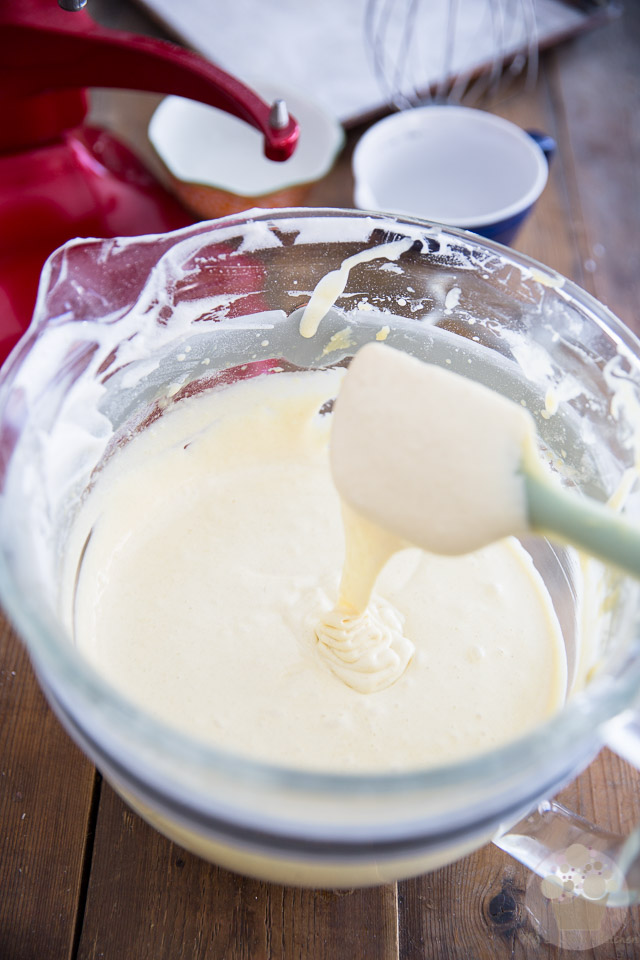
Continue mixing on high speed for about 5 minutes, or until the batter gets light and airy and almost white in color.
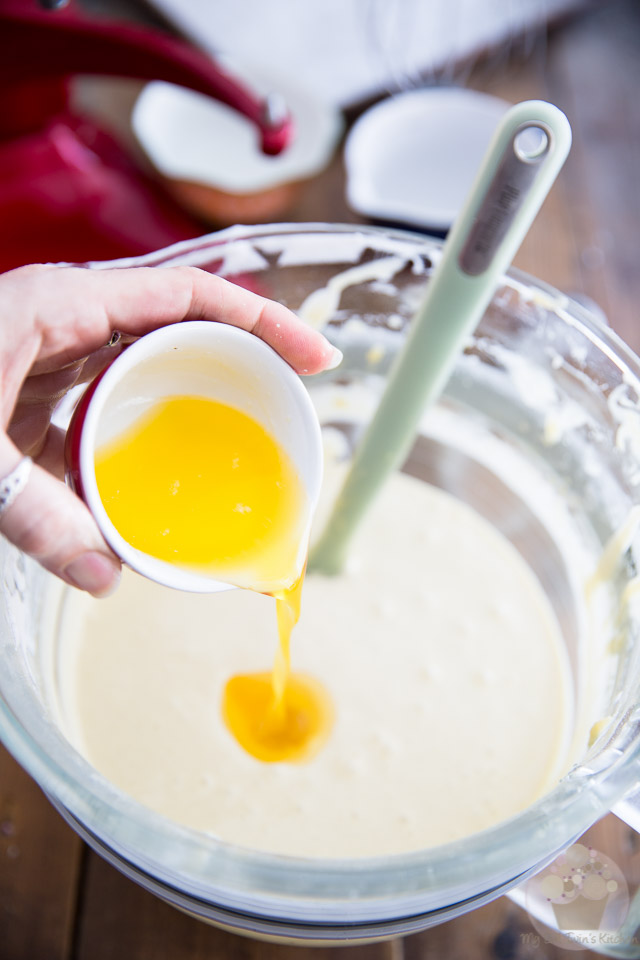
Pour in the melted butter…
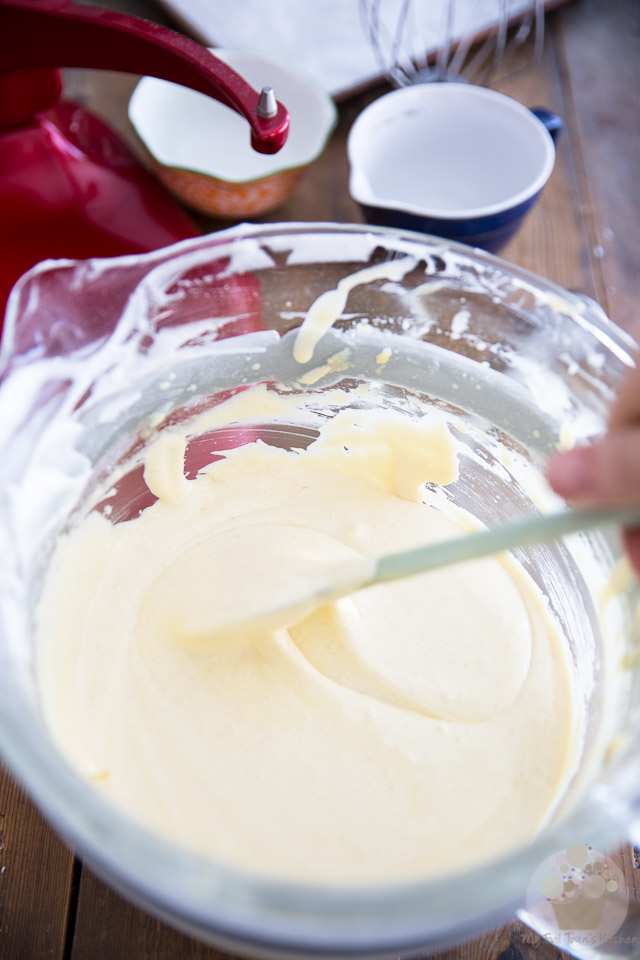
… and delicately fold it in with a rubber spatula.
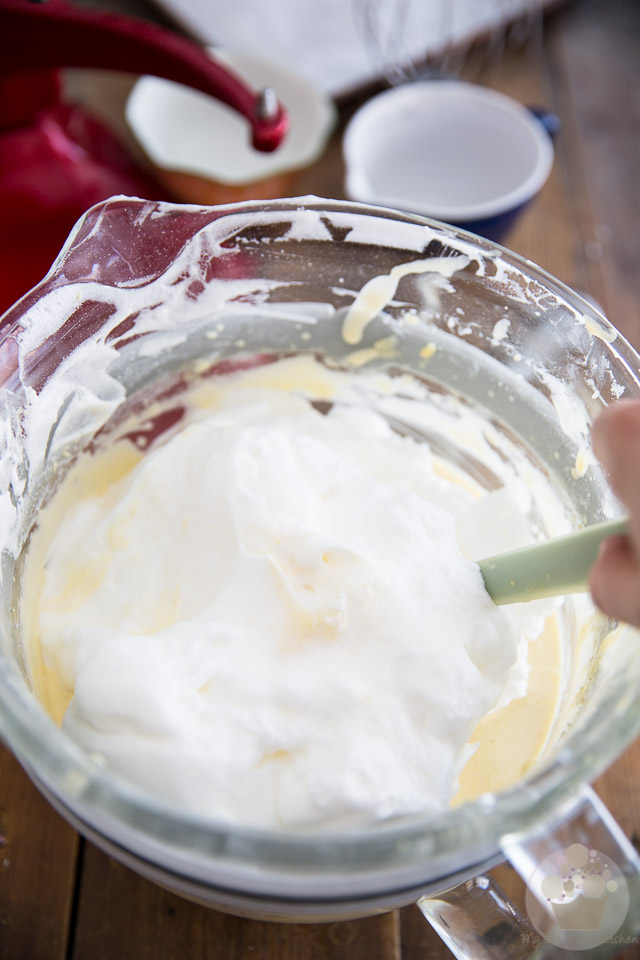
Add the reserved meringue to this mixture…
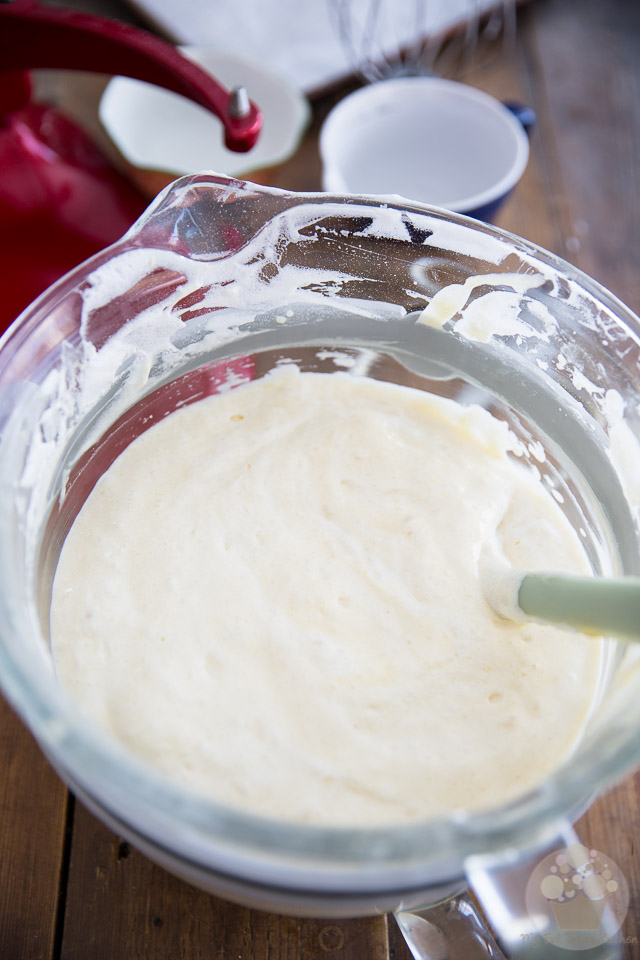
…and delicately fold that in too with a rubber spatula.
It’s important that you be as delicate as possible here to avoid deflating the batter. You want to preserve as much as the precious air you just incorporated as you possibly can.
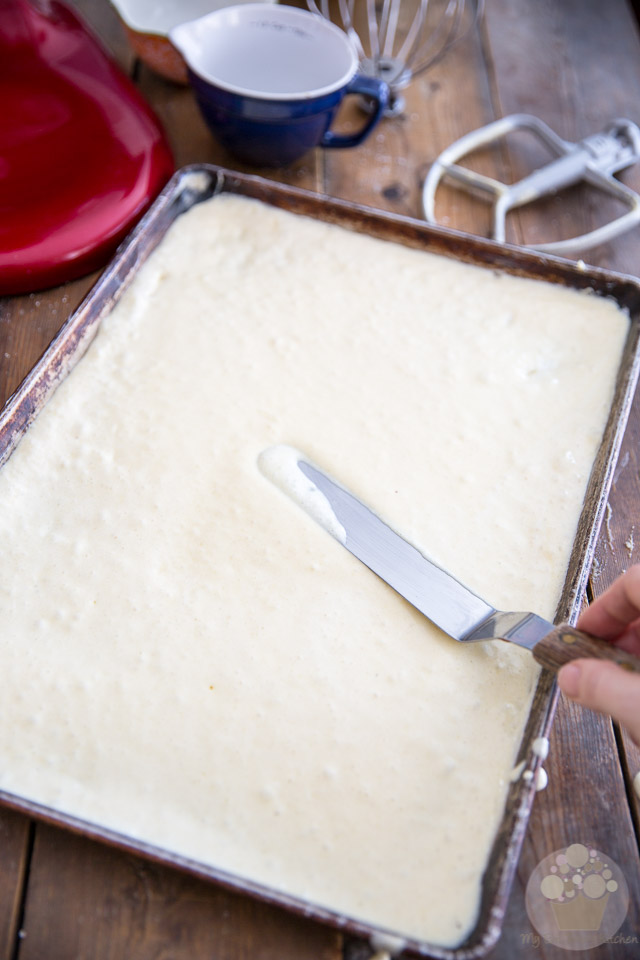
Pour half of the cake batter onto the prepared baking sheet and spread it delicately, as evenly as possible, with an offset spatula.
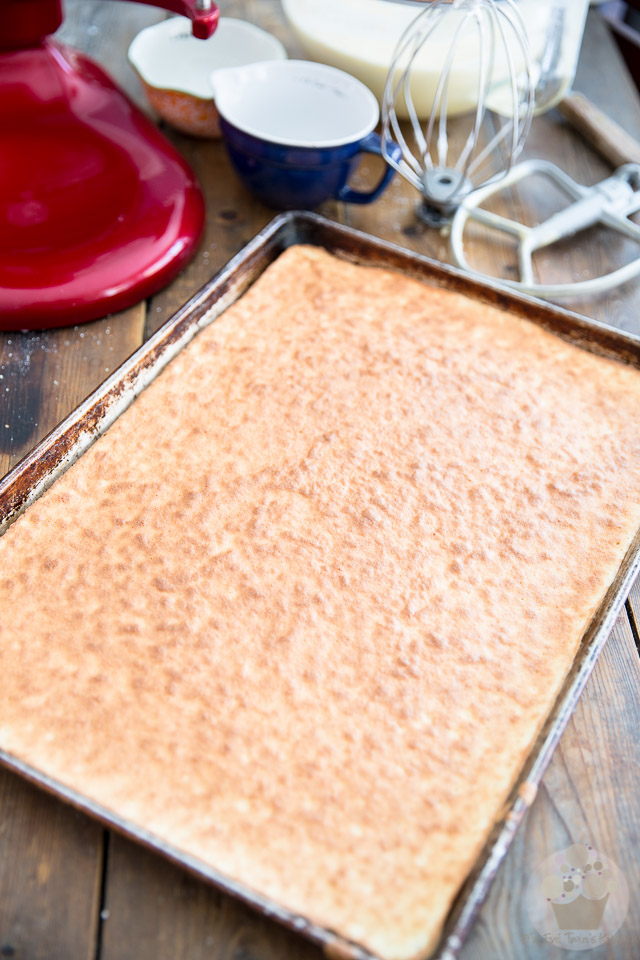
Bake in the oven for 5 to 7 minutes, or until the top turns golden brown.
Turn the cake over onto a clean tea towel as soon as it comes out of the oven but do not remove the parchment paper just yet.
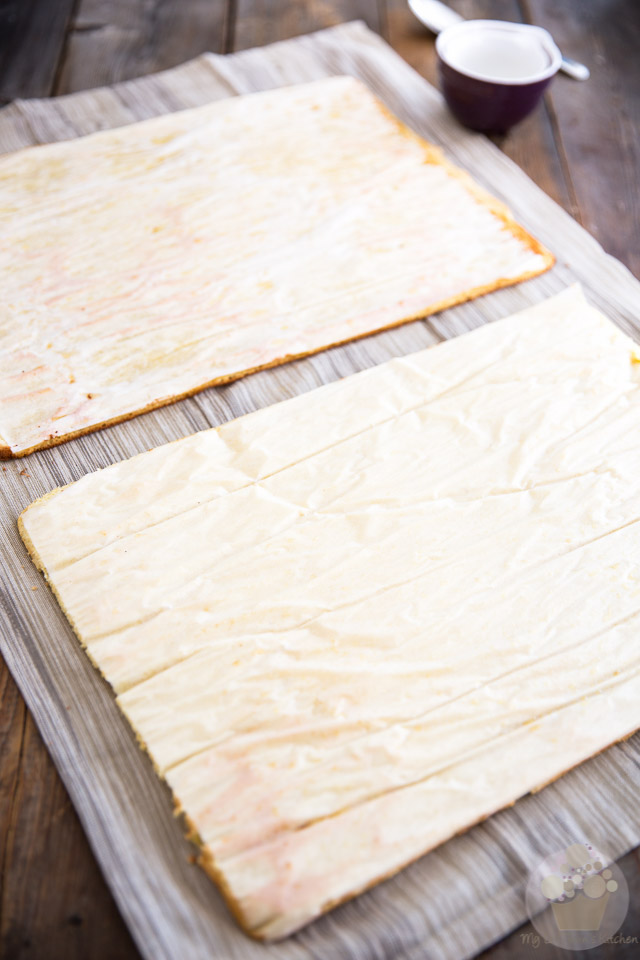
Let the baking sheet cool for a minute or two (unless you had access to a second baking sheet, in which case you’re gonna want to use it and right away), then grease and line it with parchment paper once again; spread the remaining batter, bake and flip that second cake onto a clean tea towel, just like you did with the first cake.
Set both cakes aside to cool completely.
MAKE THE GANACHE
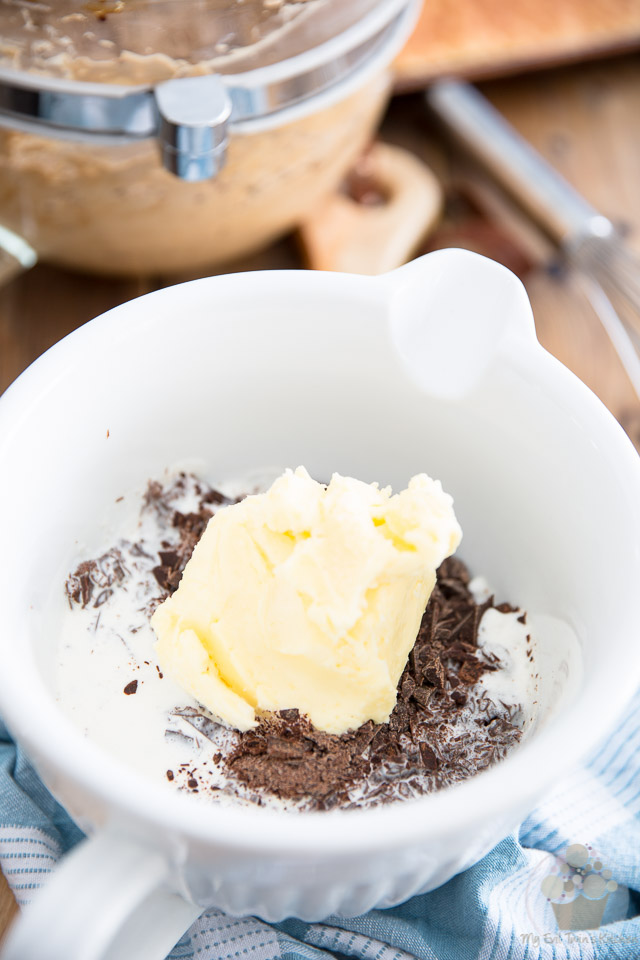
In a mixing bowl, combine the chopped chocolate, heavy cream and butter and place them in the microwave for 1 minute. Allow to rest for 1 full minute and then stir for 1 minute.
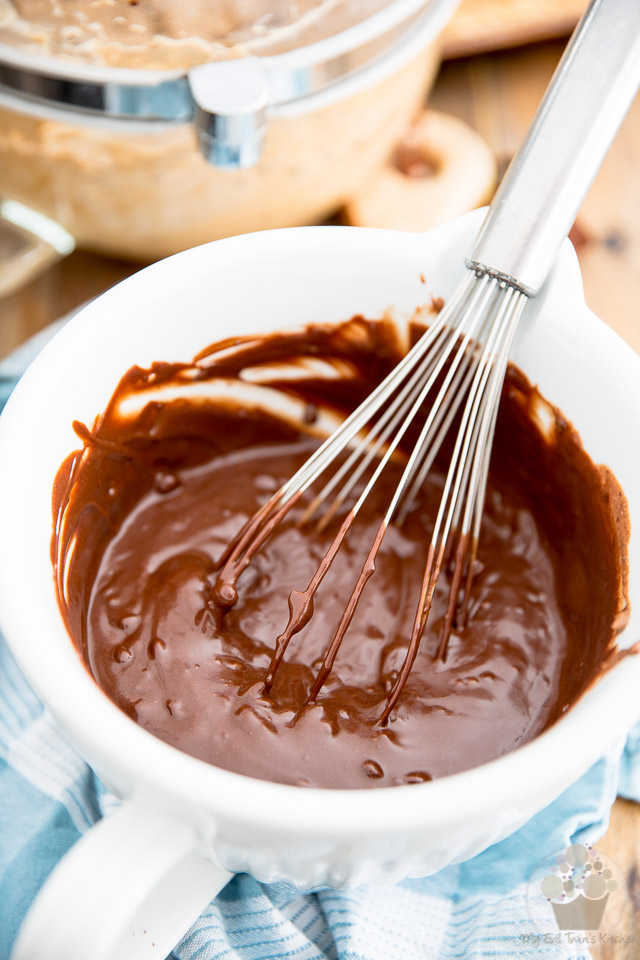
If there were still lumps of unmelted chocolate left after that, repeat the process but for only 30 seconds this time.
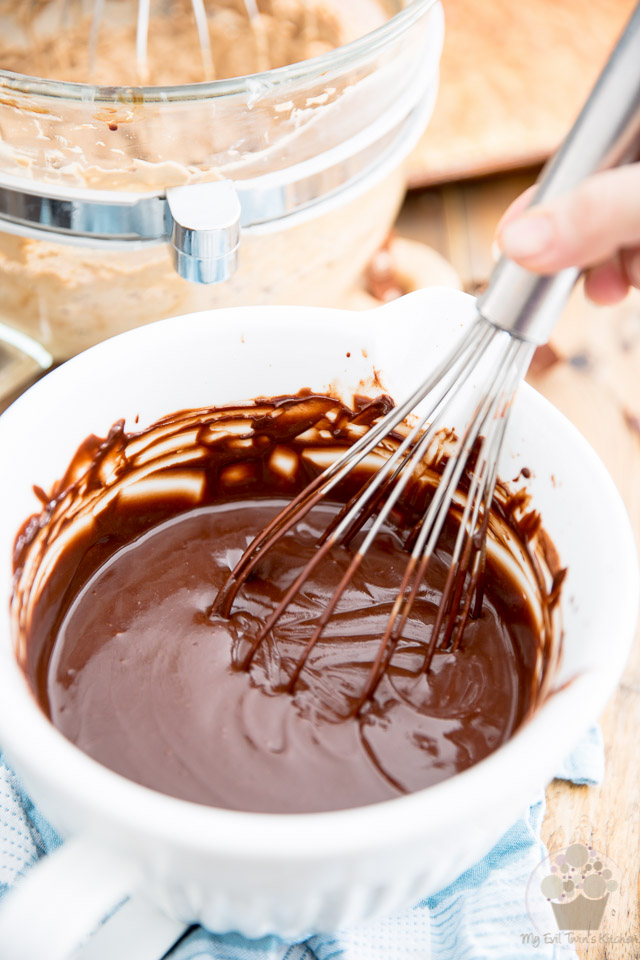
Continue doing that until the chocolate is completely melted and the ganache is fully combined without feeling hot to the touch.
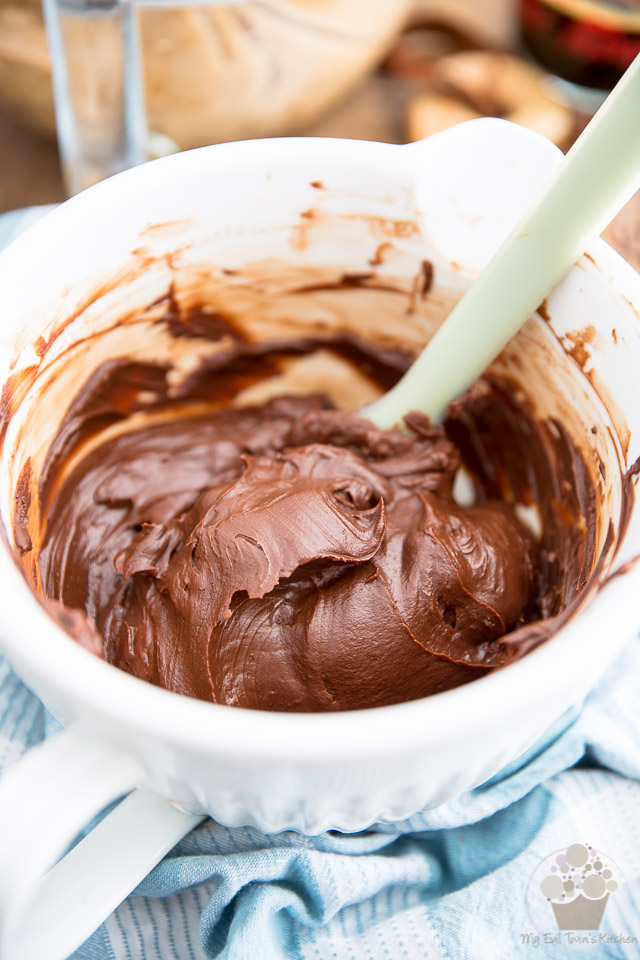
Let your ganache rest at room temperature until it has a consistency similar to that of buttercream. This could take up to a couple of hours, depending on the ambient temperature.
Give it a stir from time to time, to help it set more evenly. If you’re in a pinch, you can also send your ganache to the refrigerator to speed up the process, but make sure to check on it and stir it regularly.
While that ganache is resting, let’s get busy working on the buttercream.
MAKE THE BUTTERCREAM
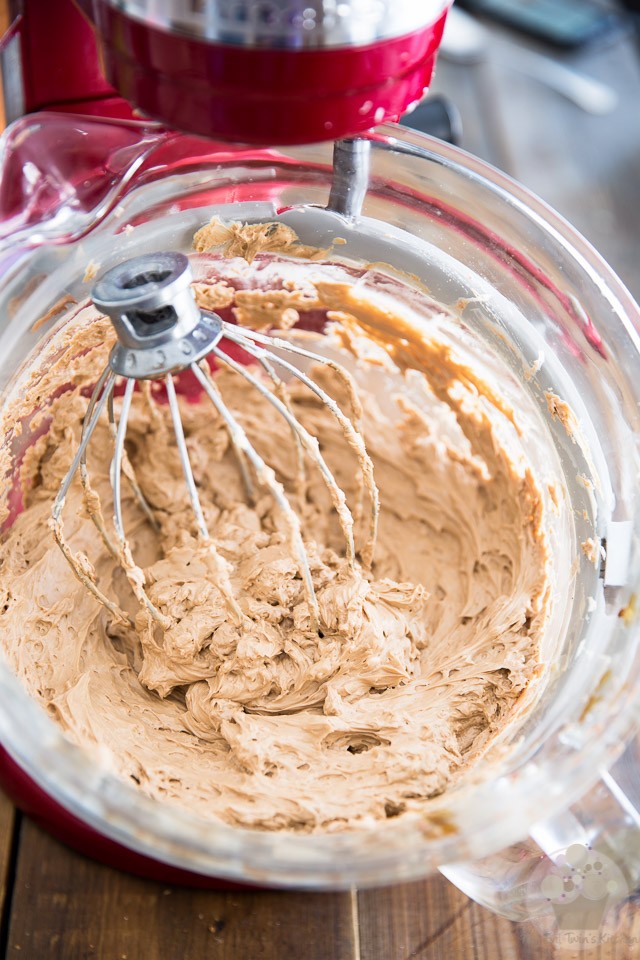
Follow the instructions in the Swiss Meringue Buttercream post and make a full batch of buttercream.
When the buttercream is finished, dilute 3 tablespoons of instant coffee powder in a tablespoon of boiling water and add that to the buttercream; mix it in on low speed and then give the buttercream a final beating on high speed for about 30 seconds.
Reserve at room temperature until ready to use.
MAKE THE COFFEE SYRUP
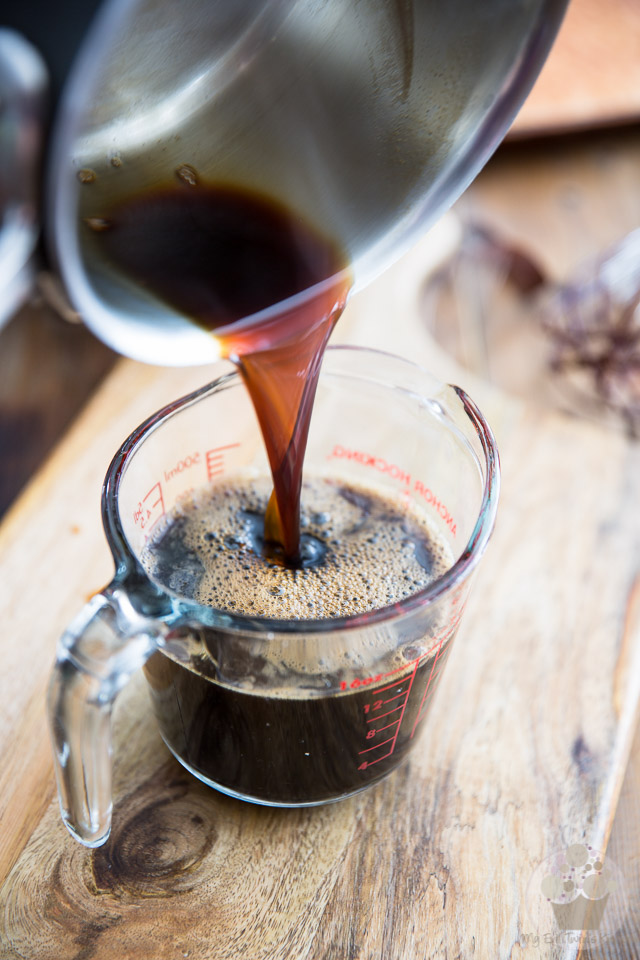
Bring the sugar and water to a boil over medium heat. Stir in instant coffee powder and let this syrup simmer for about a minute then kill the heat and set aside.
ASSEMBLY
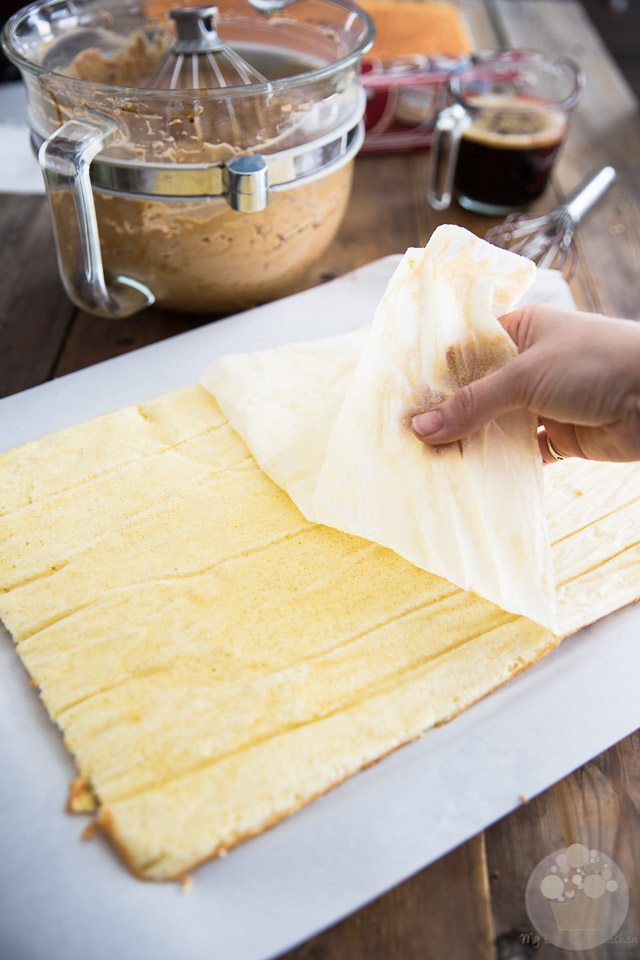
Grab one of the Joconde cakes and carefully pull on the parchment paper to remove it.
Be especially gentle around the edges, the cake is very delicate and will tear fairly easily!
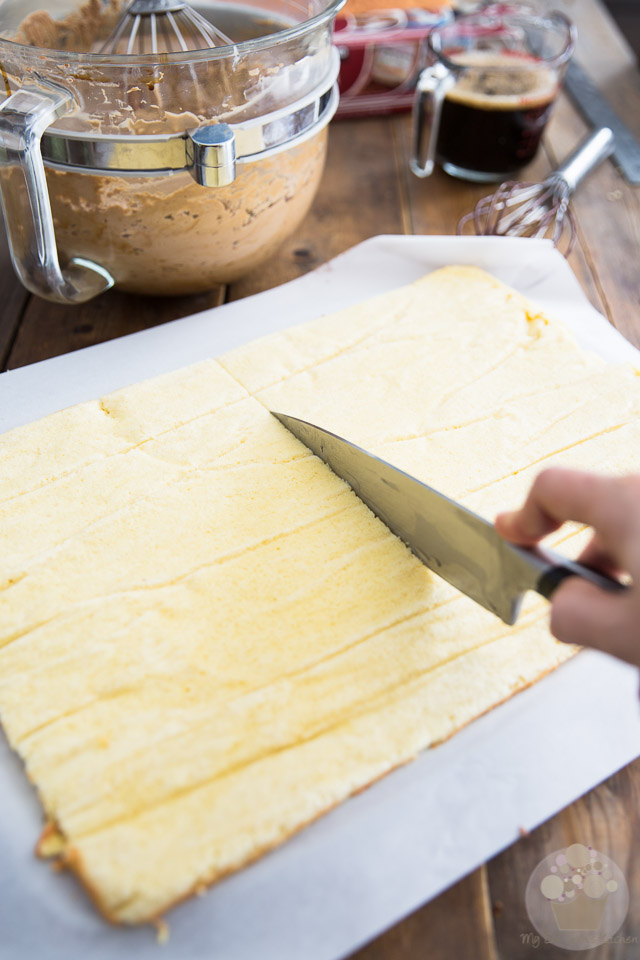
Cut the cake exactly in half crosswise and place one of the halves on a large cake board or inverted cookie sheet.
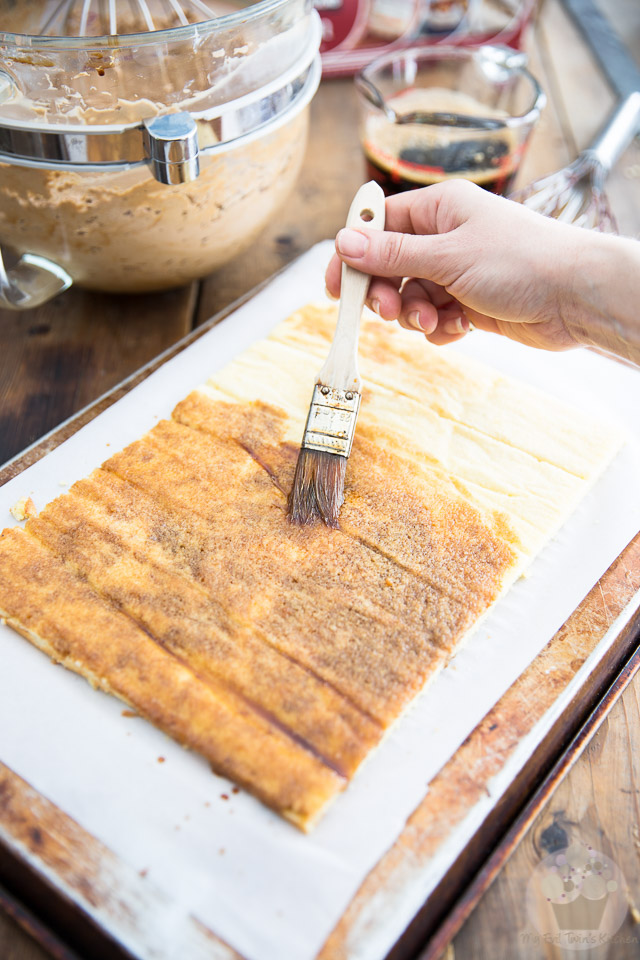
Brush the entire surface of the cake generously with the coffee syrup.
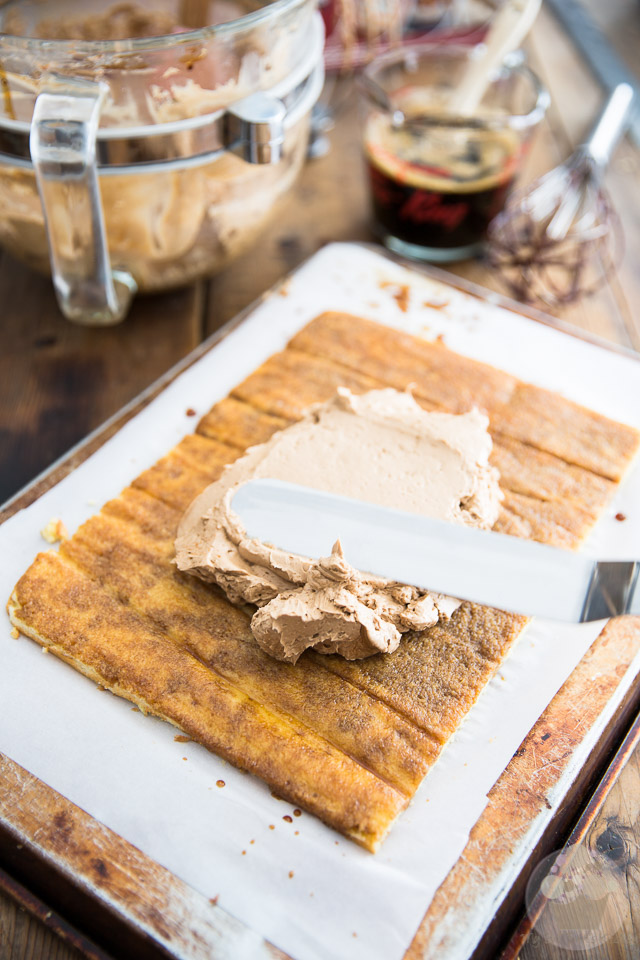
Now mound a little more than a third of the coffee buttercream right in the center of the cake.
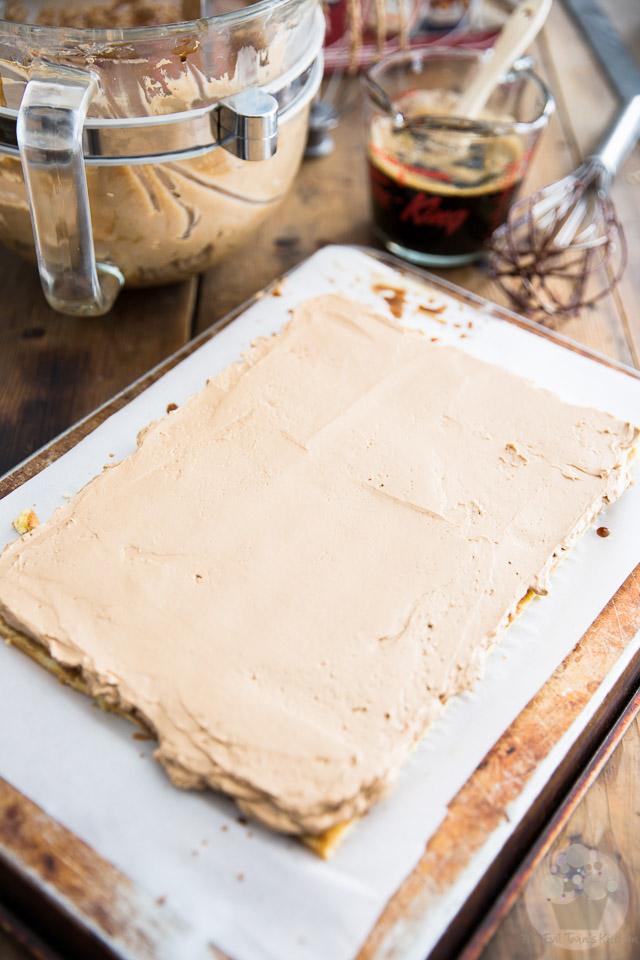
Spread it evenly, all the way to the edge.
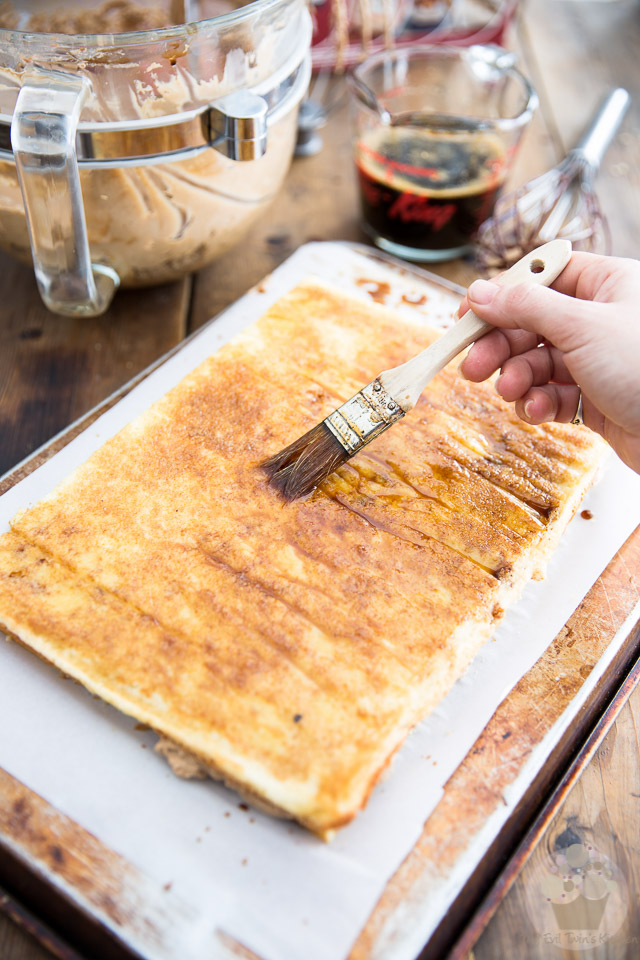
Place the other half of the cake you just sliced over this layer and again, brush generously with the coffee syrup.
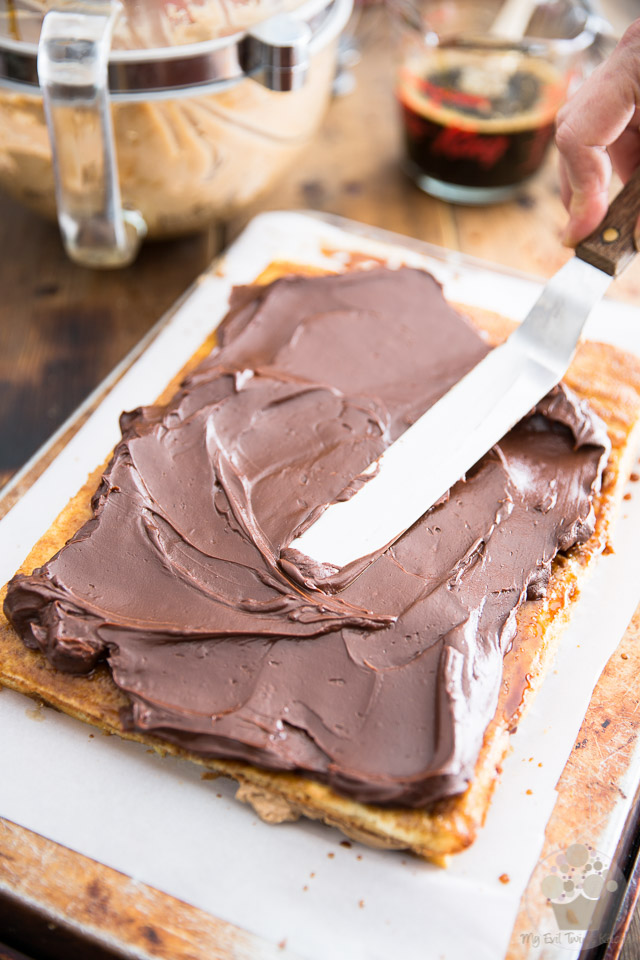
Then, mound the ganache, save for a few tablespoons which you’ll use to decorate the cake later, right in the center of the cake…
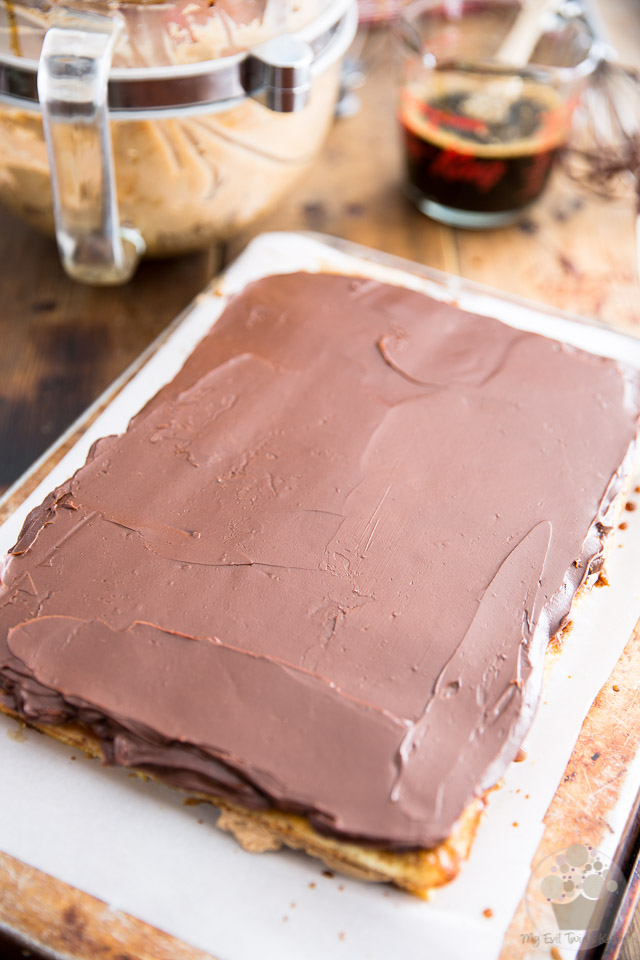
Spread the ganache evenly all the way to the edge.
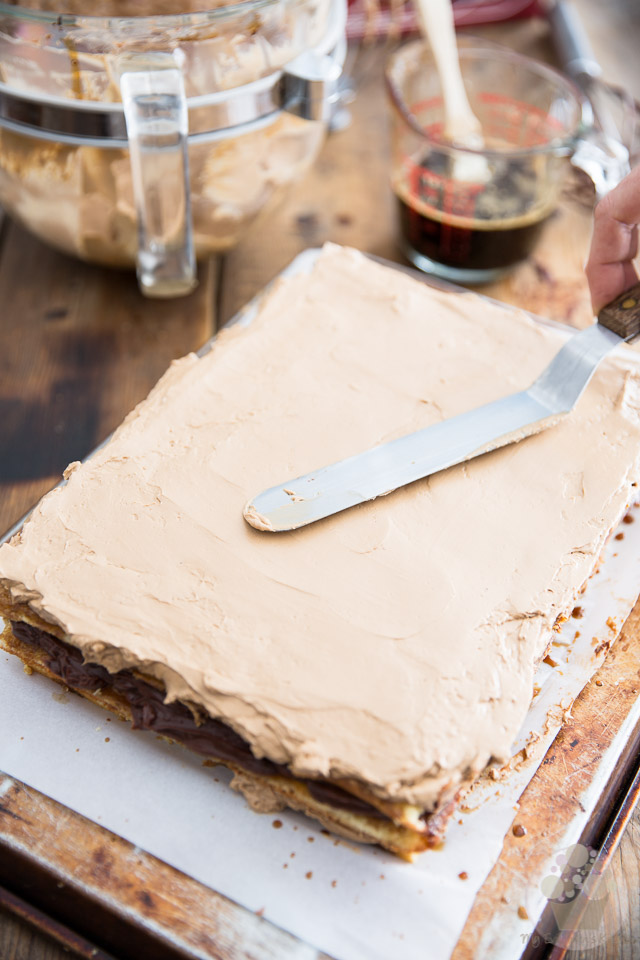
Here you’ll want to repeat the exact same process you did for the first layer using the second Joconde cake: remove the parchment paper, cut exactly in half crosswise, place one of the halves over the 2 layers already in place; brush with coffee syrup, spread about 2/3 of what’s left of the buttercream over the cake.
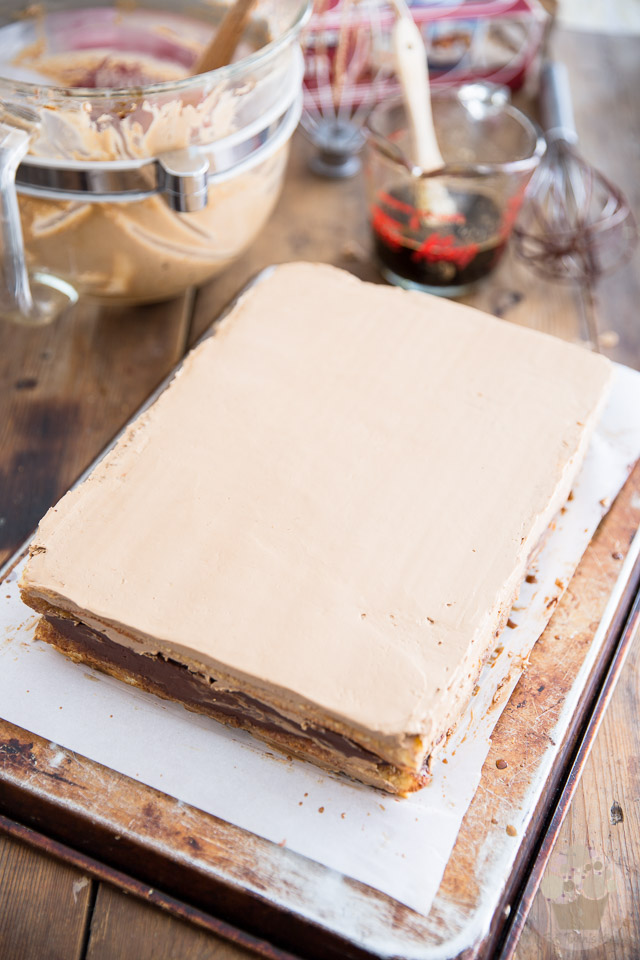
Top with the 4th and last piece of Joconde cake and cover this final layer with a very thin coat of buttercream, just enough to make the top really nice and smooth.
You should have plenty of buttercream left to decorate the top of the cake, but do make sure that you save at least a few tablespoons.
Send your cake to the fridge to firm up completely, at least 2 hours, but preferably 4 to 6 hours.
MAKE THE CHOCOLATE GLAZE
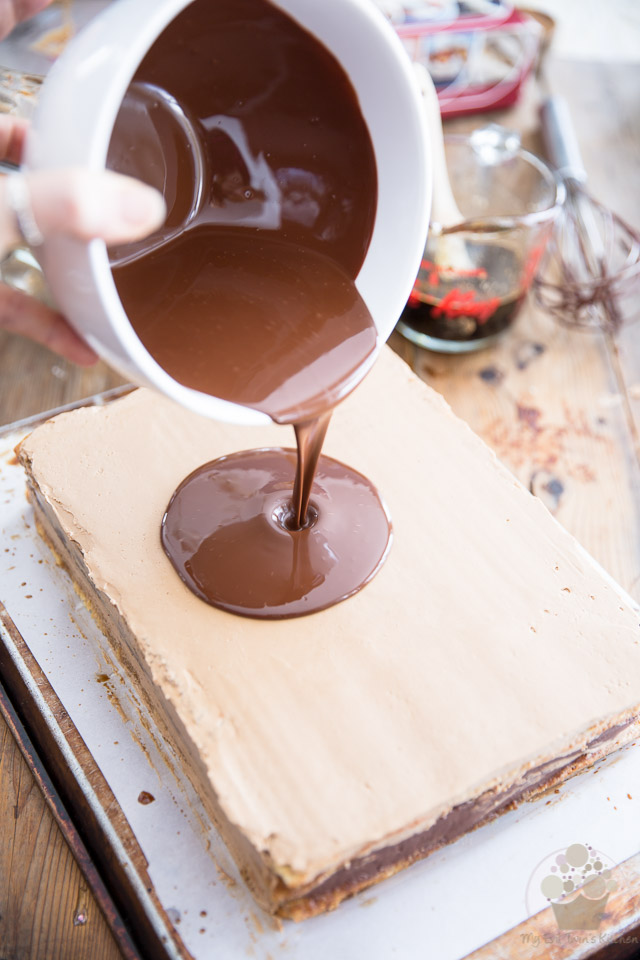
Combine the chocolates and oil in a bowl and melt in the microwave in 30 second increments, stirring well for an equal amount of time between each increment, until the chocolate is completely melted. About 3 to 4 trips to the microwave should do the trick. Make sure that the chocolate doesn’t get hot, otherwise it’ll melt your delicate buttercream on contact!
Pour that chocolate glaze slowly right in the center of your chilled cake and then spread it all the way to the edge with a straight metal spatula.
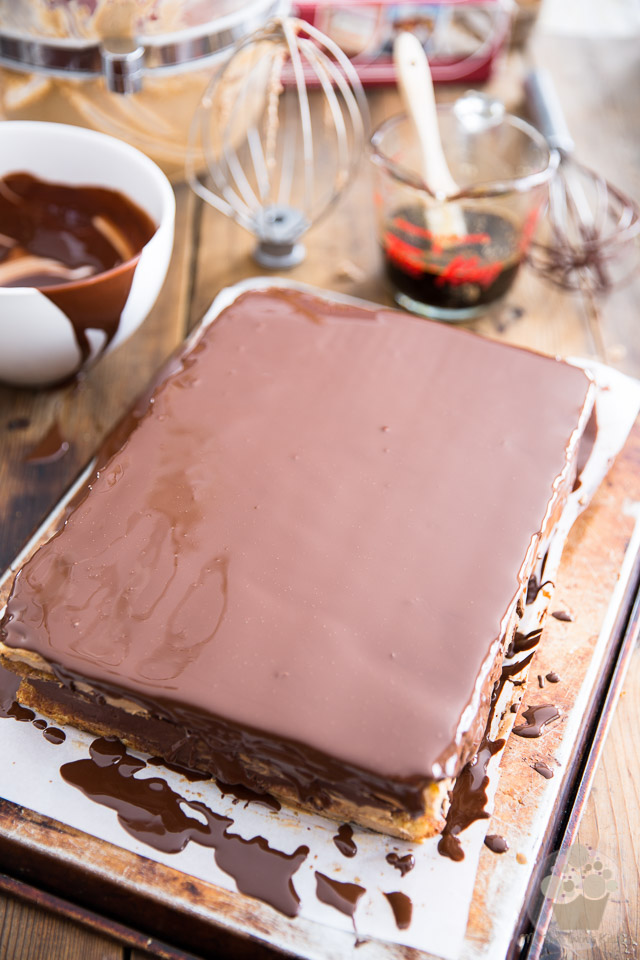
Don’t worry if it goes over a little bit, as you’ll be trimming the edges off later. However, try to make that top as smooth and straight as possible. Every little defect will show once the chocolate sets.
The lines that you see in my chocolate glaze are actually a reflection of my dining room light right above… that gives the illusion that my top is all “wrinkled” but it wasn’t really.
Send your cake back to the fridge until the top is completely set, ideally about an hour.
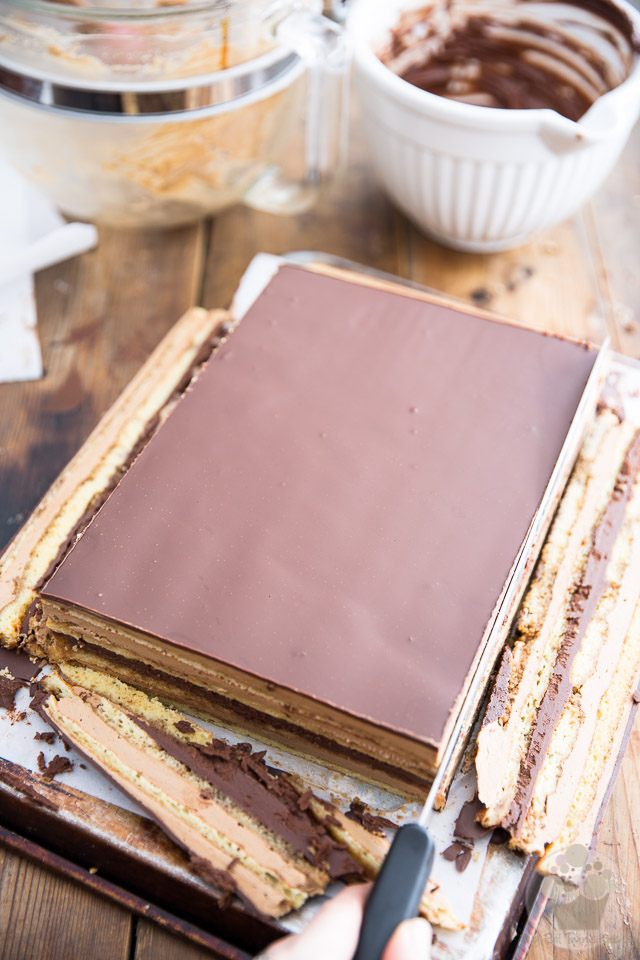
When the top is nice and set and no longer appears shiny, take the cake out of the fridge and carefully trim out the edges with a long serrated knife.
Whatever you do, hang on to those cake trimmings… you do NOT want to be throwing them out, trust me. Just keep them in a container, you’ll be more than happy to munch on them as you wait for the piece the resistance to be served!
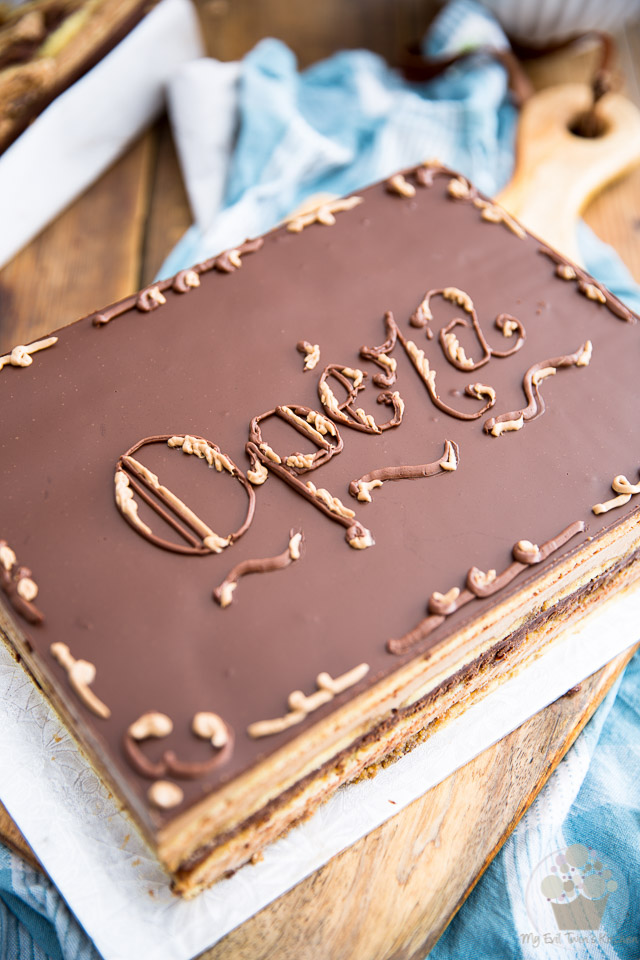
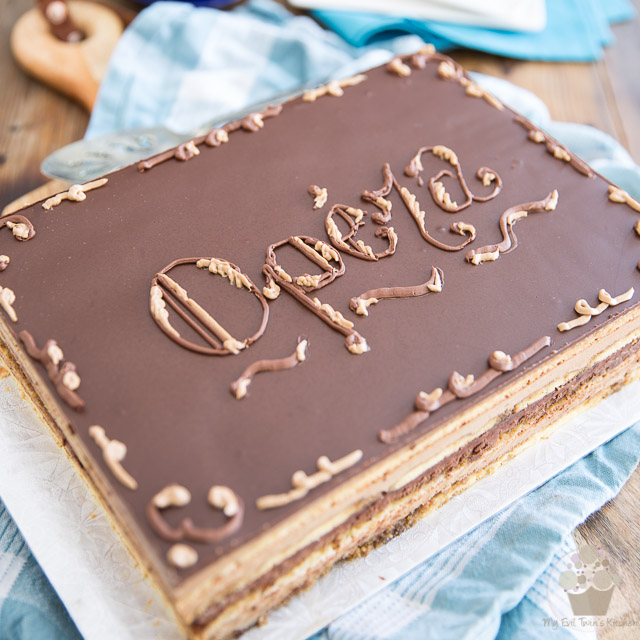
Transfer your cake to a clean cake board and decorate it with the reserved ganache and buttercream.
I like to use a parchment paper cone for that, but a pastry bag equipped with a fine round tip would also do the trick.
And voilà! You’re finally done!
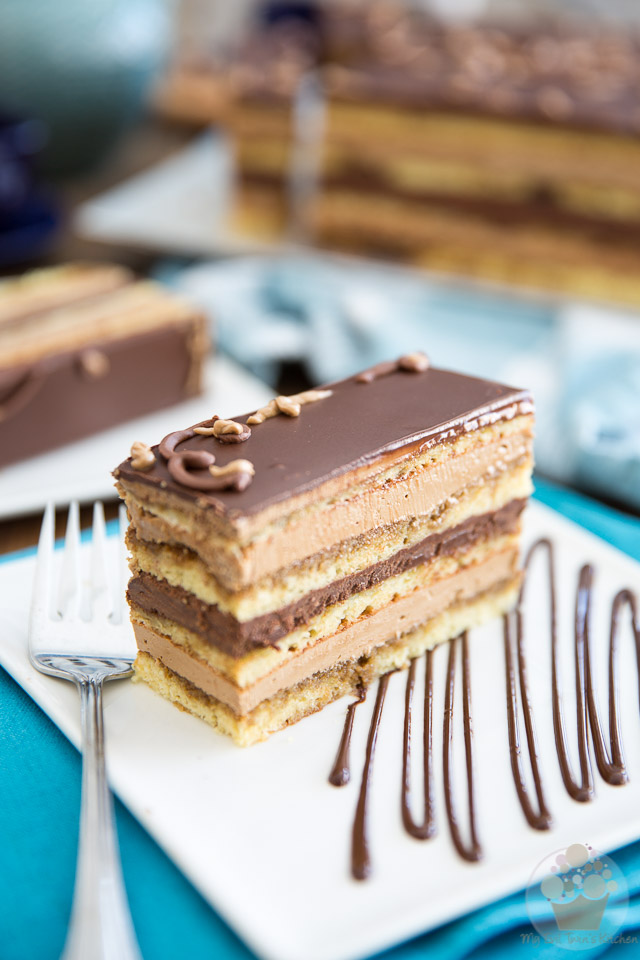
To be truly enjoyed at its best, this cake must imperatively sit at room temperature for at least 3 to 4 hours prior to being served. If you were to serve it cold, the ganache and buttercream would be way too firm and would not melt in your mouth on contact and turn into this rich, creamy, soft and velvety bite of heaven, the way they’re meant to.
Think of butter straight out of the fridge vs butter that’s been kept in the pantry. Which one would you choose to spread on your soft, warm piece of bread?
I thought so…
Be patient, trust me. It’s taken you this long to make the cake, you’ve worked really super hard to get it on your table… give it just a few more hours.
It’ll be totally worth the wait, I swear!
Ingredients
- 3 cups (315g | 11.1oz) almond flour
- 2-1/2 cups (300g | 10.6oz) powdered sugar
- 2/3 cup (85g | 3oz) unbleached all-purpose flour
- 8 large eggs
- 2 tbsp corn syrup
- 1/4 cup (60g | 2.1oz) butter, melted
- 8 large (240g | 8.45oz) egg whites
- 1/2 cup (100g | 3.5oz) granulated sugar
- 1/4 tsp cream of tartar
- 2-1/2 cups (375g | 13.2oz) finely chopped dark chocolate
- 1 cup (240ml) heavy cream
- 1/2 cup (120g | 4.2oz) butter, softened
- 1- Swiss meringue buttercream recipe
- 3 tbsp instant coffee powder
- 1 tbsp boiling water
- 1/2 cup (100g | 3.6oz) granulated sugar
- 3/4 cup (180ml) water
- 1 tbsp instant coffee powder
- 1 cup (150g | 5.3oz) finely chopped dark chocolate
- 1/3 cup (50g | 1.7oz) finely chopped milk chocolate
- 3 tbsp peanut oil (or other neutral tasting oil of your choice)
Instructions
- Preheat your oven to 450°F
- Grease a 13" x 18" rimmed baking sheet and then line it with a piece of parchment paper that fits snuggly inside it. Make sure that the parchment paper adheres evenly to the entire surface of the pan, especially around the edges.
- Have a second piece of parchment paper of the exact same size ready to line the pan a second time, or prepare a second pan if you have access to one.
- Sift the almond flour, powdered sugar and flour together over a large mixing bowl. Reserve.
- Combine the egg whites, granulated sugar and cream of tartar in the bowl of a stand mixer equipped with the whisk attachment. Beat on high speed until light and fluffy and stiff peaks form, about 4 to 5 minutes. Transfer to a bowl.
- In the bowl of the stand mixer (no need to rinse or wash), combine the sifted almond flour, powdered sugar and flour with the corn syrup and 3 eggs. Beat on medium speed with the paddle attachment until well combined; the batter will be kind of thick and sticky at this point.
- Add 5 more eggs, one at a time, beating until fully incorporated between each addition, and then continue mixing on high speed for about 5 minutes, or until the batter gets light and airy and almost white in color.
- Pour in the melted butter and delicately fold it in with a rubber spatula.
- Add the reserved meringue to this mixture and delicately fold it in with a rubber spatula.
- Using an offset spatula, spread half of this batter as evenly as possible onto the prepared cookie sheet and bake in the oven for 5 to 7 minutes, or until the top turns golden brown.
- Turn this cake over onto a clean tea towel as soon as it comes out of the oven but do not remove the parchment paper just yet.
- Let the baking sheet cool for a minute or two, then grease and line it with parchment paper once again; spread the remaining batter, bake and flip that second cake onto a clean tea towel, just like you did with the first cake.
- Set aside to cool completely.
- In a mixing bowl, combine the chopped chocolate, heavy cream and butter and place that in the microwave for 1 minute. Allow to rest for 1 full minute and then stir for 1 minute. If there are still lumps of unmelted chocolate left after that, repeat the process but for 30 seconds this time, and continue doing that until the chocolate is completely melted and the ganache is fully combined without feeling hot to the touch.
- Let your ganache rest at room temperature until it has a consistency similar to that of buttercream. This could take up to a couple of hours, depending on the ambient temperature.
- While that ganache is resting, let’s get busy working on the buttercream.
- Make a batch of Swiss meringue buttercream recipe following the instructions in the post.
- When the buttercream is ready, dilute the instant coffee powder in the boiling water and add that to the buttercream; mix it in on low speed and then give the cream a good beating on high speed for about 30 seconds.
- Reserve at room temperature until ready to use.
- Bring the sugar and water to a boil over medium heat. Stir in instant coffee powder and let this syrup simmer for about a minute then kill the heat and set aside.
- Grab one of the Joconde cakes and carefully pull on the parchment paper to remove it. Cut the cake exactly in half crosswise and place one of the halves on a large cake board or inverted cookie sheet. Brush the entire surface of the cake generously with the coffee syrup.
- Now mound a little more than a third of the coffee buttercream right in the center of the cake and spread it evenly, all the way to the edge.
- Place the other half of the cake you just sliced over this layer and again, brush generously with the coffee syrup. Then, mound the ganache, save for a few tablespoons which you'll use to decorate the cake later, right in the center of the cake and spread evenly all the way to the edge.
- Repeat the process with the other Joconde cake; remove parchment paper, cut it in half crosswise, place one of the halves over the 2 layers already in place. Brush with syrup, spread about 2/3 of what's left of the buttercream and then add the final layer, top with a thin layer of the buttercream just enough to make the top really nice and smooth. Make sure that you also save a few tablespoons of the buttercream to decorate the cake.
- Send your cake to the fridge to firm up completely, at least 2 hours, but preferably 4 to 6 hours.
- Combine the chocolates and oil in a bowl and melt in the microwave in 30 second increments, stirring well for an equal amount of time between each increment, until the chocolate is completely melted. About 3 to 4 trips to the microwave should do the trick. Make sure that the chocolate doesn't get hot, otherwise it'll melt your delicate buttercream on contact.
- Pour that chocolate glaze slowly right in the center of your cake and then spread it all the way to the edge with a straight metal spatula. Don’t worry if it goes over a little bit, you’ll be cutting that out later. However, try to make that top as smooth and straight as possible. Every little defect will show once the chocolate sets.
- Send the cake back to the fridge until completely set, ideally about an hour.
- Take the cake out of the fridge and carefully trim out the edges with a long serrated knife
- Transfer your cake to a clean cake board and decorate it with the reserved ganache and buttercream. Use either a parchment paper cone or a pastry bag equipped with a fine round tip.
- Let the cake sit at room temperature at least 4 hours prior to serving. If you were to serve it cold, the ganache and buttercream would be very firm and would not melt in your mouth on contact the way they’re supposed to.
wow, how did I miss this one, saw them make it on a baking show on the food network, wow, what a lot of work you put into this, I will definitely be saving to make on a snowy week when I am snowed in., thank you for all you do!
Opera cake: Where do I put the 1/2 cup of granulated sugar? Into the egg whites??
Absolutely, Marnie! Sorry about the omission, and thanks for spotting it. All fixed now!
Hi there, can this recipe be halved? We have only 2 people, so I don’t know how we can eat a 24-serving cake LOL
Thank you 🙂
Yes, it can… but for the record, it freezes very well!
How do you wrap it and how long can it be kept frozen?
How long can it be stored and where? Covered? Uncovered?
Thanks you for this detailed recipe!! I am an amateur baker. But still decided to make this for my husband’s bday after seeing your detailed steps. I have to say that cake came out quite good.
You are right in saying that this recipe will need hours to be spent in the kitchen but it’s totally worth it!!
Real happy to hear, Neeti! Thanks for the great feedback, I really appreciate it! 🙂
Reading through this recipe and i’m already a little lost on the Joconde stage! in the text description below, you dictate to “Combine the egg whites, granulated sugar and cream of tartar in the bowl of a stand mixer”, yet in the instructions with the photos, you leave out the granulated sugar….
I will be researching other joconde sponge recipes as i want this cake to be perfect.
While i’m here, also, you mention the parchment paper to fit snuggly especially around the edges… but… what do you mean by that? do you mean the parchment paper to fit precisely the bottom of the mould only? or the parchment paper to also cover the 2.5cm sides of the tray too??