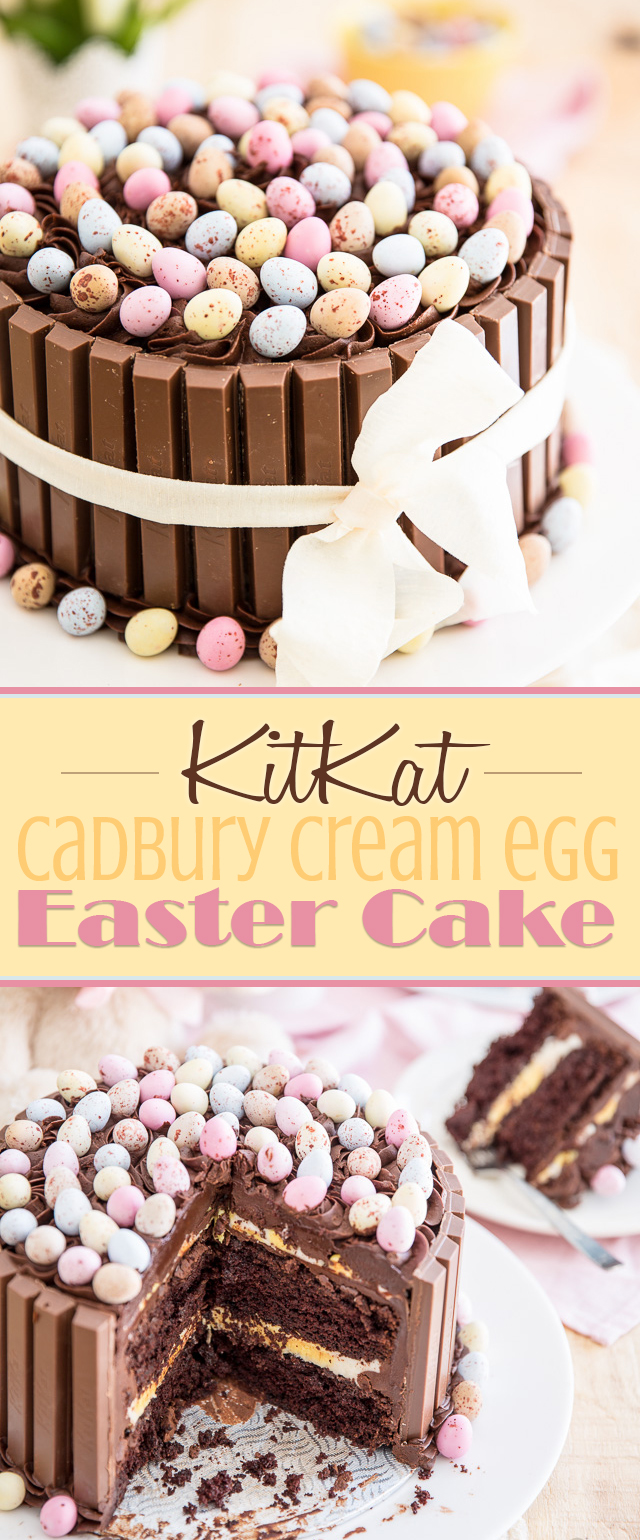
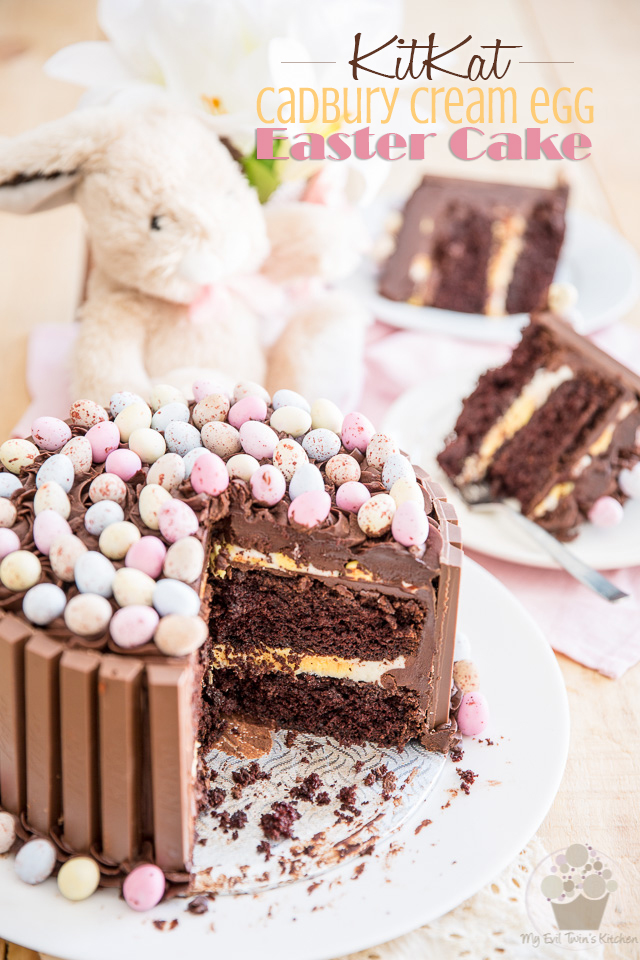
This KitKat cake screams easter: chocolate overload with a gooey Cadbury Cream Egg center, mini eggs all over its top: it’ll make you a hero this Easter!
I know, I know… Easter has already come and gone this year, no need to tell me I’m a little late to the party.
But since this is the actual cake that I made and shared with my family this past Easter, it was kind of hard for me to make it way in advance so I could post it here on time for you to make it, too. Plus, it would be kind of rude to serve pre-sliced and pre-tasted cake to my guests, wouldn’t it?
Ha. I knew you’d agree.
But seriously though, what you really want to be doing now is pin this recipe or save it somewhere safe, because trust me, you’re going to WANT to make it next year. Heck, I’m thinking I want to make it again next year, and I’m not usually one to make the exact same cake twice.
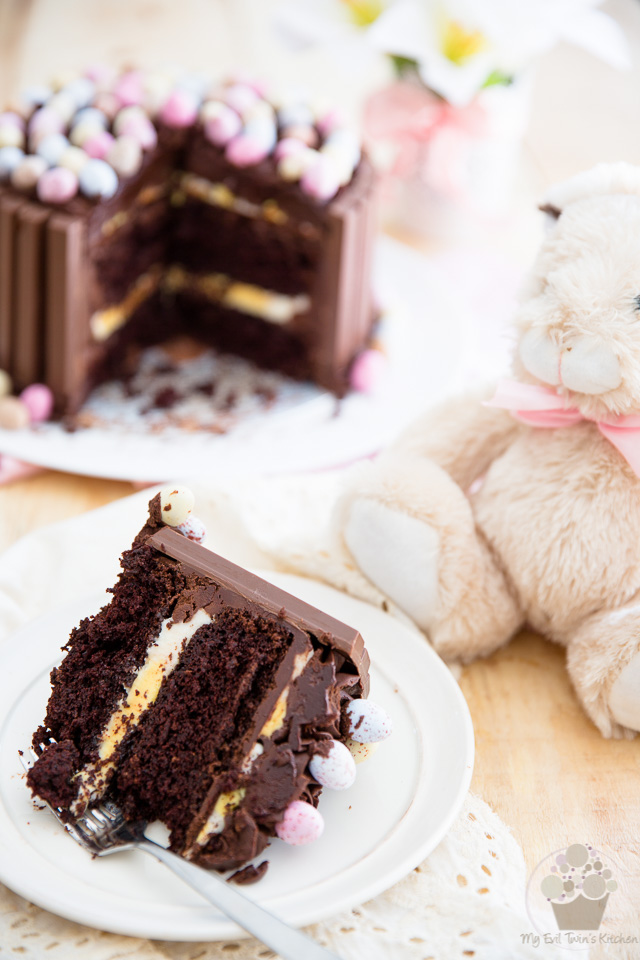
But this KitKat cake, it SCREAMS Easter. For starters, it’s got the chocolate part covered, and very generously, too. The cake istelf, which I adapted from a recipe that seems to be all over the Net, did not disappoint: it has a very rich chocolate flavor, and it’s incredibly moist and tender, too! You could very well eat it just as is and be very content. But hey… this is Easter we’re talking about. We need to bring on the chocolate! So that already delicious cake gets covered in a thick layer of the fudgiest, richest, tastiest chocolate frosting you will have ever tasted.
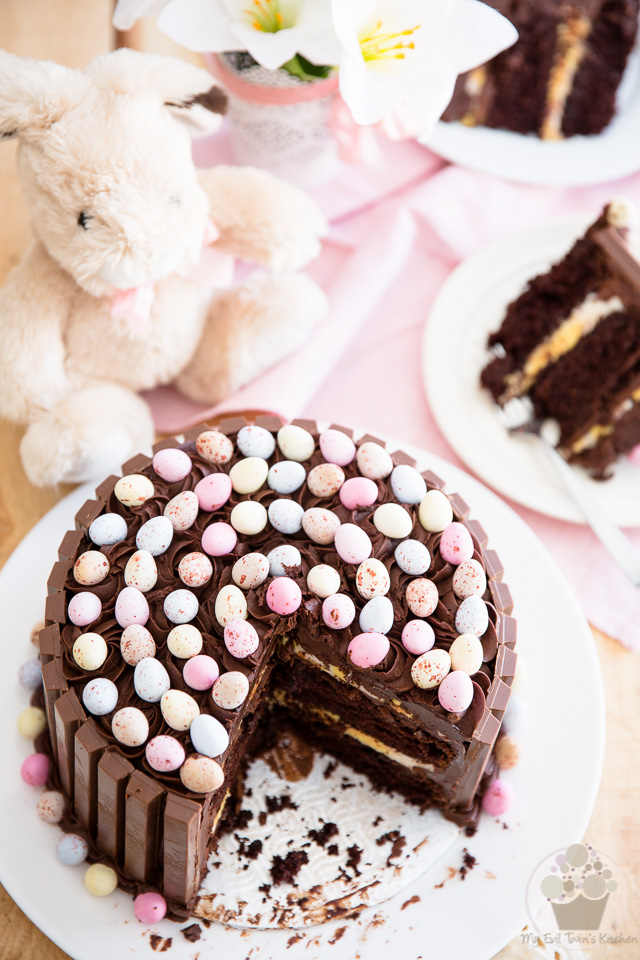
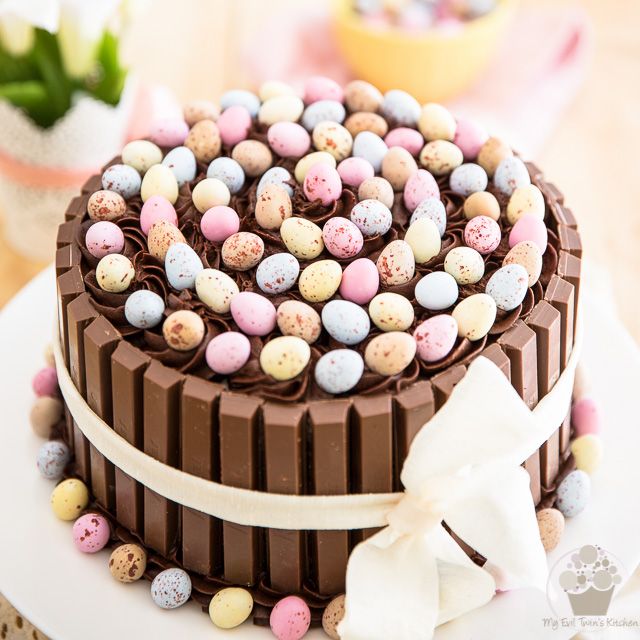
Then come the parts that truly make this cake an Easter cake: as if the chocolate frosting alone wasn’t enough, I decided to add not one, but two layers of intensely sweet, ooey and gooey Cadburry Cream Egg filling. Oh! the decadence. The stuff tastes and feels just like the real thing, too! And to really seal the deal, KitKat fingers surround the entire perimeter of this king of Easter, while mini Easter eggs get scattered across the entire top, giving the king its crown.
I swear, you and your guests, adults and kids alike, will fall head over heels for that masterpiece. And you, the maker of this jaw-dropping-sugar-coma-inducer, will be the hero of the party!
Looking at this post, you might be thinking that this cake will have you spend at least a week in the kitchen, but really, you’ll be surprised at how quickly it comes together.
I started working on mine the day before Easter, because I thought for sure that it would be a 2 day project. In my mind’s eye, there was no way I could start it in the morning (read late morning) and be finished by dinner time. Well, I was in for a surprise. In a little over 3 hours, everything was said and done (and I’d taken pictures, too!)
Here’s how it goes: while the cake is in the oven, you make the Cadbury Cream Egg filling, then while the cake is cooling in the pans, you make the Chocolate Fudge Frosting. You then send your cakes to the freezer for about an hour to chill completely.
Then it’s only a matter of cutting your KitKat bars and assembling this beauty.
Are you ready to get started? Let’s go…
STEP-BY-STEP INSTRUCTIONS & PICTURES
First item on our list – The Devil’s Food Cake
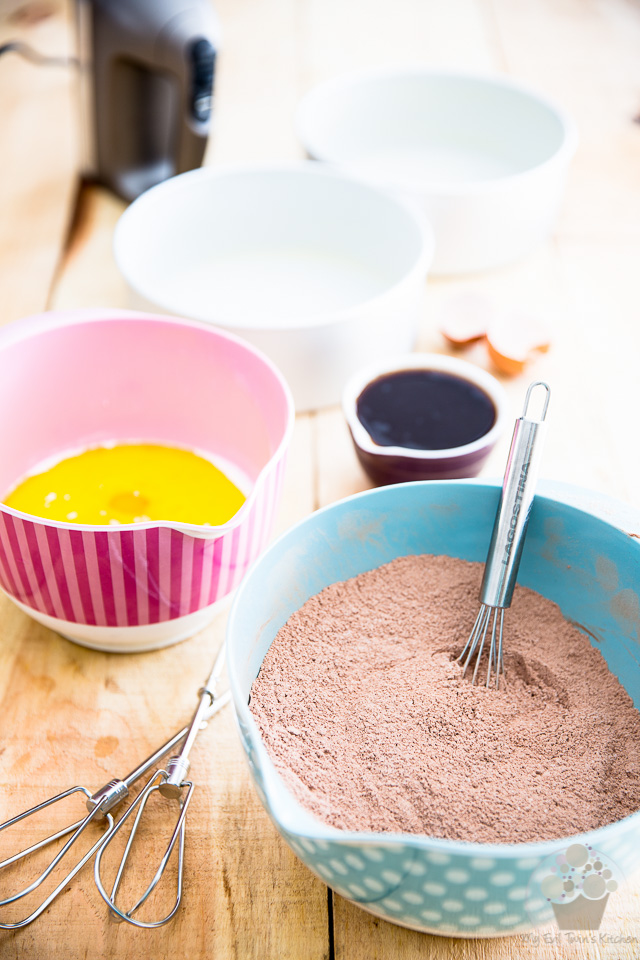
Preheat the oven to 350°F; butter and flour two 8″ round cake pans. Hold you pans upside down and bang them gently against the edge of your counter or kitchen sink to remove all excess flour and set aside. Yes, this will send a little cloud of flower flying across you kitchen, but it’s very well worth it, trust me.
Next, sift the flour, cocoa powder, baking soda and baking powder into a large mixing bowl. Add the sugar and salt and mix well with a flat whisk until all the ingredients are well combined.
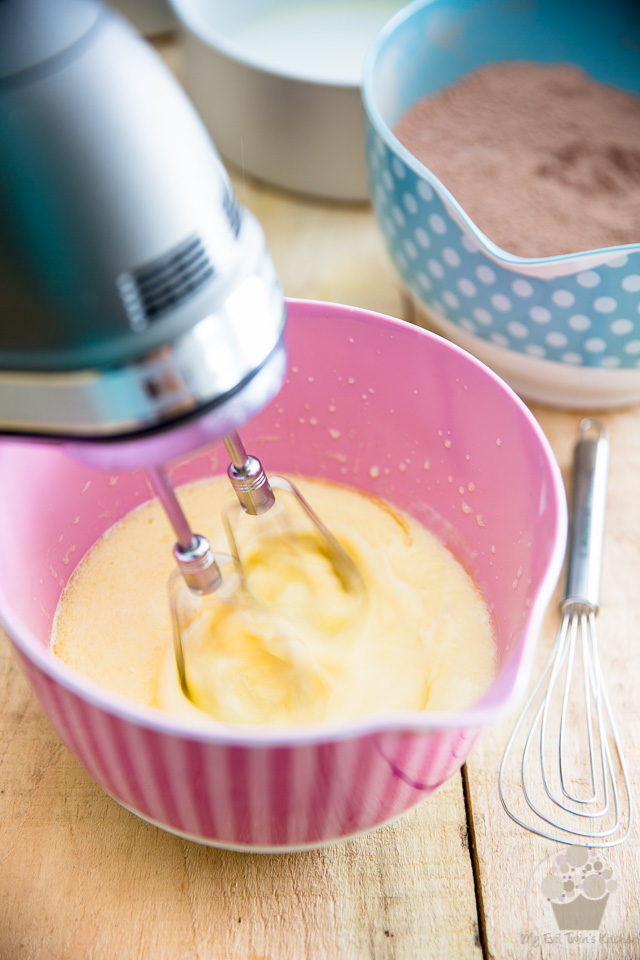
In a separate bowl, combine the buttermilk, melted ghee (you could also use oil if you preferred, but I don’t recommend using butter, because of its additional moisture content. You really want to be using pure fat, here) and eggs and beat with an electric mixer on medium speed until well combined.
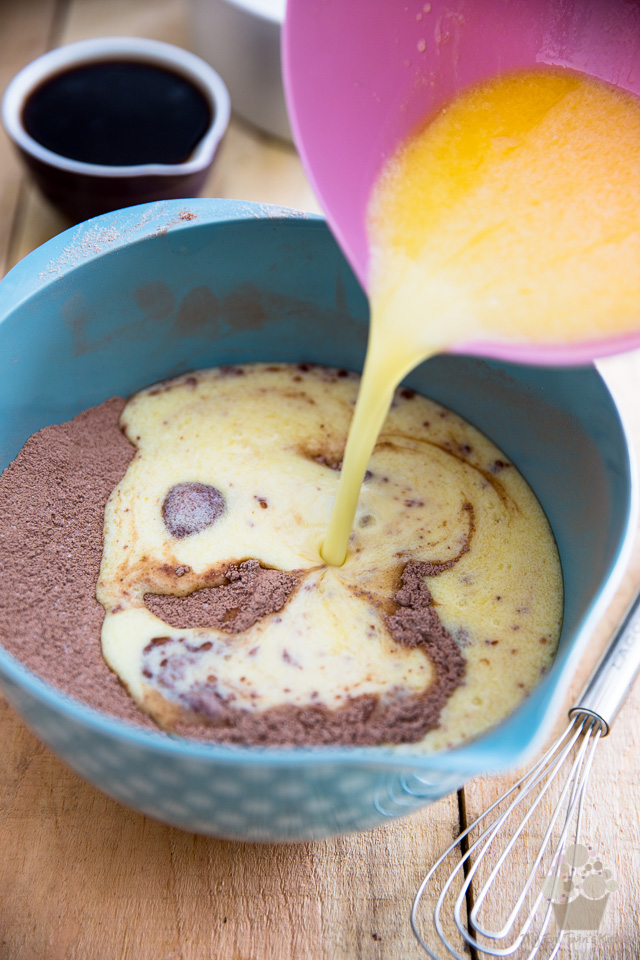
Slowly add your wet ingredients to the dry ingredients…
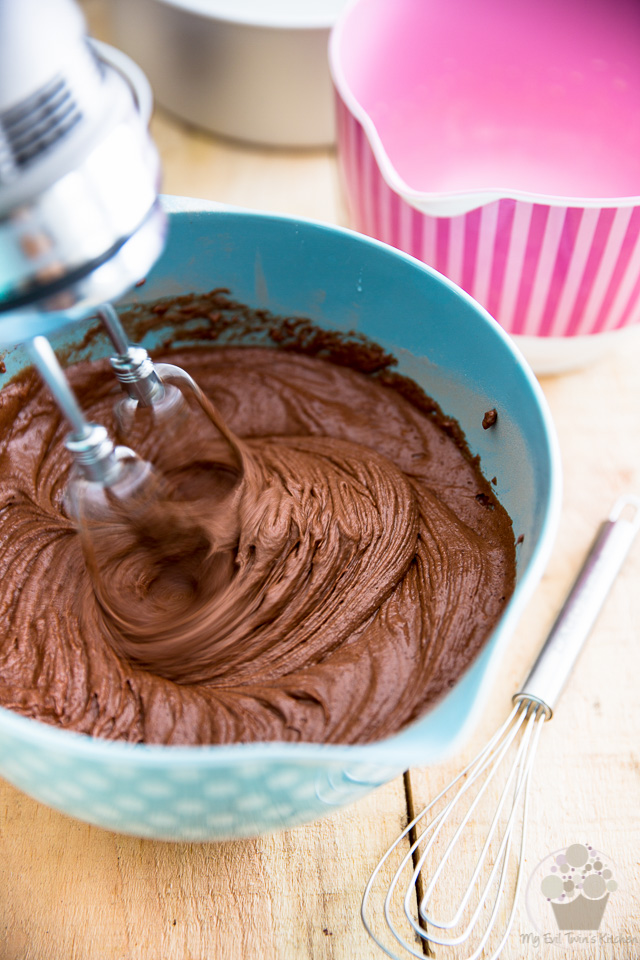
…and mix until well combined, about 2 minutes.
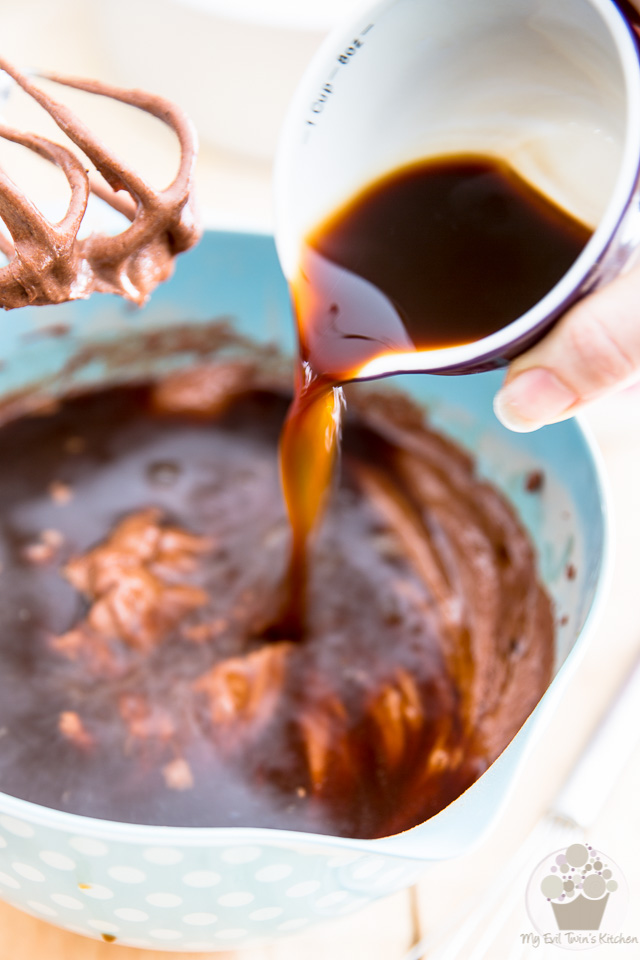
Now dilute the instant coffee in the boiling water and add the vanilla extract; pour that right into the cake batter
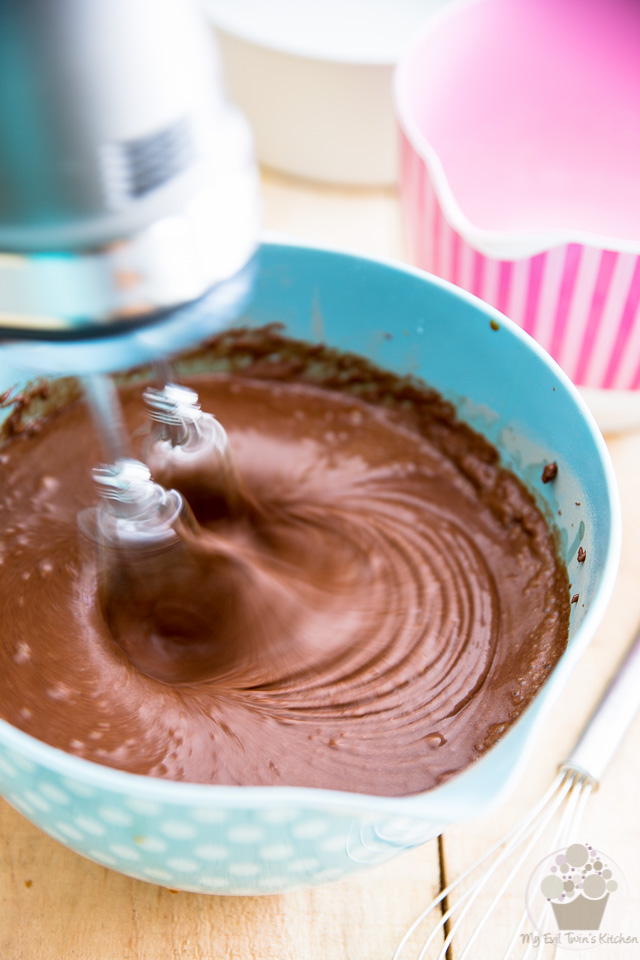
Resume beating with the mixer on medium speed until well combined, scraping the bottom of the bowl with a rubber spatula once or twice.
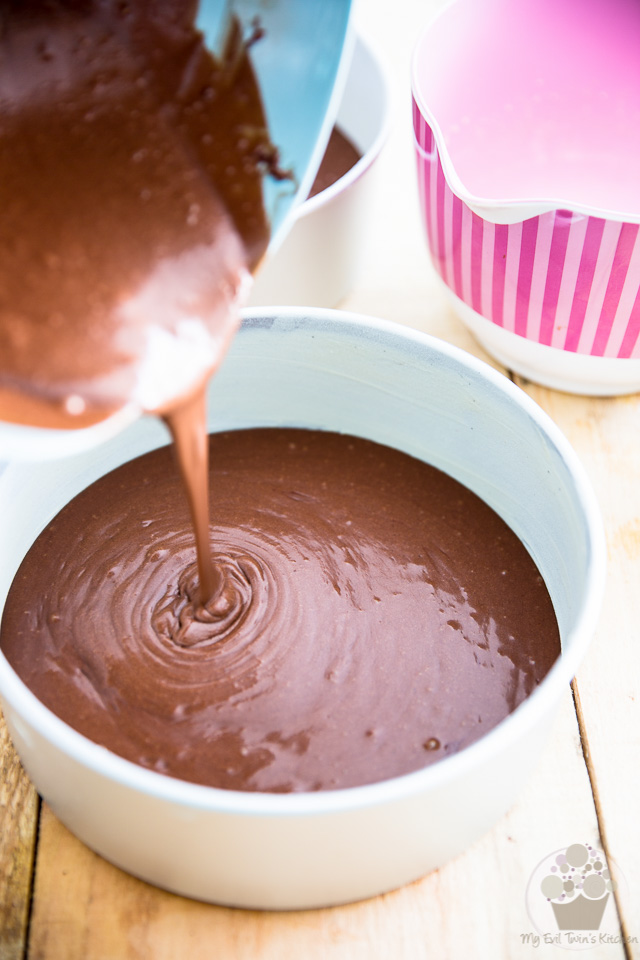
Pour the batter into the prepared pans (you should have about 625g | 22oz of batter per pan) and bake for 35 to 40 minutes, or until a toothpick inserted in the center comes out clean.
Now about those pans… I used 3″ high pans because that’s all I have, (I figure you can very well use a 3″ high pan to bake a standard 2″ cake but the opposite definitely isn’t true, so if you’re going to invest in cake pans, you might as well get the higher ones and be done with it) but the lower 2″ high cake pans will work just fine, too.
When the cakes are done, you’ll want to cool them in the pans for 25 to 30 minutes, before to delicately turn them onto a cooling rack and place them in the refrigerator (or preferably even in the freezer) to cool completely.
But while those cakes are in the oven…
Let’s make us some Cadbury Cream Egg Filling
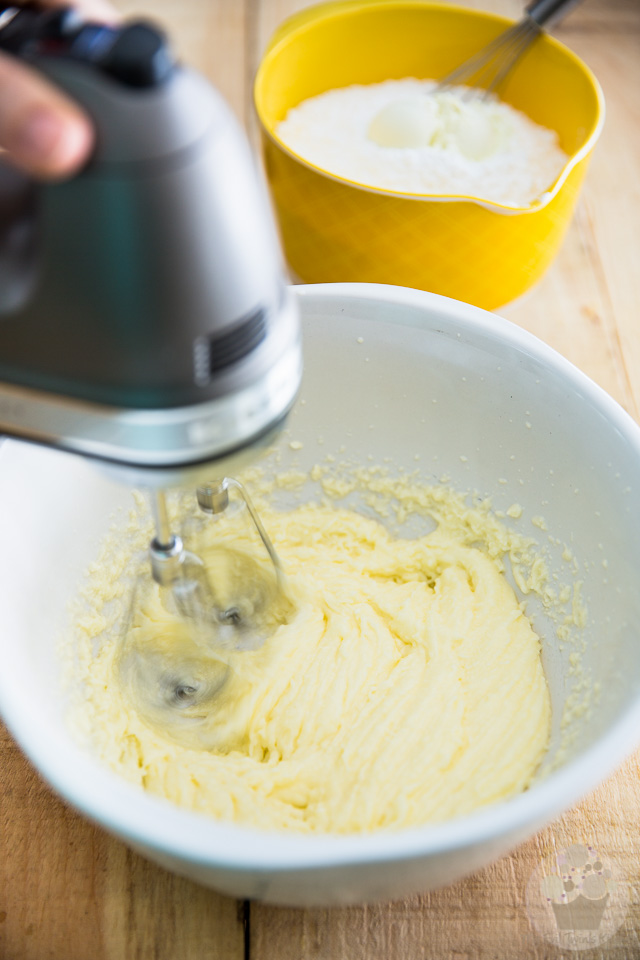
Combine the butter, light corn syrup and heavy cream in a large mixing bowl and beat with an electric mixer on high speed until light and fluffy, about 3 minutes.
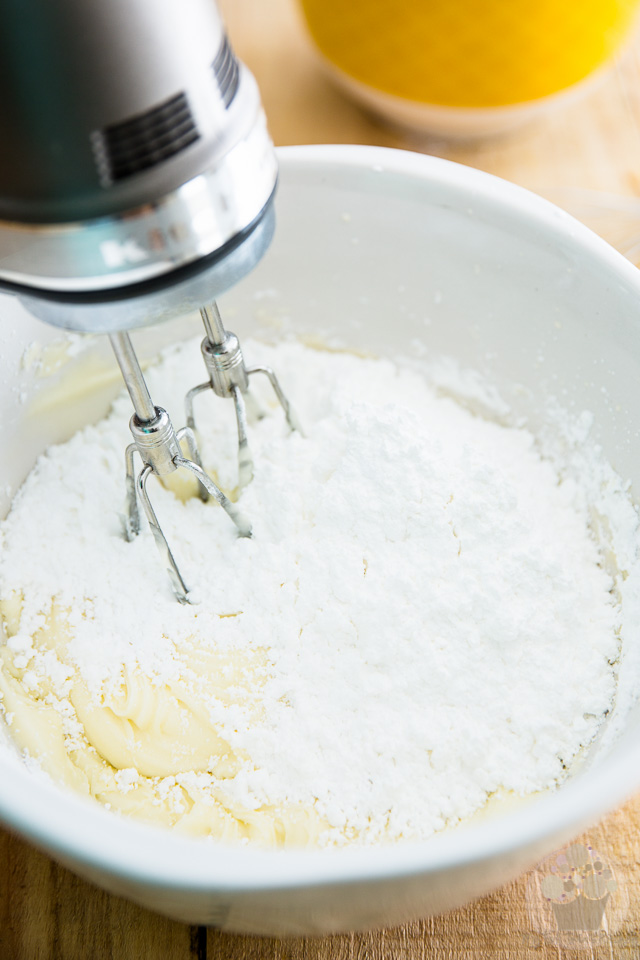
Add the powdered sugar and dry buttermilk and mix well, starting on low speed…
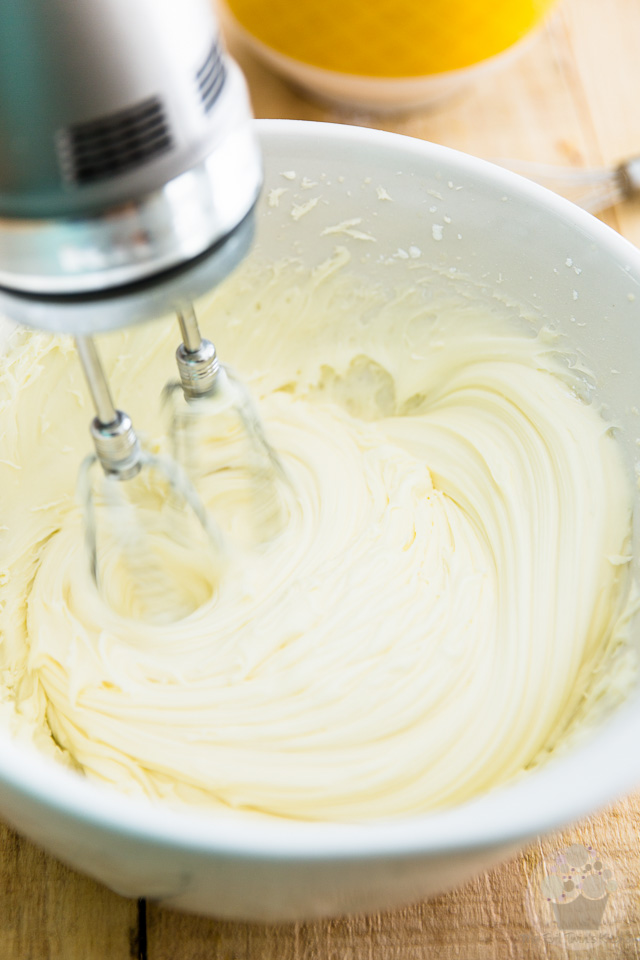
Progressively increase the speed all the way up to high and beat until the filling becomes really smooth and creamy and sticky and sweet and dreamy and… oh my… this filling!
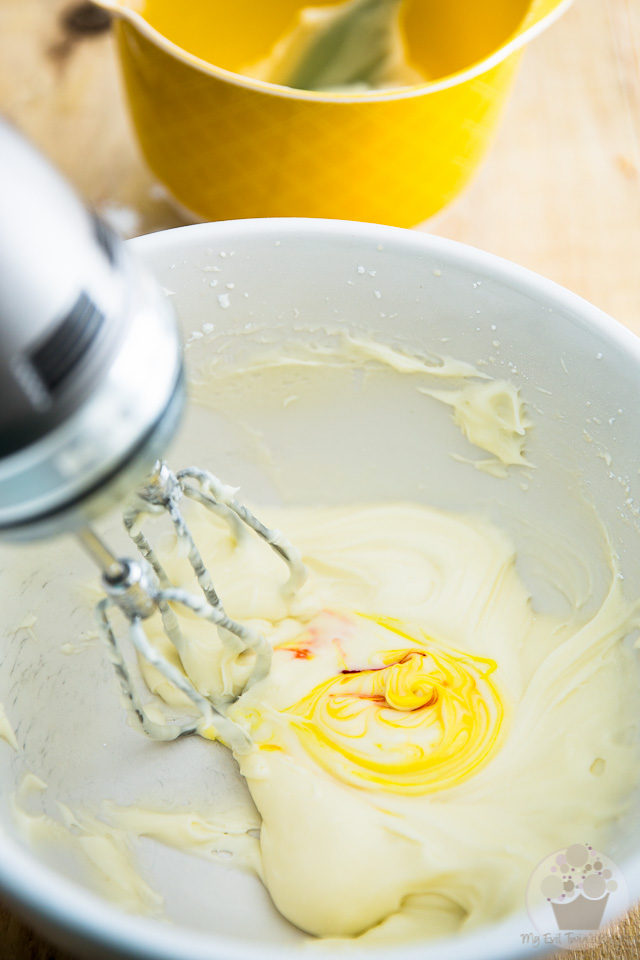
Set aside about 2/3 of the filling and color it with yellow and red icing colors. You’ll want to use mostly yellow and just a very little hint of red, just to give a slight orange tint to the filling.
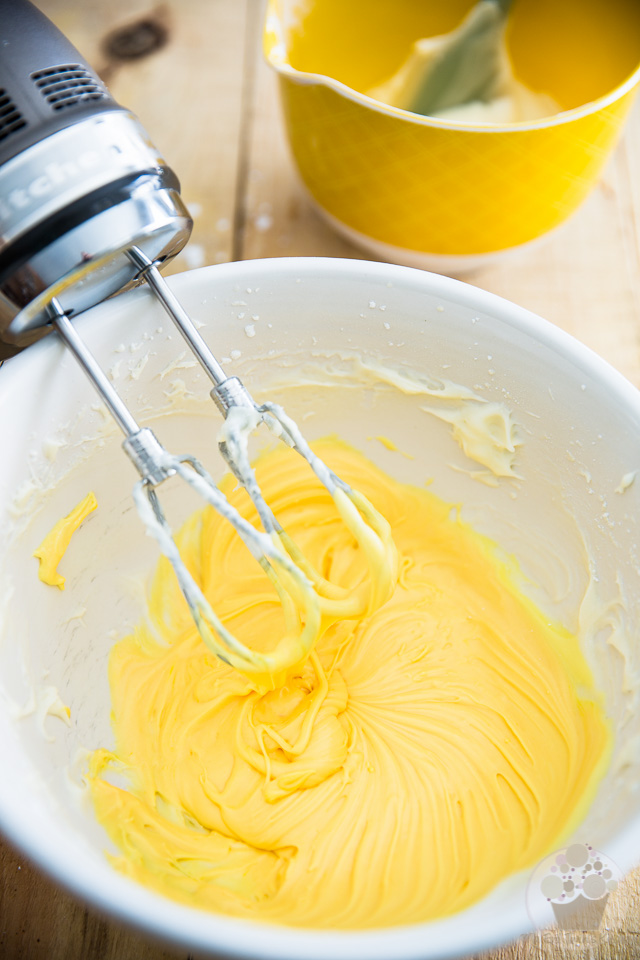
I strongly suggest that you use concentrated paste icing colors so you don’t add extra moisture to your icing, which could end up making it a tad too soft for the task that we have in store for it. If you’ve never tried that paste before, you really have to. This stuff costs close to nothing and will last you years, because a little goes a VERY long way, like really, it goes for miles and miles and miles. Plus, it comes in so many pretty colors. To try it is to adopt it, you’ll see.
But if all you have on hand is the liquid stuff, don’t fret. Worse comes to worst, you may only need to add a tad more icing sugar to your yellow cream egg filling to bring it back to the desired consistency.
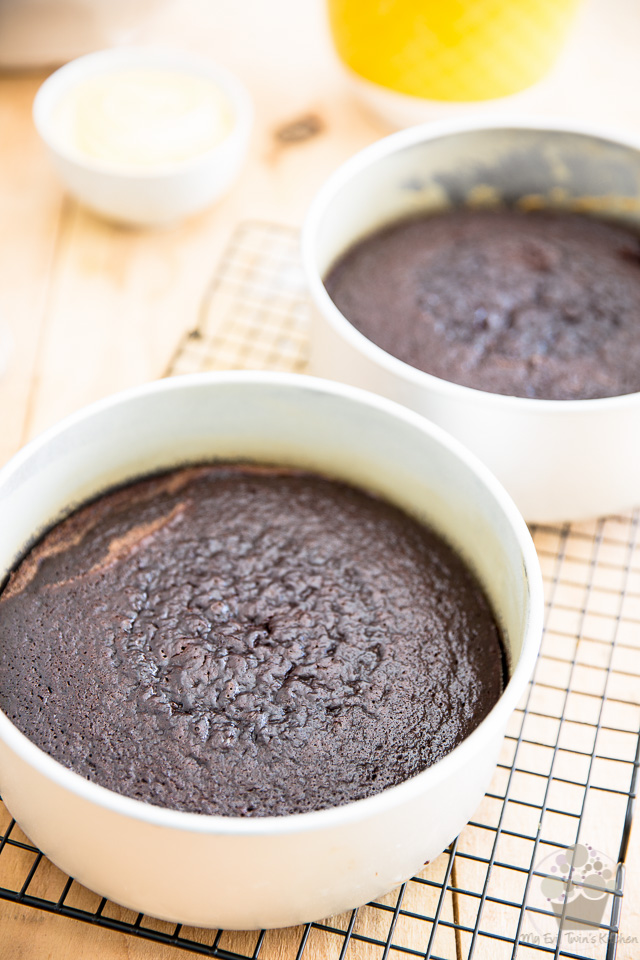
And voilà! Cream egg filling: done! I think those cakes must be ready to get out of the oven by now, what say you? It must have been close to a half hour, right?
How’s about we take a short break to set them to cool in their pans, and then we can move on to…
The Chocolate Fudge Frosting!
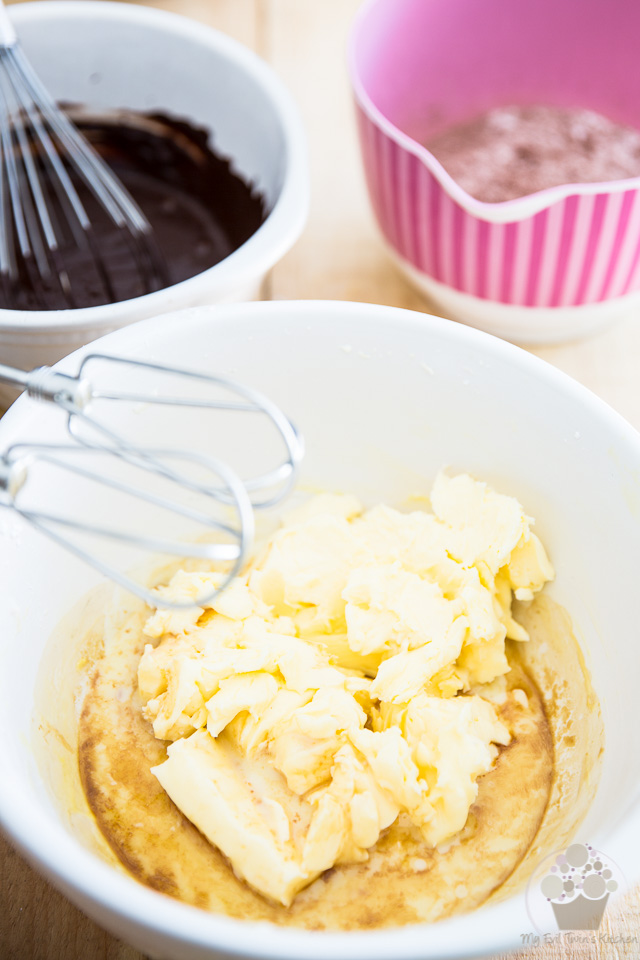
Combine the the butter, sweetened condensed milk and vanilla extract in a large mixing bowl…
While you’re at it, you may want to take a second to melt your chocolate now, too, as well as sift your cocoa powder and powdered sugar together in a mixing bowl.
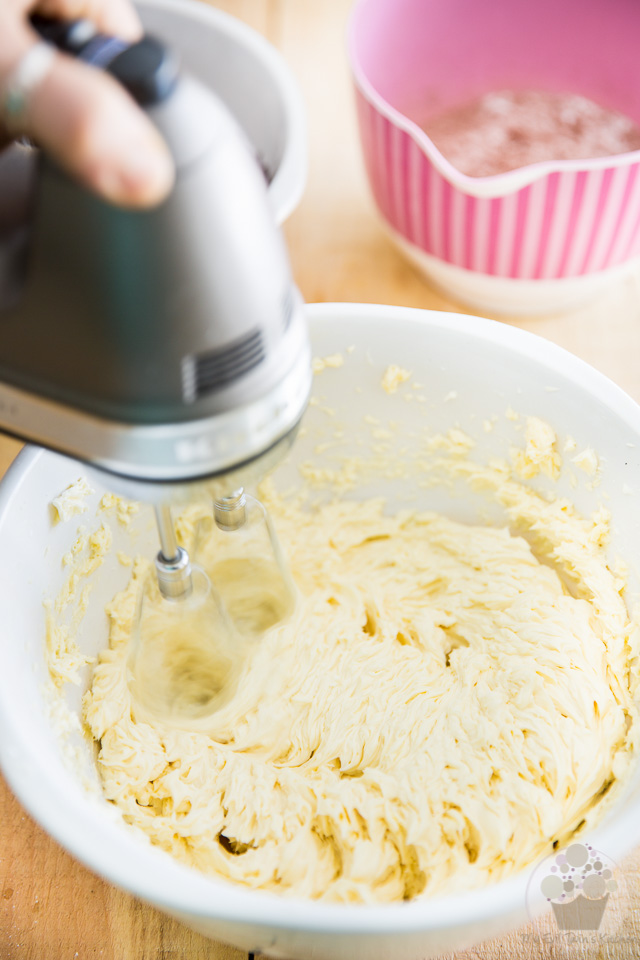
Beat the butter and condensed milk with an electric mixer on high speed until light and fluffy, about 5 minutes.
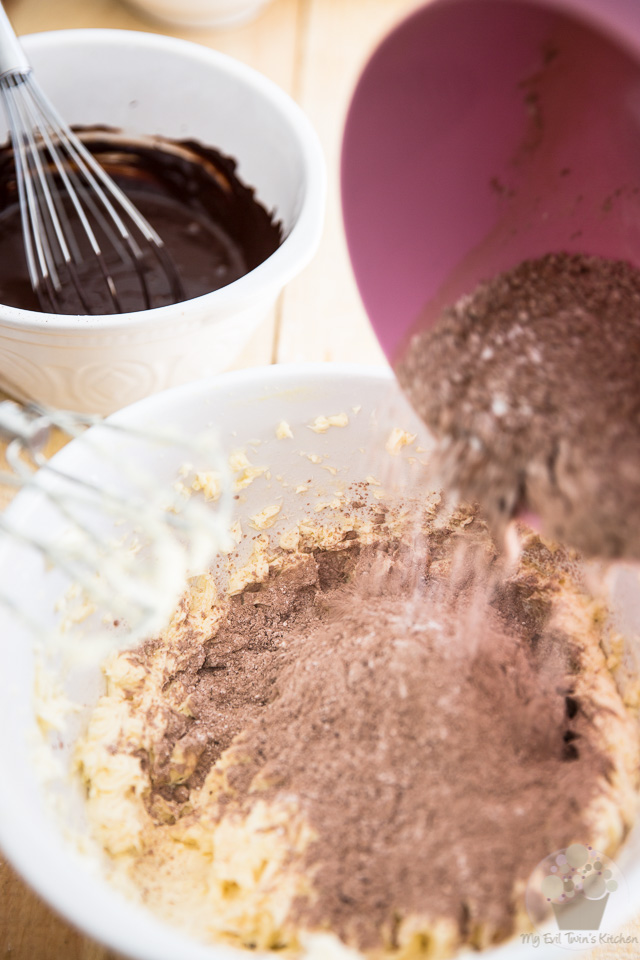
Add the powdered sugar and cocoa powder to the the creamed mixture…
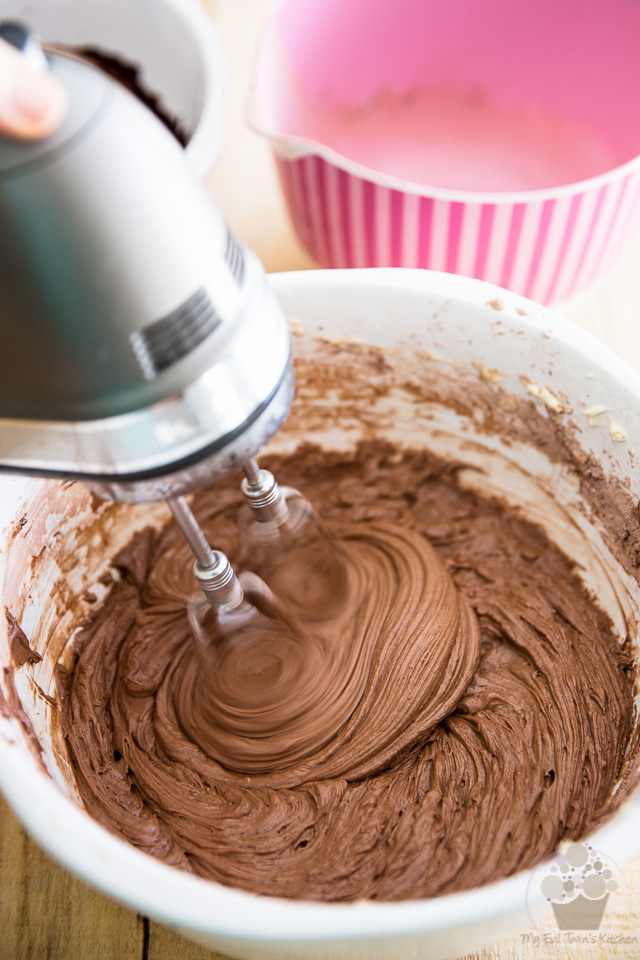
…and beat on low speed until well incorporated, about 1 minute, then increase the speed to high and beat for an additional minute.
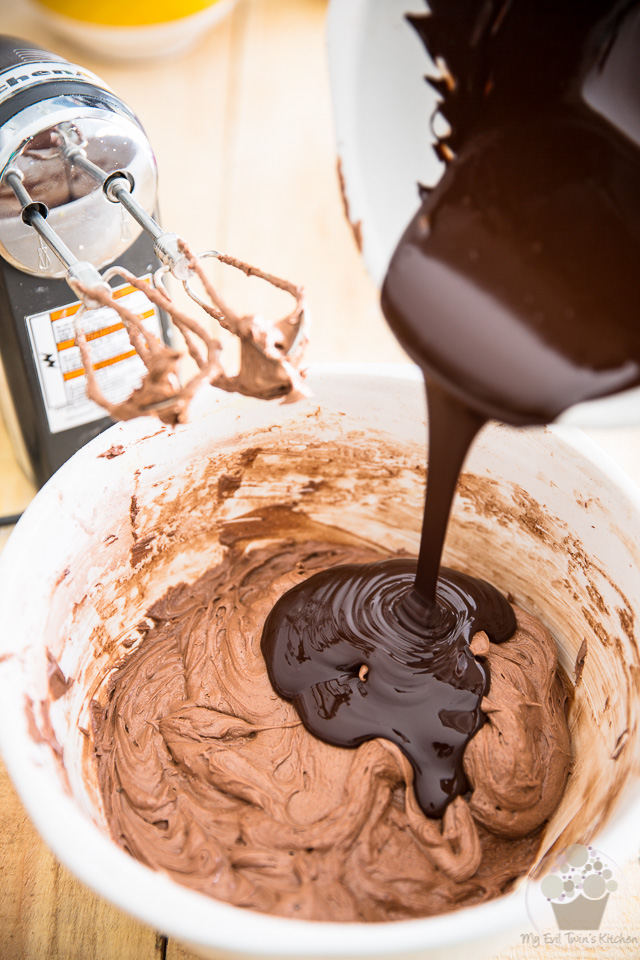
Add the melted chocolate and beat on high speed until smooth and fluffy, about 1 minute.
Note that I chose to use unsweetened chocolate because I like my chocolate REALLY dark. If you like yours a tad more on the sweeter side, use the dark chocolate instead. Keep in mind though that the cake is extremely sweet overall, so the dark chocolate sort of gives your palate a nice little break… Kids, however, may find it a bit too much. Ultimately, the choice is yours!
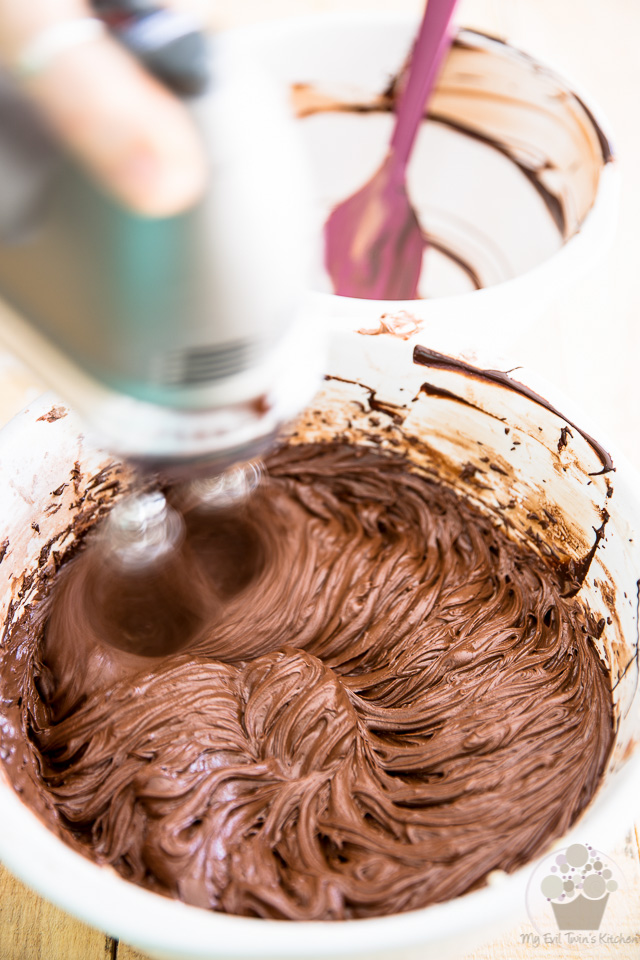
As it stands now, the frosting is too soft to be used up, so you’ll want to refrigerate it for about 10 minutes, and then you’ll need to beat it again so it becomes smooth and fluffy and just right for use.
You will see that the frosting firms up rather quickly in the fridge, so make sure you don’t overdo it.
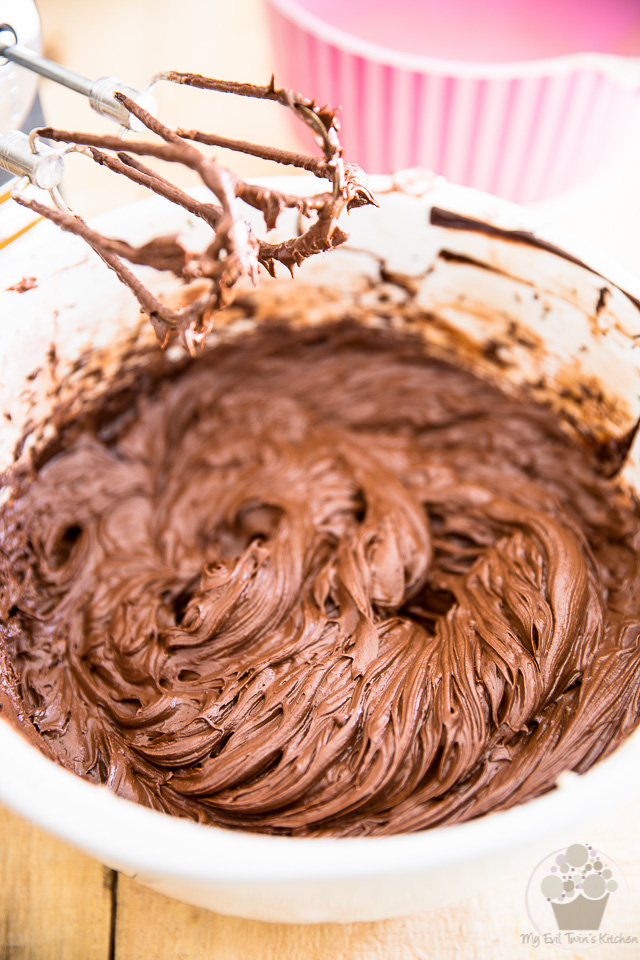
Let’s pause for a second to admire this wonder of the world.
I’m telling you, this frosting is so incredible, I’m thinking it probably deserves an entry of its own… I think I’ll add it to the list of future recipes to write about.
But, can one make a batch of frosting with no other purpose in mind than making frosting? What is one supposed to do with that batch of frosting after it’s done? Am I supposed to sit myself down with the bowl and eat the whole thing by the spoonful? Or maybe I could just bathe in it… or bake a cake! Now there’s an idea!
But I digress… let’s continue working on THIS cake, if we’re hoping to have it ready for Easter…
Wait! We still have about a full year for that, don’t we? So where’s the hurry? Ahhhhhh, let’s pause and look at that frosting for a little while longer then.
Kidding. I think it’s time we released our cakes from their pans now…
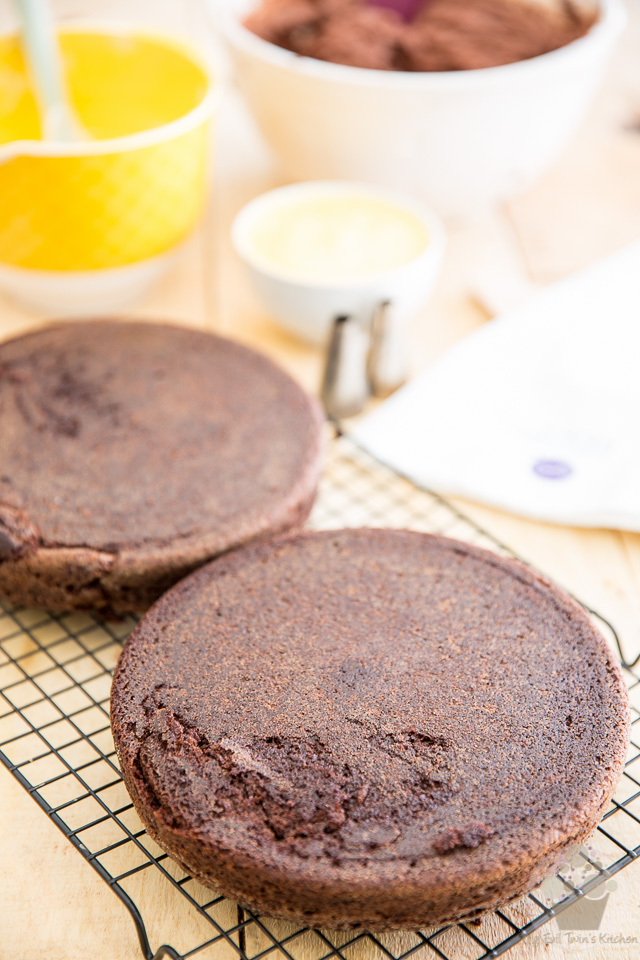
As you can see, I had a bit of an accident with mine, but nothing major, thankfully.
You might want to note that this cake is extremely delicate and you can feel just how moist it is as it comes free of its pan, so be very gentle when prying them loose.
If you want to be absolutely certain that this won’t happen to you, first, don’t get your pan all caught up in the grill of your gas range as you unmold your cake (yeah, that’s what happened to me…), and more importantly, you may want to consider lining the bottom of your pan with parchment paper.
Whatever you do, respect your cakes as you set them free and be very gentle.
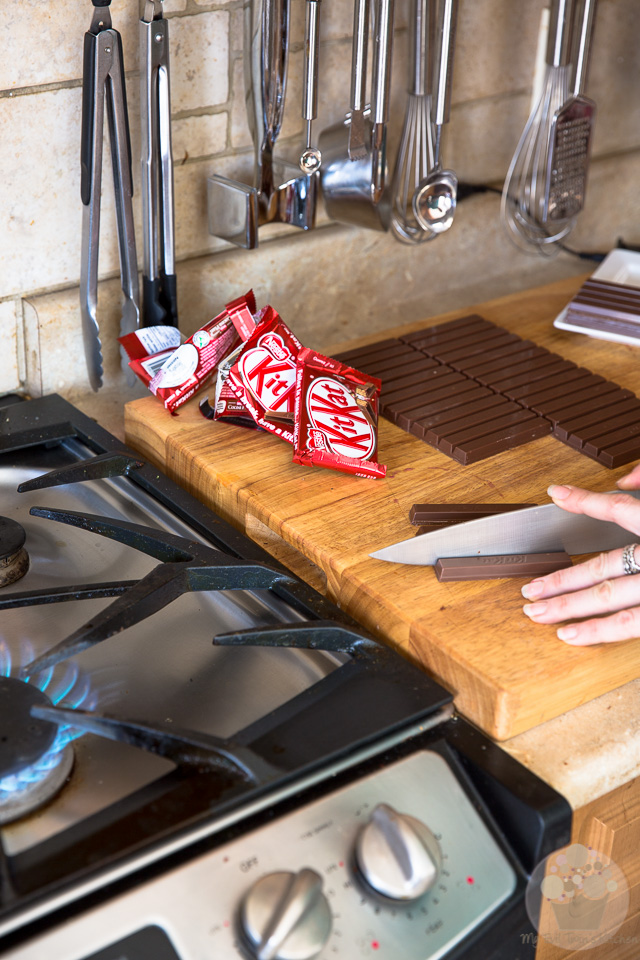
While our cakes are chilling (hopefully you were able to find a little spot for them in the freezer) let’s get our KitKats ready.
Unwrap the KitKat bars and cut them into individual sticks using a sharp knife. To get a nice clean cut, slightly warm your blade between each cut, either by dipping it in hot water and wiping it dry or by moving it briefly over an open flame and wiping it clean after each cut. If like me you have a gas range, then you have the perfect set-up for the job!
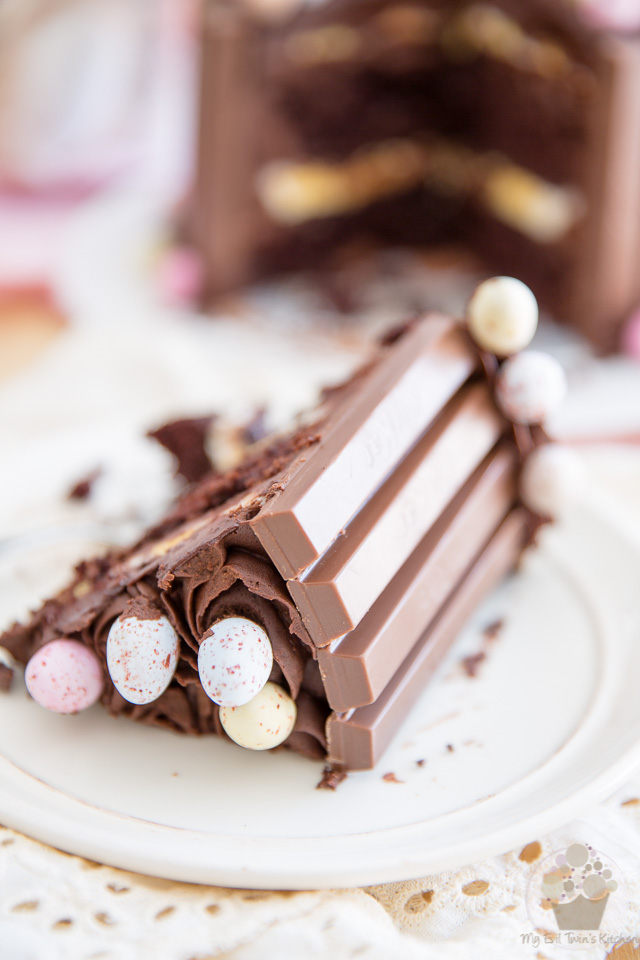
Lots of people, when making KitKat cakes, choose to leave their candy bars whole, or simply cut them in half. I really wanted to cut mine into single fingers because one, I figured it would make it way easier to cut the cake into whatever size portions I wanted (I felt 2 fingers was perhaps on the small side and a whole candy bar was probably way too much, so 3 sticks sounded like the perfect serving size to me) and two, it plain looks better, rounder. What can I say? I’m a bit of a perfectionist.
All set? Let’s put the KitKat in the KitKat cake
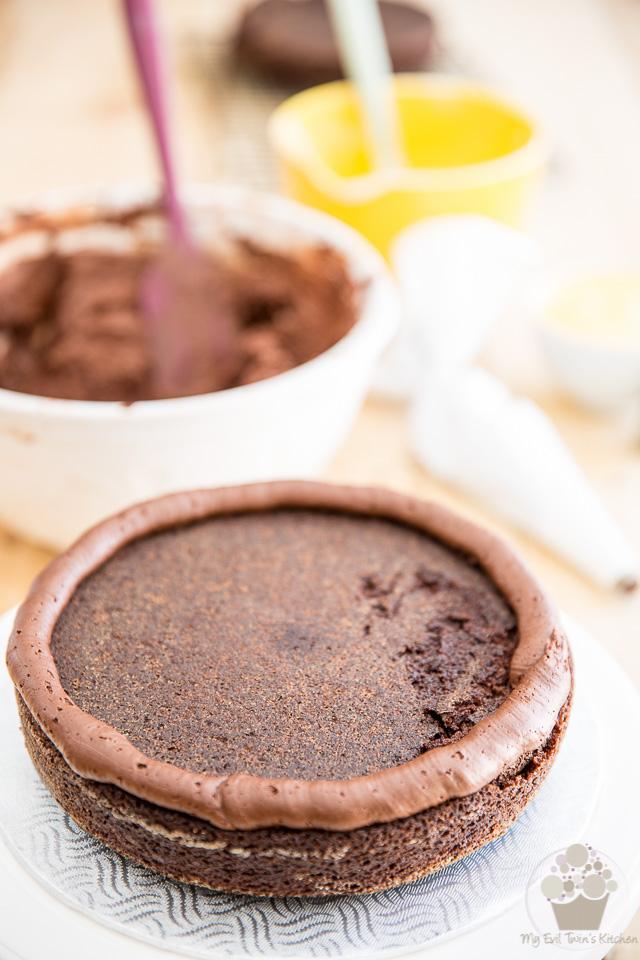
Once your cakes are completely chilled, place one cake, flat side up, on a cake plate or pedestal. Pipe a bead of chocolate frosting around the perimeter of that cake.
This will ensure that the cream egg filling stays nicely in place on top of the cake and doesn’t leak on the sides.
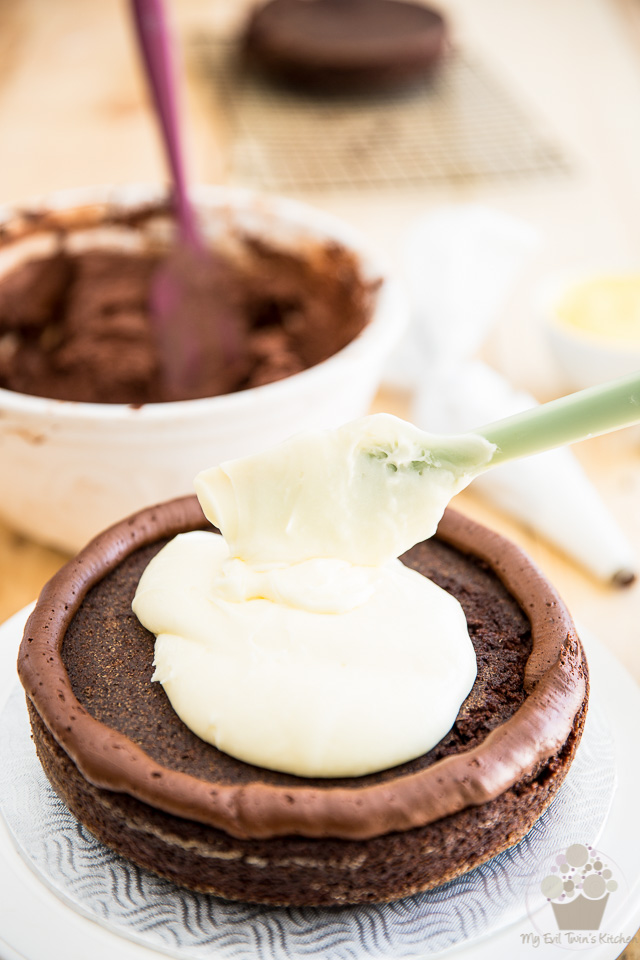
Spoon about 2/3 of the white cream egg filling in the center and delicately spread that filling all the way to the bead of frosting
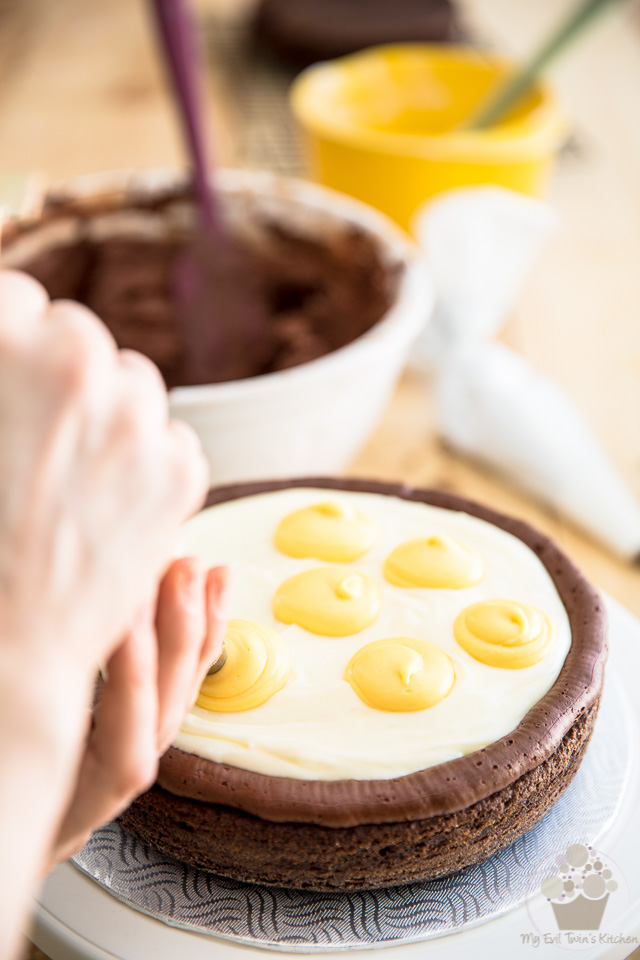
Pipe large dots of the yellow cream filling over the white layer.
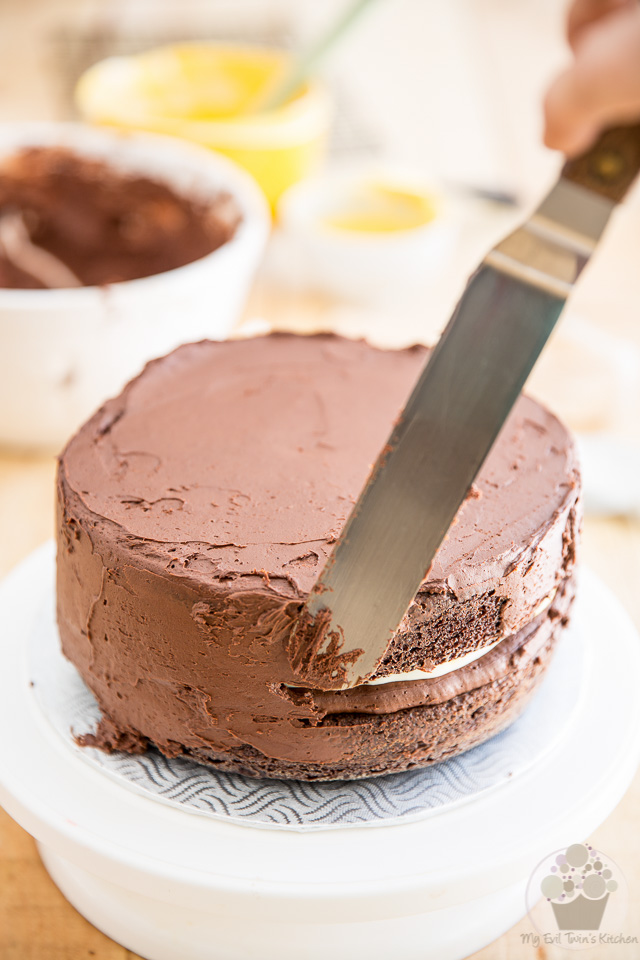
Top with the second cake, flat side up, and spread a thin layer of chocolate frosting with an offset spatula on the top and sides of the entire cake.
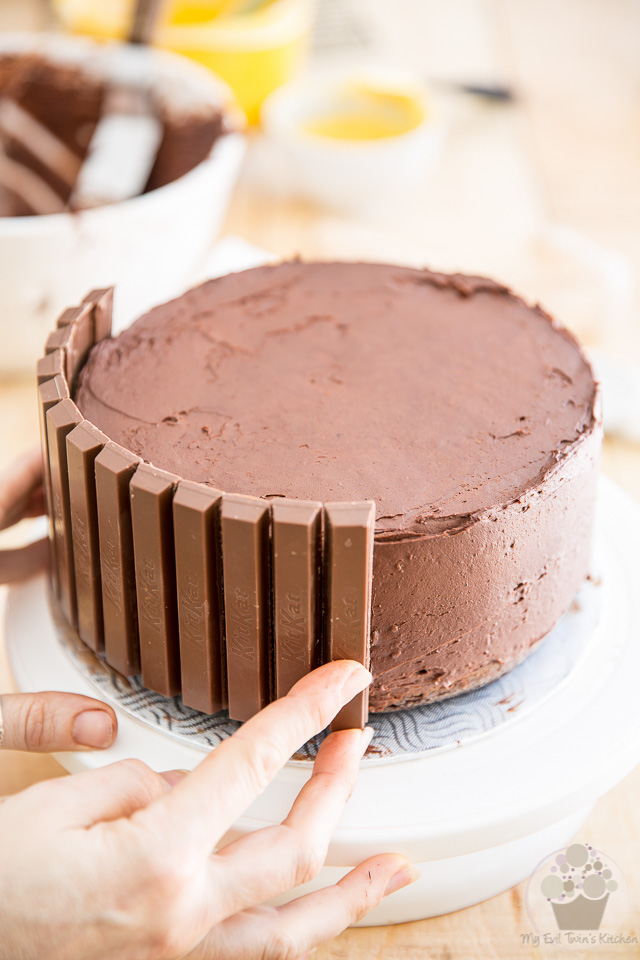
Now position the KitKat bars around the cake, letting about 3/4″ stick out at the top of the cake.
Don’t worry if there’s a gap at the bottom of the cake, that is actually desirable, as we’ll be filling that void with a pretty little decorative border in a few minutes.
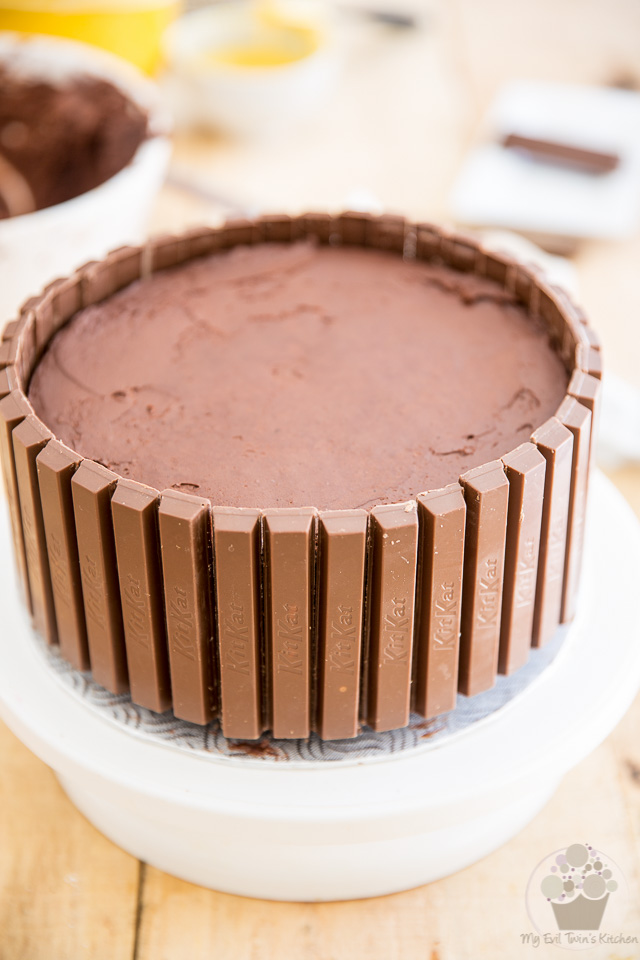
Try and keep your KitKats as straight and close together as possible and also too, make sure that they are all aligned at the same height.
And if you really like to pay attention to details, like me, make sure that the lettering all faces the same way, too!
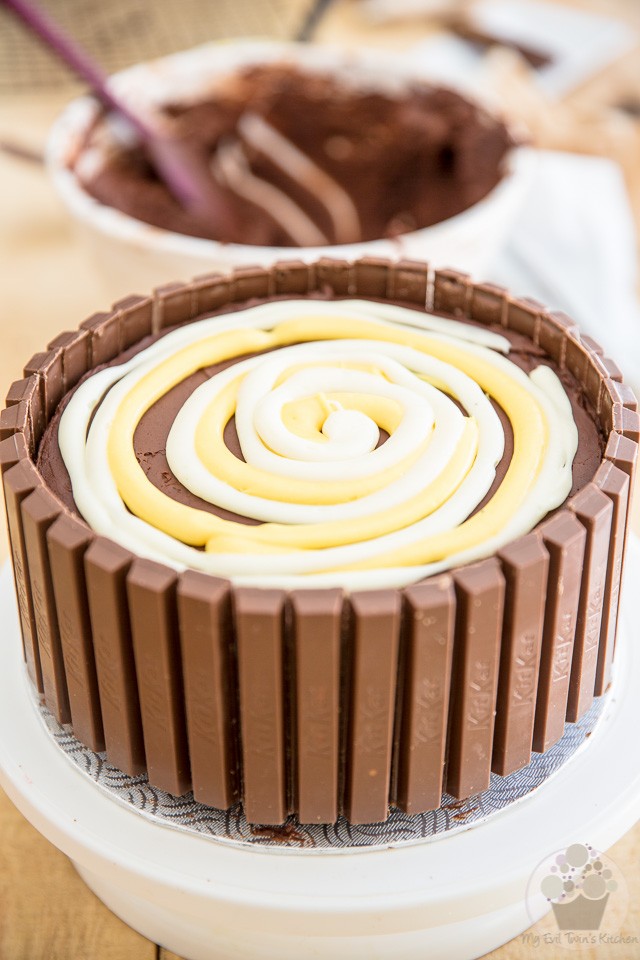
Now pipe interlacing spirals on top of the cake using whatever cream egg filling you have left…
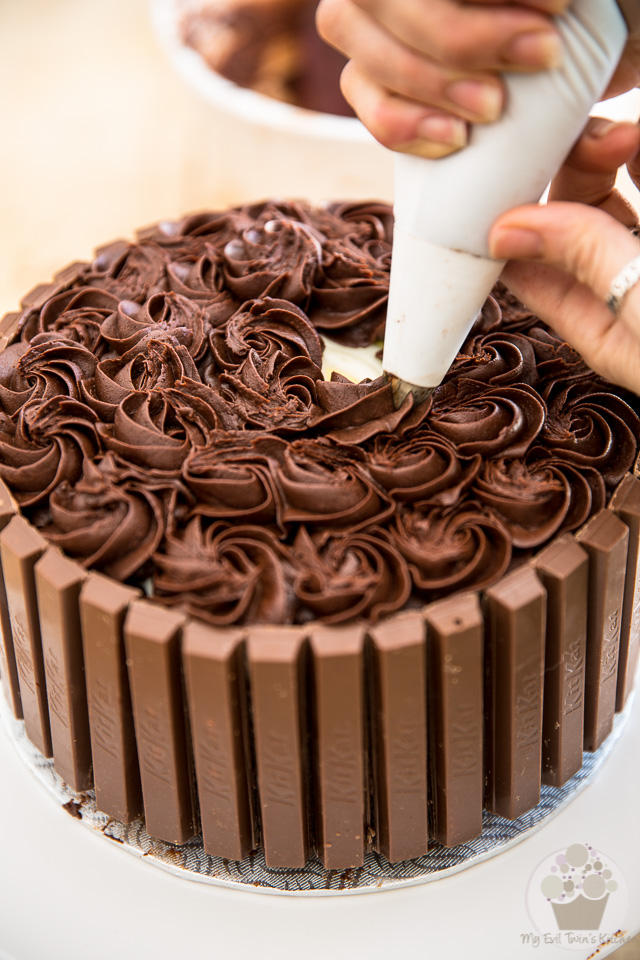
Next, using a large open star tip (I used an Ateco #6), pipe swirls of the chocolate frosting over those spirals of cream egg icing to cover the entire top of the cake.
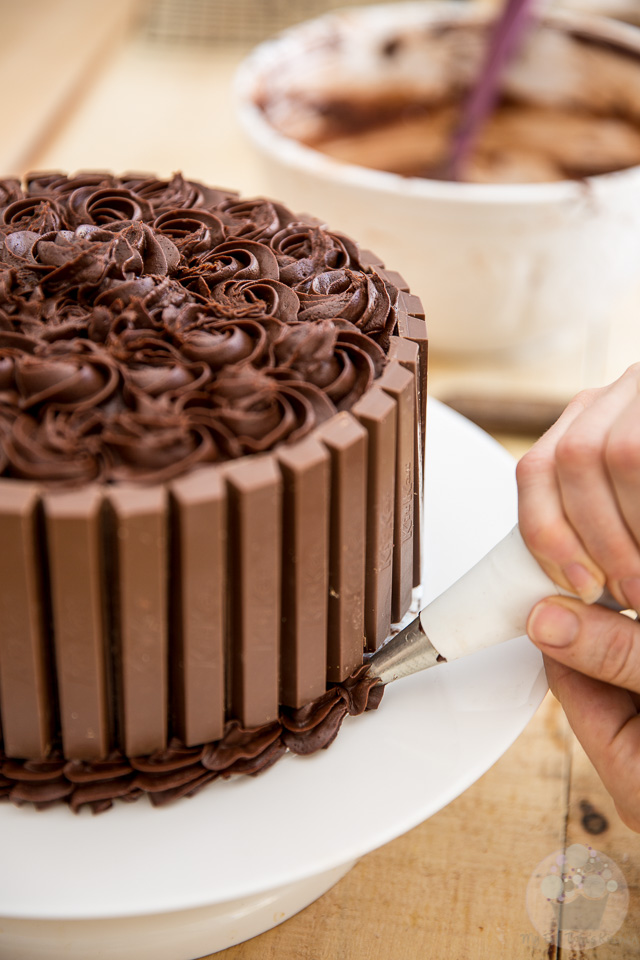
Switch to a smaller open star tip (I used an Ateco #2) to pipe a border of chocolate frosting around the base of the cake.
This will take care of the eventual gap left between the cake plate and the KitKat bars.
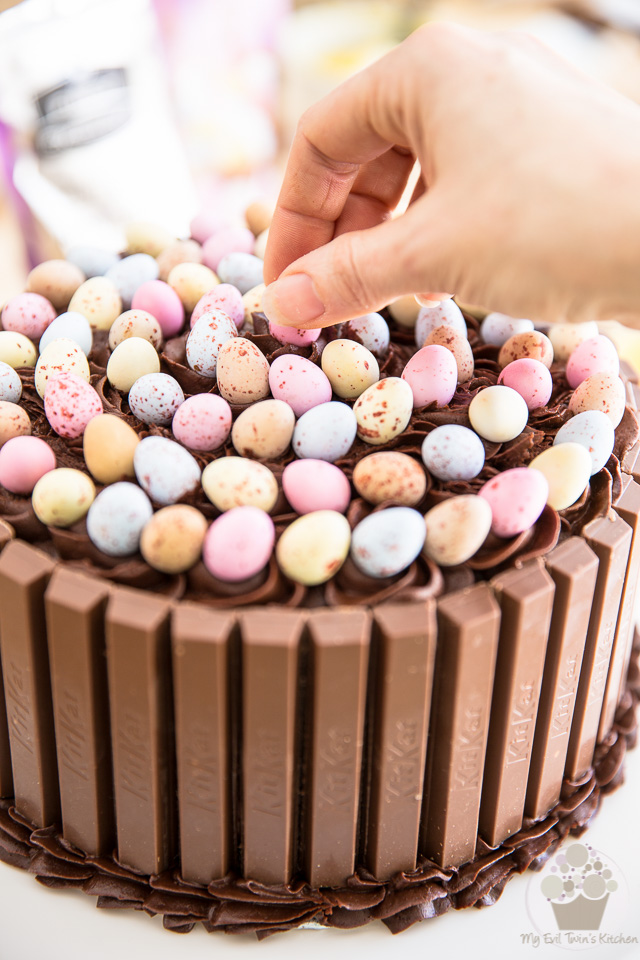
Arrange the mini eggs over the top of the cake as well as around the border…
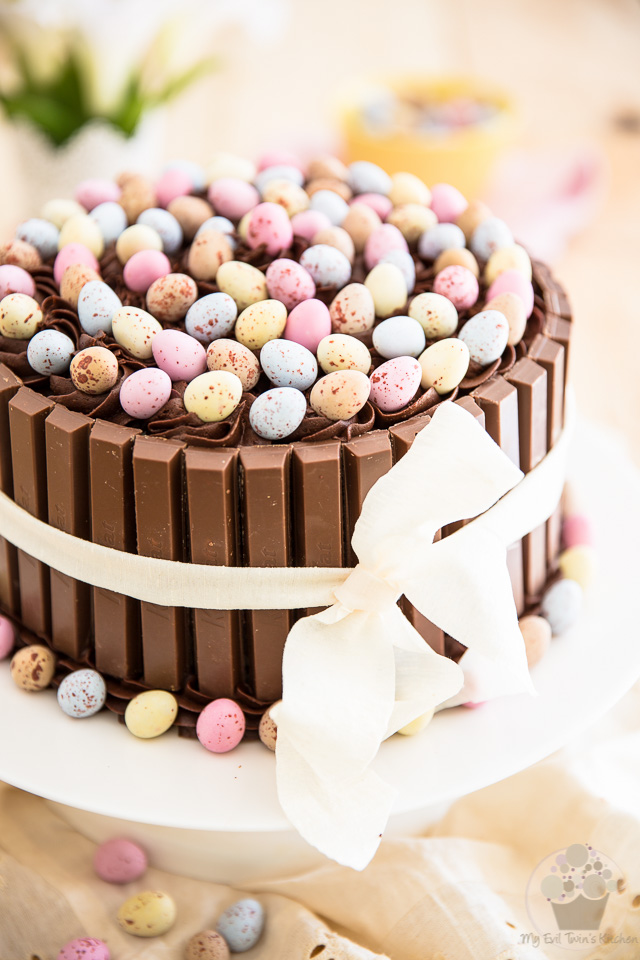
… and finally, secure the KitKats by tying a pretty little bow around your cake.
TADA!!!
That didn’t take so long now, did it? And it wasn’t so hard now, was it?
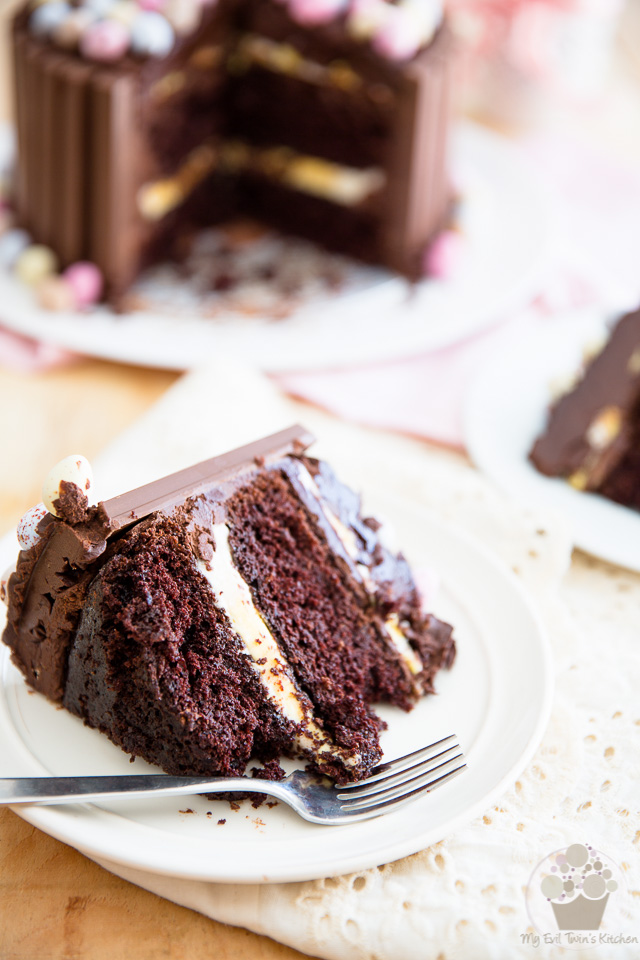
Your cake is now officially ready to be served. I ended up making “4 finger” slices for the pictures, but let me tell ya, it was way too much (that, coming from someone who LOVES their sugar and can handle it well, too!) I strongly suggest that you stick with 2 or 3 finger slices. But then again, you know yourself, and you know your people better than I do. So you slice ’em however big you want, how’s that?
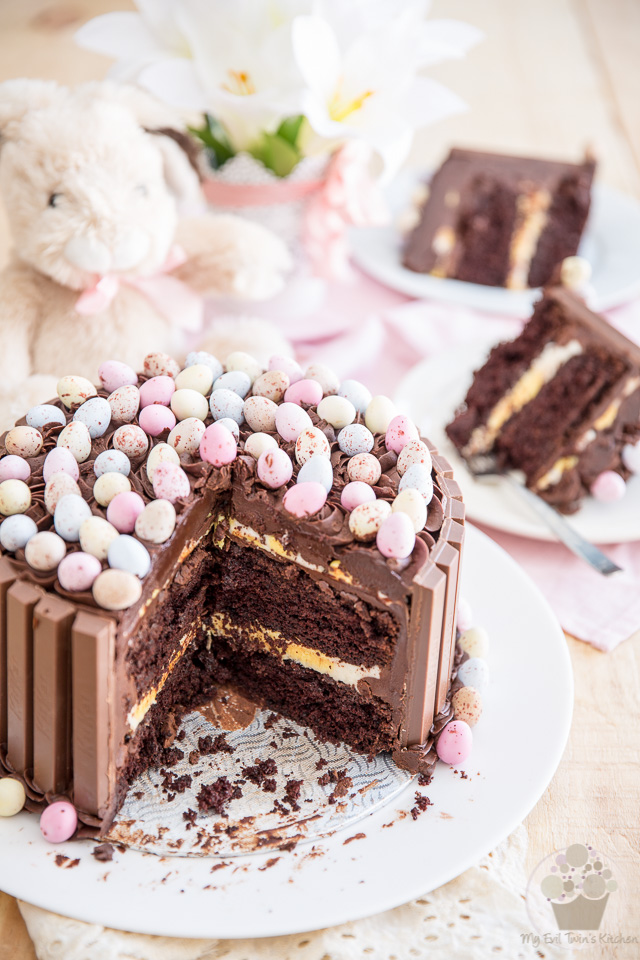
One last little word of advice, though, before I let you eat in peace. Like any cake, this cake is much better enjoyed at room temperature, and much easier to slice, too. So while it should be stored in the refrigerator, make sure to take it out of there at least 4 hours prior to serving.
Any leftovers will keep for up to 10 days…
But really… what leftovers are we talking about?
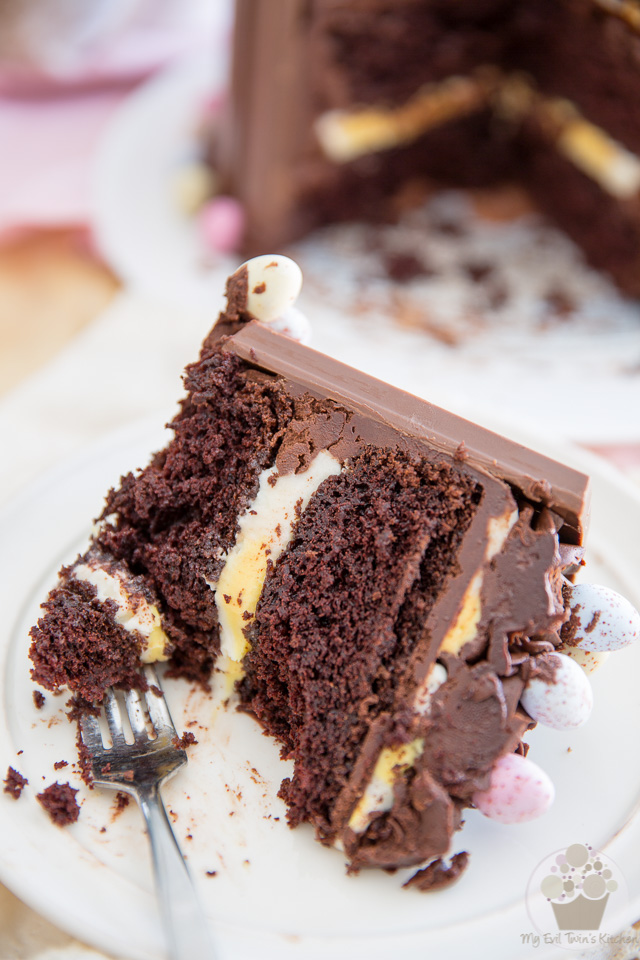
Happy [Next] Easter to you!
Ingredients
- 1-3/4 cup (210g | 7.4oz ) unbleached all-purpose flour
- 1-3/4 cup (350g | 12.3oz) granulated sugar
- 3/4 cup (65g | 2.25oz) unsweetened cocoa powder
- 2 tsp baking soda
- 1 tsp baking powder
- 1 tsp salt (I use Himalayan salt)
- 1 cup (240ml | 8oz) buttermilk, at room temperature
- 1/2 cup (120g | 4.2oz) ghee, melted (store-bought or homemade) (you could also use oil)
- 2 large eggs, at room temperature
- 1 cup (240ml | 8oz) boiling water
- 1 tbsp instant coffee granules
- 1 tbsp pure vanilla extract, (store-bought or homemade)
- 1/2 cup (120g | 4.2oz) butter, at room temperature
- 3/4 cup (180ml | 6oz) corn syrup
- 1/4 cup (60ml | 2oz) heavy cream
- 2 tbsp dry buttermilk
- 4 cups (480g | 16.9oz) powdered sugar
- Yellow and red icing colors
- 1-1/2 cups (360g | 12.7oz) butter, at room temperature
- 1 can (300ml | 14oz) sweetened condensed milk
- 1 tsp pure vanilla extract, (store-bought or homemade)
- 3/4 cup (90g | 3.2oz) powdered sugar
- 3/4 cup (60g | 2.1oz) unsweetened cocoa powder
- 2-1/4 cups (340g | 12oz) finely chopped unsweetened or dark chocolate, melted (depending on how dark you like your chocolate)
- 10 kit-kat bars (I needed 38 sticks total)
- 2 cups (350g | 12.3oz) mini eggs
Instructions
- Preheat the oven to 350°F; butter and flour two 8" round cake pans. Make sure to bang the pans upside down on the counter a few times to remove any excess flour. Set aside.
- Sift the flour, cocoa powder, baking soda and baking powder into a large mixing bowl. Add the sugar and salt and mix well with a flat whisk until all the ingredients are well combined.
- In a separate bowl, combine the buttermilk, melted ghee (or oil) and eggs and beat with an electric mixer on medium speed until well combined.
- Slowly add the wet ingredients to the dry and mix until well combined, about 2 minutes.
- Dilute the instant coffee in the boiling water and add the vanilla. Pour that right into the cake batter and beat with the mixer on medium speed until well combined, scraping the bottom of the bowl with a rubber spatula once or twice. Pour the batter into the prepared pans (you should have about 625g | 22oz of batter per pan) and bake for 35 to 40 minutes, until a toothpick inserted in the center comes out clean.
- Cool the cakes in the pans for 25 to 30 minutes, then delicately turn them onto a cooling rack and place in the refrigerator (or preferably the freezer) to cool completely.
- Combine the butter, light corn syrup and heavy cream in a large mixing bowl and beat with an electric mixer on high speed until light and fluffy, about 3 minutes.
- Add the powdered sugar and dry buttermilk and mix well, starting on low speed and progressively moving to high, until the filling becomes super smooth and creamy.
- Set aside about 2/3 of the filling and color with yellow and red icing colors (use mostly yellow and very little red, just to give a slight orange tint to the filling).
- Combine the the butter, sweetened condensed milk and vanilla extract in a large mixing bowl and beat with an electric mixer on high speed until light and fluffy, about 5 minutes.
- Sift the cocoa powder and powdered sugar together and add to the the creamed mixture. Beat on low speed until well incorporated, about 1 minute, then increase the speed to high and beat for an additional minute.
- Add the melted chocolate and beat on high speed until smooth, about 1 minute.
- Refrigerate for about 10 minutes and then beat again before use.
- Unwrap the KitKat bars and cut them into individual fingers with a sharp knife. For best results, slightly warm your blade between each cut, either by dipping it in hot water and wiping it dry or by moving it briefly over an open flame and wiping it clean after each cut.
- Once your cakes are completely chilled, place one of the cakes, flat side up, on a cake plate or pedestal. Pipe a bead of chocolate frosting around the perimeter of that cake and then spoon about 2/3 of the white cream egg filling in its center. Delicately spread that filling all the way to the bead of frosting, and then pipe large dots of the yellow cream filling over the white layer.
- Top with the second cake, flat side up, and spread a thin layer of chocolate frosting with an offset spatula on the top and sides of the whole cake.
- Position the KitKats around the cake, letting about 3/4" stick out at the top of the cake (don't worry if there's a gap at the bottom of the cake, we'll be filling that void with a pretty little decorative border later)
- Try and keep your KitKats as straight and close together as possible and also too, make sure that they are all at the same height. And if you really like to pay attention to details, like me, make sure that the lettering all faces the same way...
- Pipe interlacing spirals with the leftover cream egg filling on top of the cake, then, using a large open star tip (Ateco #6), pipe swirls of the chocolate frosting over those spirals and cover the entire top of the cake.
- Switch to a smaller open star tip (Ateco #2) to pipe a border of chocolate frosting around the base of the cake (and fill the eventual gap between the cake plate and KitKats)
- Arrange the mini eggs over the top of the cake and around the border and finally, secure the KitKats by tying a pretty ribbon around your cake.
- Store in the refrigerator for up to 10 days.
- Serve at room temperature (take the cake out of the fridge at least 4 hours prior to serving)
Notes
Devil's Food Cake recipe slightly adapted from Beatty's Chocolate Cake
That deserves to be in a cake museum!!! It’s so picture perfect, too good to eat!
You’re too kind, Michelle! Seriously, though, it would be a real shame not to eat that cake! This thing tastes like paradise! I guess can save the pictures for the museum… 😉
Oh my god this cake looks amazing, all the photos! Yum!
Thanks Thalia! Would you believe me if I told you that it tastes even better than it looks? ‘Cuz it does! 🙂
My granddaughter and son-in-law would flip for this one! I’m also one of those bloggers who is frequently behind the holiday and seasonal calendar so you’re not alone!
Yummy!!!!
I love chocolate cake.
Going to make this cake in the upcoming days!!
Thanks for the recipe.
I just did it today for a birthday and looks amazing! I´m sharing it in my blog with a link to your page if that´s alright =)
Thanks for the recipe, is great!
Happy to hear the cake turned out amazing, Ginny! So long as you don’t share the actual recipe on your blog, I’m perfectly fine with your sharing your results! 🙂
I can’t get powdered buttermilk in the small town I live in. Is there something else I can use? Or leave it out entirely?
Technically, you could leave it out, but you’re probably gonna have to make up for it by adding more powdered sugar. If you can get your hands on it, though, it’s really worth adding, as it does do a lot for the overall flavor and texture of the icing.
This recipe was much more complicated than it had to be. The list of ingredients shown on Pinterest were not accurate measurements and the list was very confusing! For instance, it said to use 2 1/8 cups of boiling water, then right next to it, it also reads 8 oz boiling water. By the time I realized I added too much water (I added 2 cups as stated), the recipe was ruined. I had to then add more of the other wet/dry ingredients and do my own calculations to fix it. This ended up costing me a lot more time and money. It was confusing and frustrating to say in the least. I was able to correct the authors calculation errors and the rest of the cake turned out fine. May I add a suggestion to the author – that in the article, the ingredient list should be shown at the top of the article, not at the bottom near the comments. Also, clear concise ingredients and measurements should be listed. I will not be using this authors recipes again in the future. Baking should be fun for those who enjoy it and this recipe caused a lot of unnecessary stress and aggravation.
With all due respect, you should know better than to follow a recipe directly from Pinterest’s rich pins cards… these cards are automatically generated by Pinterest (not by the bloggers themselves), through some program, so mistakes are to be expected. They are meant to help you choose a recipe based on its ingredients directly from Pinterest and save you the trouble of having to visit tens of blogs and scroll all the way down to the recipe cards on all of them – ‘cuz yeah, having the recipe card showing at the bottom of the post is usually pretty much the way things roll on ALL food blogs, not just mine!
Ever notice how there’s a “make it” button on those cards that take you to the actual recipe when you click on it? Next time you decide to follow a recipe from a blog, might I suggest that you actually do that and follow the blogger’s original recipe card instead? It might save you a lot of time and trouble. And if you decide to follow a recipe directly from the rich pin card, then you shouldn’t be blaming “the author” for a mistake that was made by robots…
As for MY list of ingredients and measurements, the ones that I take the time to calculate, measure, test and write myself, they couldn’t be clearer or more concise!
Wow!!! It looks so delicious.
This is absolutely my all-time favourite cake to bake for events! It’s always a showstopper, and tastes divine, even without the creme egg aspect!
wow!!!!
I love this kit-kat chocolate cake.
Going to make this cake!!
Thanks for sharing the recipe.
Loved the recipe!
This is amazing! The kids would love it!