The perfect sandwich for your next picnic: on top of being super pretty, this Tapenade Salami Sandwich is crazy tasty, real easy to make and very portable!

It’s officially picnic season! At least, I think it is… When it’s not raining buckets or freezing cold out, it definitely is picnic season!
But do you guys still do that? Picnic?
I remember when I was younger, I used to LOVE picnics. I would get so crazy excited at the very thought of whipping up all kinds of delicious food, loading it all up into a big cooler (and having a very hard time fitting it all in) and then taking the whole rig to some remote outdoor location to enjoy it in good company. Then we’d throw some ball or Frisbee, or play games, fly kites, take a swim in the lake, or just lay there and bask in the sun.
Some of my fondest childhood memories definitely involve some kind of portable food and the great outdoors. I can’t even say which part I liked best… from elaborating the menu to prepping the food, to tetris-ing it into the cooler then car, to getting to our chosen location to actually setting up and eating, I loved every single thing about picnics.

For some reason, though, it’s been YEARS since I’ve last done that. The closest thing that I’ve done to an actual picnic is making a few portable dishes and bring them to my mom’s to enjoy by the poolside at her new condo. Perhaps the fact that I now actually live in the sticks makes me less inclined to the idea of carrying my food to some other “outdoorsy” location. Or maybe it’s just that I’m getting old and don’t have much of a social life anymore…
But, whipping up this Tapenade Salami Sandwich earlier this week totally gave me an irresistible itch to go on an actual picnic, complete with road trip and all.
There’s something about this sandwich that just says party, summertime fun and adventure! Perhaps it even whispers things about sandy beaches, if you listen carefully!
It’s beautiful, it’s festive and it’s super delicious, too!

Of course, you don’t have to reserve it strictly for picnics! It would be totally suitable for pot-lucks, family parties and other social gatherings. It would also, without the shadow of a doubt, bring a little bit of sunshine to your lunch hour, should you decide to enjoy it at work.
I say that this is such a fantastic sandwich that it will bring smiles, sunshine and happiness wherever or whenever you choose to enjoy it!
STEP-BY-STEP INSTRUCTIONS & PICTURES

This Tapenade Salami Sandwich is so easy to make, it hardly even requires a recipe at all, let alone step-by-step instructions or pictures. But food is a beautiful thing to look at, isn’t it? And pictures are so much more fun than words…
So today, for the most part, you won’t really have to bother reading the instructions. Just looking at the pictures should do the trick!
As usual, the very first thing that you should do is prep all your ingredients… slice the bread, cheese, roasted bell peppers, get your salami and basil ready, and make the tapenade.
The tapenade would be one of the key ingredient of this sandwich; it imparts SO MUCH FLAVOR to it, there’s no need to reach for any other condiment!
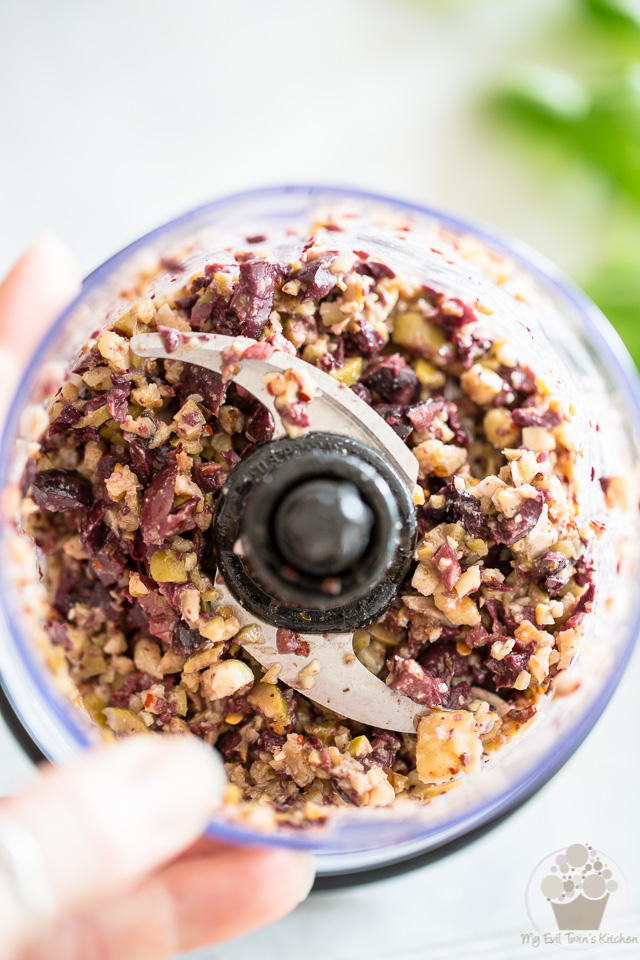
To make it, you need only combine a generous amount of pitted kalamata and green olives, a handful of walnuts, a garlic clove, a few tablespoons of extra-virgin olive oil as well as a pinch of red pepper flakes into a small food processor (I’m a big fan of the Ninja Master Prep Pro).
Process all the ingredients on pulse until they are reduced to a coarse paste. As you can see, I like mine to be on the really coarse side, so it retains a bit of a bite, but you could choose to process yours a little bit longer to make it a bit smoother. There’s no exact science here.
Also, if you didn’t have such a food processor, you could very well chop your olives, walnuts and garlic by hand and then stir in the olive oil and chili pepper flakes. It would work just as well.
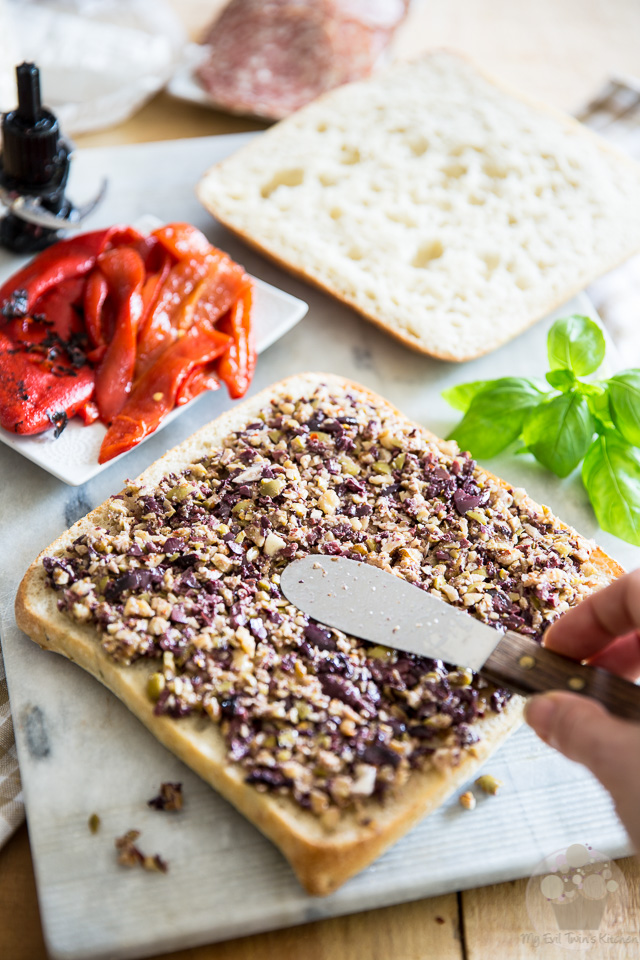
Once your tapenade is done to your liking, spread it over the cut side of the bottom slice of bread.

Top with half the salami…
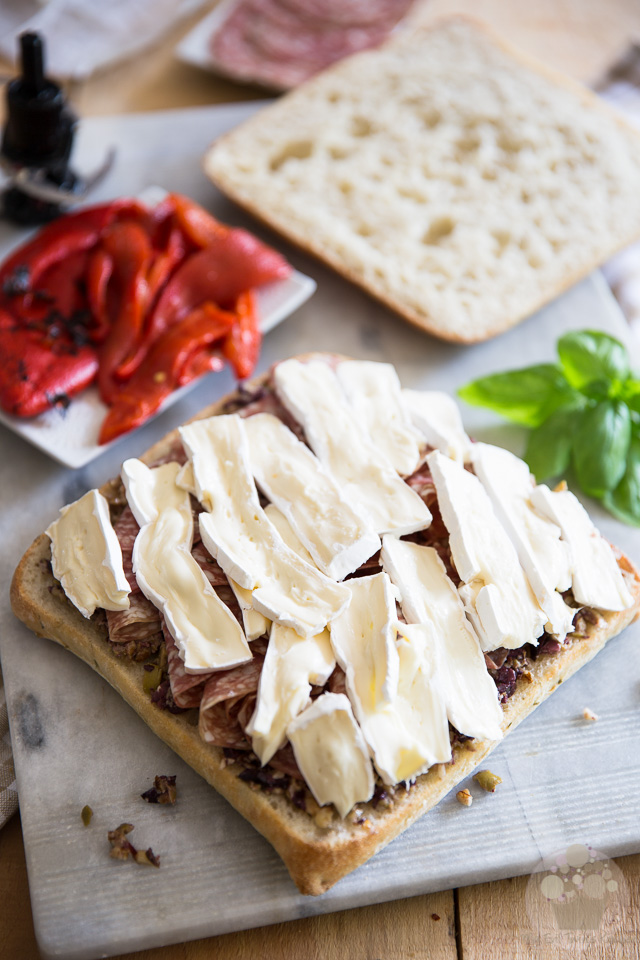
…followed with the sliced brie cheese…
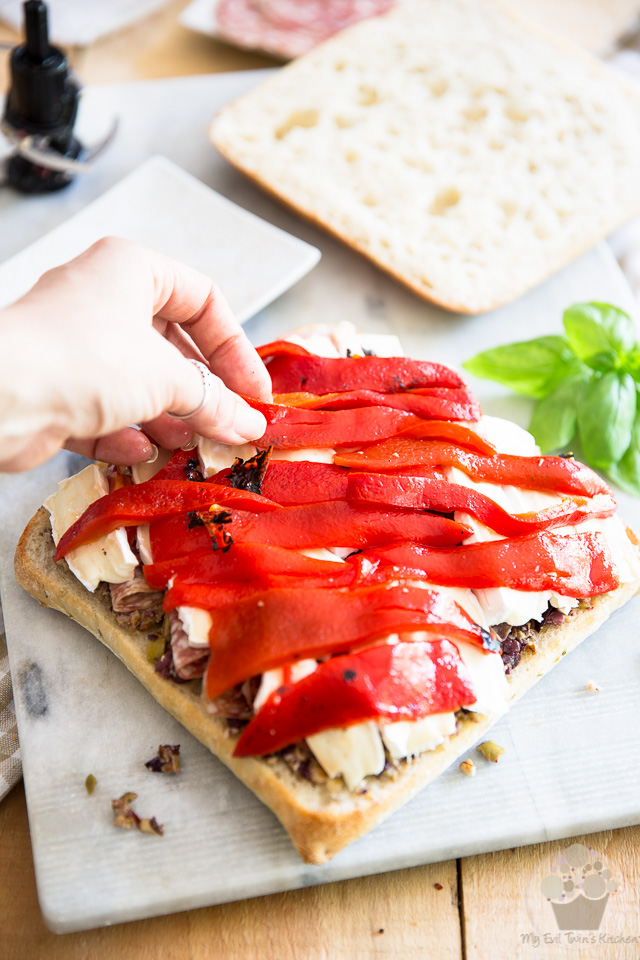
…roasted bell peppers… (make sure you pat them really, really dry: these things contain A LOT of liquid!)
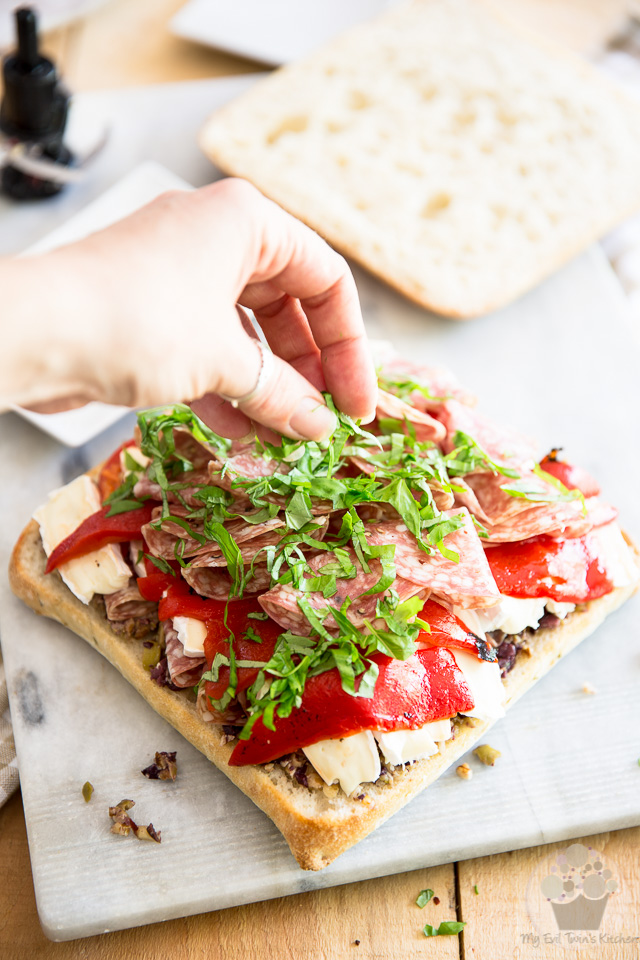
…and the remainder of the salami.
Finally, sprinkle with the chopped basil…
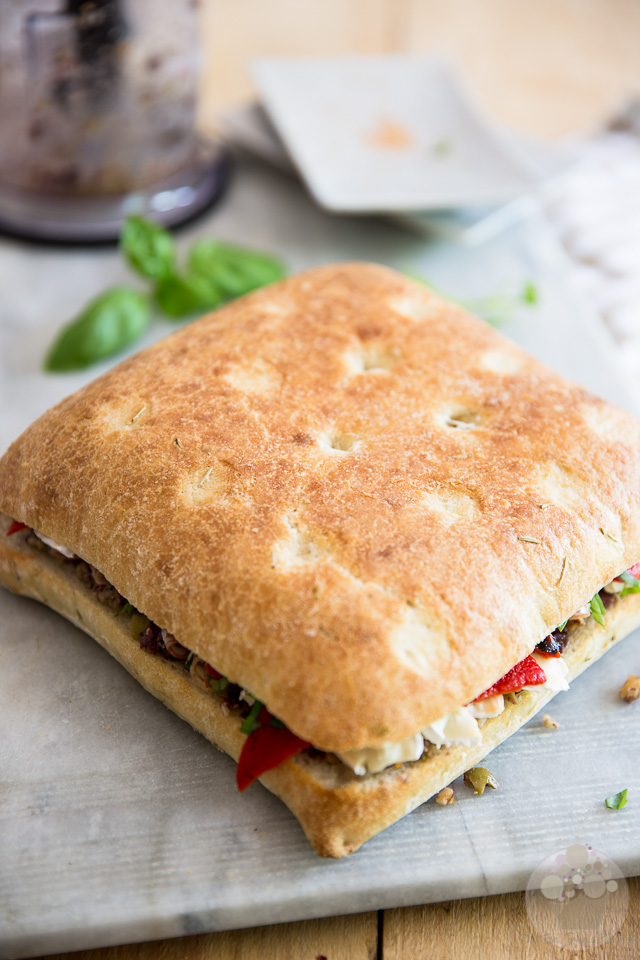
…and replace the top part of the bread.
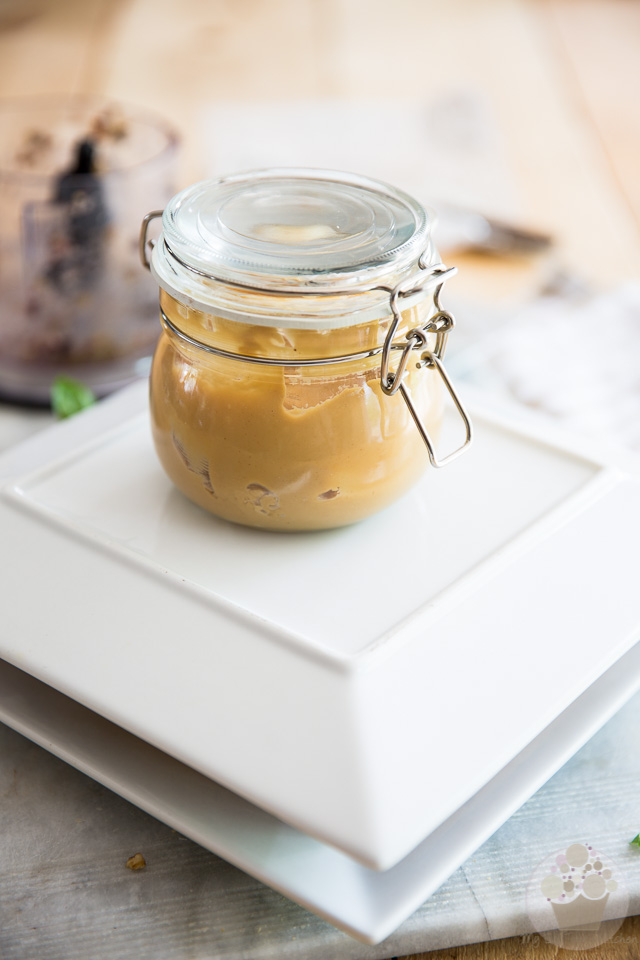
If time permits, weigh your sandwich down for about an hour.
What I did is I placed my sandwich in a square plate, topped it with another square plate and then placed a jar of my homemade peanut butter on top.
While this step isn’t mandatory, it’ll help your sandwich stay together and hold its shape better.
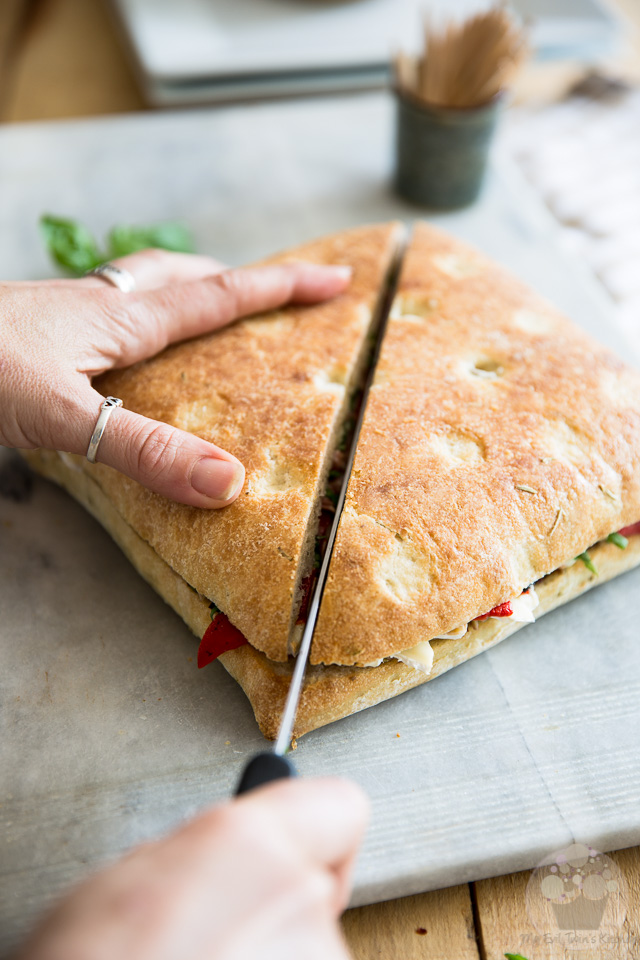
Slice your finished sandwich into as many or as few triangles as you like.

I find that if you’re gonna bring this sandwich with you to work, for instance, quarters work really good because they are easy to wrap and carry in a lunch bag…
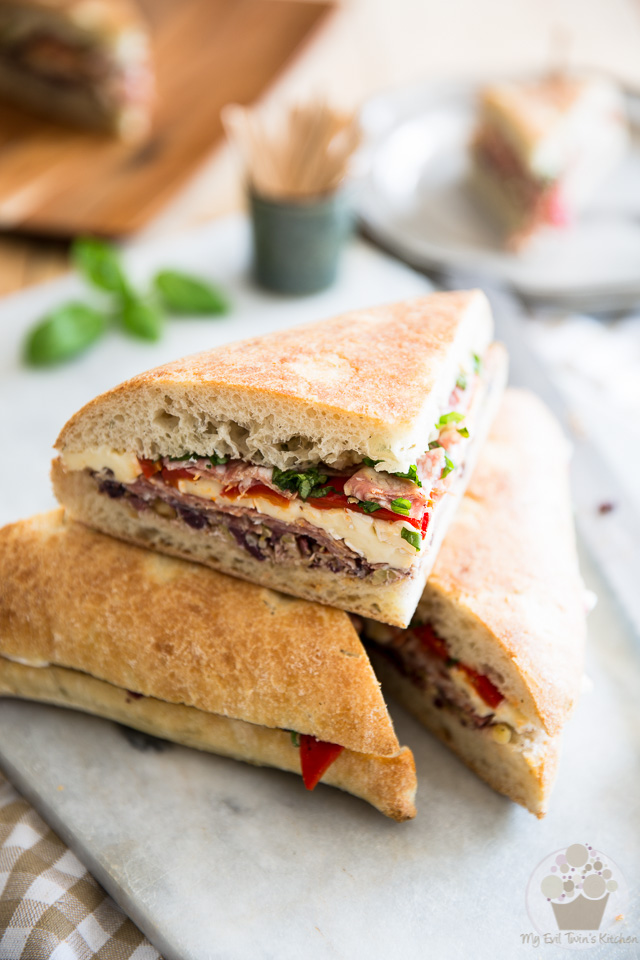
If you are going to serve your sandwiches on a platter, though, cut them into 8 or even 16 triangles; perfect for a picnic or any other social gathering!

If you want to get real fancy, when ready to serve, stick a toothpick into each wedge and then decorate it with a manzanilla olive.

And now just for fun, what’d you say we put all of these images in action? Just for fun!

Ingredients
- 1 focaccia bread, sliced in half horizontally
- 175g (6.2oz) thinly sliced Genoa salami
- 150g (5.3oz) brie cheese, sliced
- 2 roasted sweet bell peppers, patted really dry and sliced
- 15-20 fresh basil leaves, finely chopped
- 1 garlic clove, coarsely chopped
- 1/3 cup (75g | 2.6oz) pitted kalamata olives
- 1/3 cup (75g | 2.6oz) pitted green olives
- 1/2 cup (50g | 1.8oz) walnuts
- 2 tbsp extra-virgin olive oil
- 1 tsp chili pepper flakes
Instructions
- Combine all the ingredients for the tapenade in a small food processor. Process on pulse until the ingredients are reduced to a coarse paste.
- Spread that tapenade over the cut side of the bottom slice of bread. Top with half the salami, followed with the sliced brie cheese, roasted bell peppers and the remainder of the salami. Finally, sprinkle with the chopped basil and replace the top part of the bread.
- If time permits, weigh your sandwich down for about an hour and then slice it into as many or as few triangles as you like.
- Insert a toothpick in each wedge and decorate with a manzanilla olive, if desired; serve without delay.
- Leftovers will keep in the refrigerator in an airtight container for up to a few days.

Leave a Reply