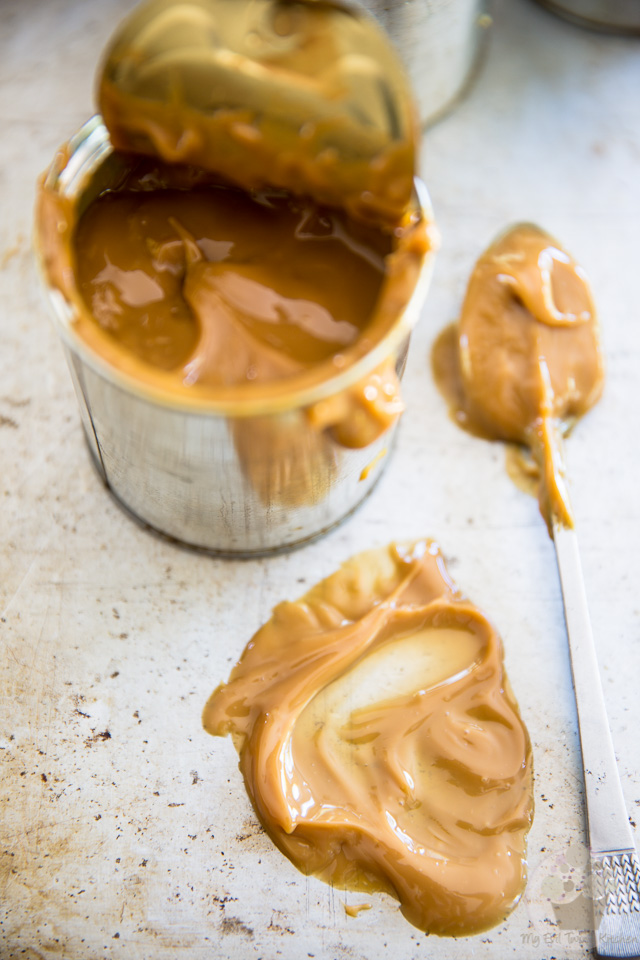
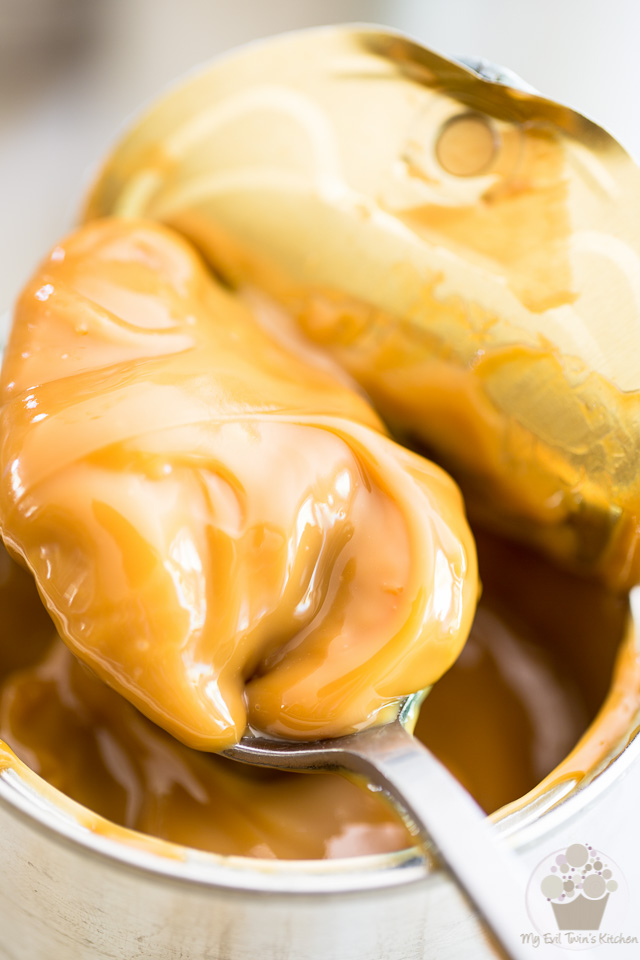
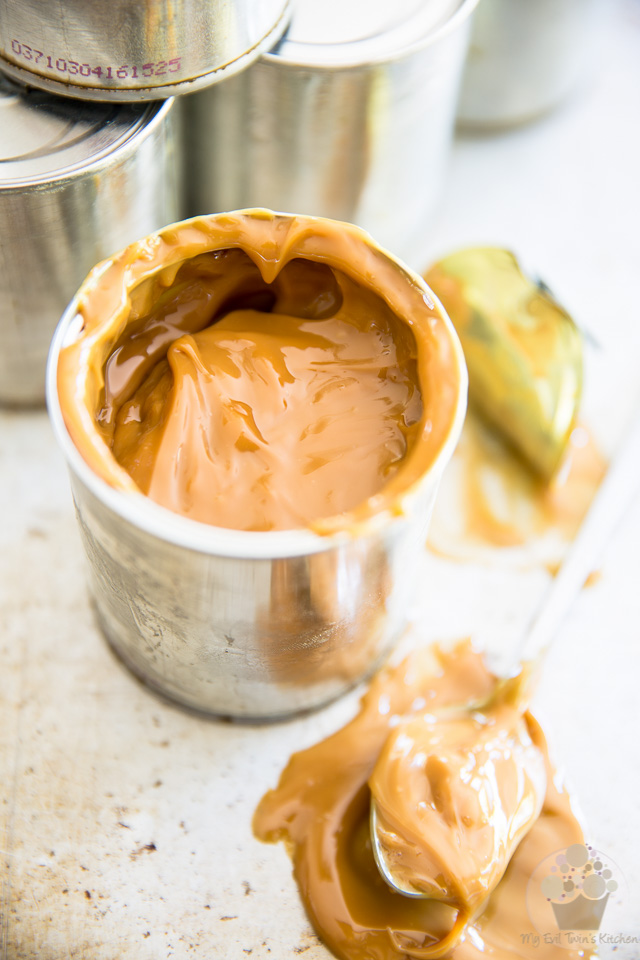
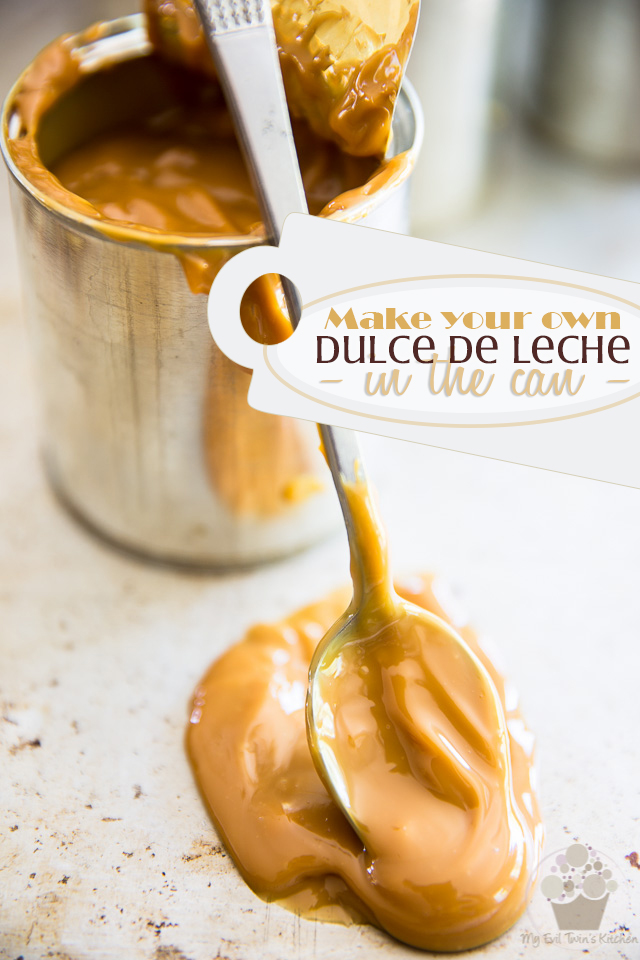
Made right in the can, this Dulce de Leche is a silky smooth, heavenly concoction with a pudding-like consistency and a delicious, sweet caramel flavor.

The term Dulce de Leche could probably be translated into something like “Milk Caramel”, or more precisely, “Milk Jam”. In French, it’s actually called Confiture de Lait, which literally translates to Milk Jam.
But never mind that… What Dulce de Leche really is is FOOD OF THE GODS!!! You know how insanely delicious sweetened condensed milk is right out of the can, right? Well, Dulce de Leche is, simply put, caramelized sweetened condensed milk. Yeppers! In other words, it’s like sweetened condensed milk made a hundred trillion times better.
If you’ve had it before, then you know exactly what I’m talking about: it’s s a silky smooth, heavenly concoction that has a creamy pudding consistency with a deliciously mild, sweet and delicate caramel flavor.
Some people like to spread this deliciousness on toasts, cupcakes, muffins and cookies, drizzle it over ice cream, or even eat it by the spoonful. Of course, you can also use it to create all kinds of decadent desserts!
The best part is you can make it SUPER easily and straight in the can, to boot; if you can boil water, you can make Dulce de Leche!
You need to follow a couple of VERY IMPORTANT rules though, otherwise, the can could explode in the process. COULD, I said. Not will.. So long as you follow the 2 crucial rules I’m about to tell you about, then the process is completely safe and stupid easy…
RULE #1 – Make sure that there ALWAYS is enough water in the pot to COMPLETELY cover the cans
I simply cannot stress that one enough, and the reason for this is twofold:
First and foremost, because water cannot physically get hotter than 212°F (100°C), the cans won’t be able to get hotter than this either, SO LONG AS THEY ARE COMPLETELY SUBMERGED. If the cans ever absorbed extra heat from the bottom of the pan in which they’re simmering, all this extra heat would be absorbed by the surrounding water. However, if you let some of that water evaporate and allowed the cans to get exposed to air, then the cans would overheat, the caramel would expand and the can that contains it WOULD LIKELY EXPLODE from the pressure build-up, sending mega-hot and sticky caramel flying all over your kitchen floor, walls, cabinet doors and ceiling! NO BUENO!
But as long as you make certain that there is plenty of water covering the cans AT ALL TIMES, then the eventuality of an explosion becomes extremely unlikely.
The other reason for keeping your cans surrounded by water is that the water in this process pretty much acts as a water bath: the fact that the cans are entirely submerged under water the whole time ensures that the caramel cooks evenly.
RULE #2 – Let the cans cool COMPLETELY before you attempt to open them.
After they have spent a bunch of hours in simmering water, the cans of Dulce de Leche MUST be allowed to cool COMPLETELY to room temperature before you attempt to open them. At this point, the hot caramel will have expanded considerably, putting some serious stress on the can. If you were to crack a can open while it was still hot, it would cause the Dulce de Leche to erupt like a volcano, which could lead to serious injuries!
Of course, the hotter the caramel, the more volume it takes up in that can, the more violent that eruption will be! So be safe, be good, and give those cans ample time to cool.
Respect these simple rules and you will be rewarded with the most delicious treat ever, practically effortlessly and totally risk free!
STEP-BY-STEP INSTRUCTIONS AND PICTURES
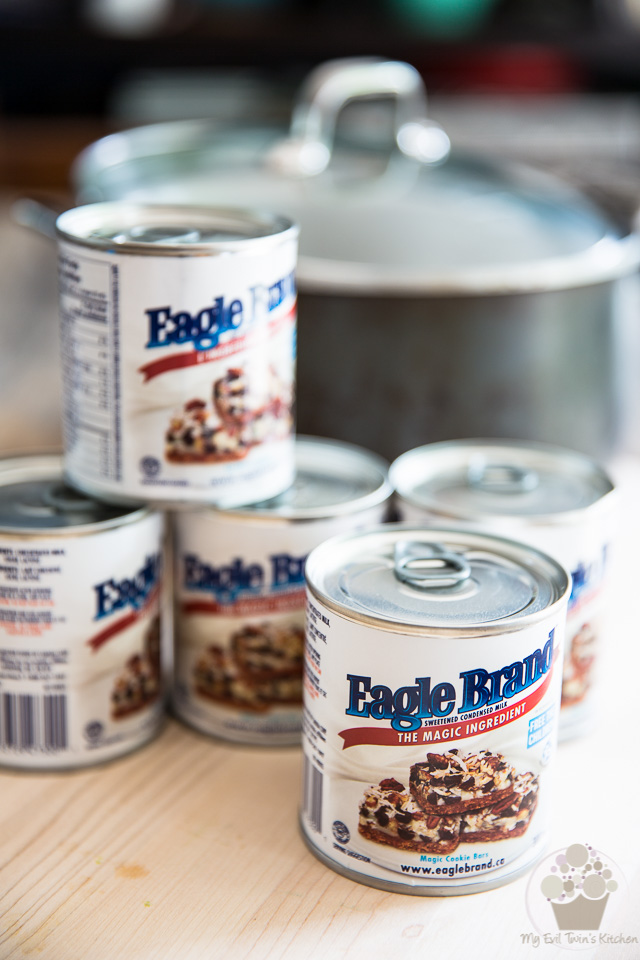
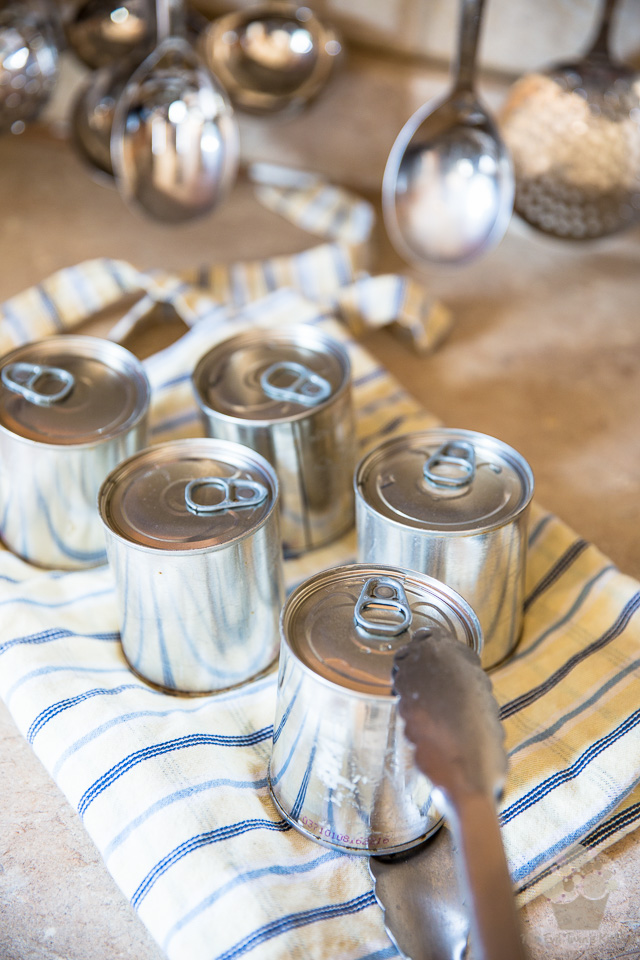
Start by gathering the desired number of cans of sweetened condensed milk.
Although it really is stupid easy, the process of making Dulce de Leche can be a bit lengthy, what with the prolonged simmering and the interminable cooling time, you know. With that in mind, coupled with the fact that unopened cans of Dulce de Leche keep almost indefinitely in the pantry, I like to make at least 3 to 5 cans at a time, to make it worth my while.
I strongly suggest that you do the same: I can guarantee you that won’t ever regret having a supply of that ambrosial nectar ready to use in your pantry.
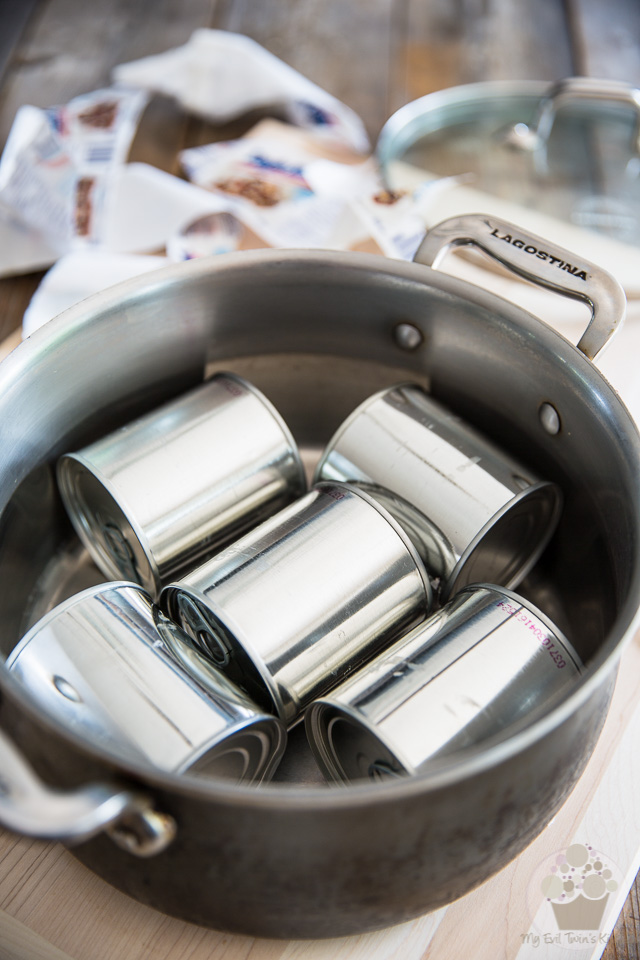
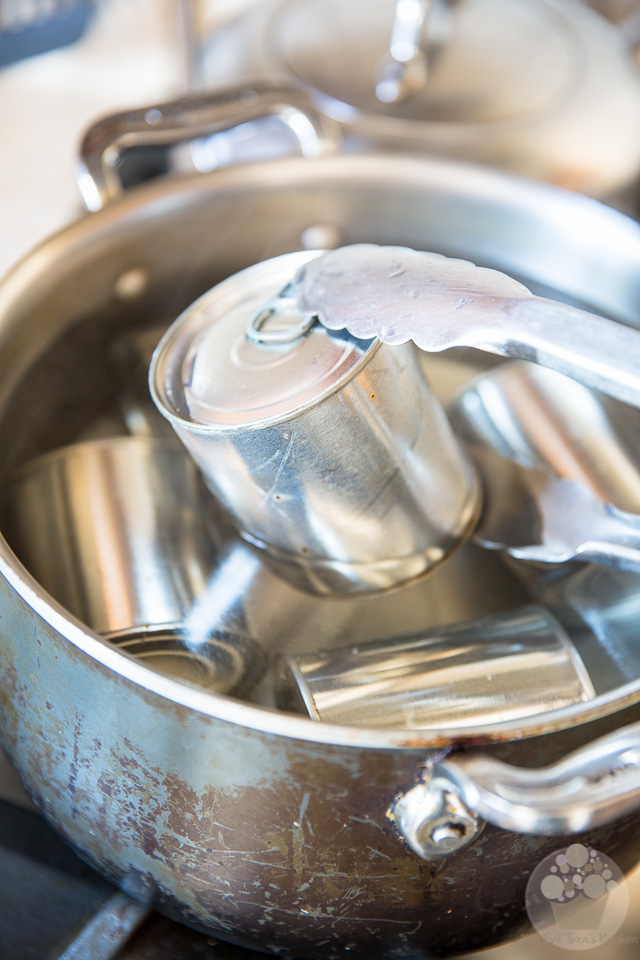
Remove the labels from your cans of sweetened condensed milk and place them on their side in a large enough stock pot to fit them all in on a single layer.
About those labels: while it’s not absolutely mandatory that you remove them, I strongly suggest that you do. Leave them on and, as they boil, they will disintegrate into millions of tiny pieces of paper that will stick to everything they touch and will be extremely tricky to clean up. Take my word for it, it’s MUCH easier to remove them beforehand.
Also, technically you COULD place the cans in an upright position, but the simmering water would cause them to bounce around in the pot, causing them to make all kinds of really annoying rattling metal sounds for 2 to 3 hours… Enough to drive even the sanest person completely insane. Some people will suggest that you place a tea towel at the bottom of the pot to prevent the noise from happening, but I say why bother? Simply placing the cans on their side will allow them to roll, as opposed to bounce, thus eliminating the very source of the noise.
Plus, placing the cans on their side usually leaves more room above them for water. The more water you have above those cans, the better. Remember the number 1 rule: don’t EVER let the cans get exposed to air. EVER! Not even for a minute.
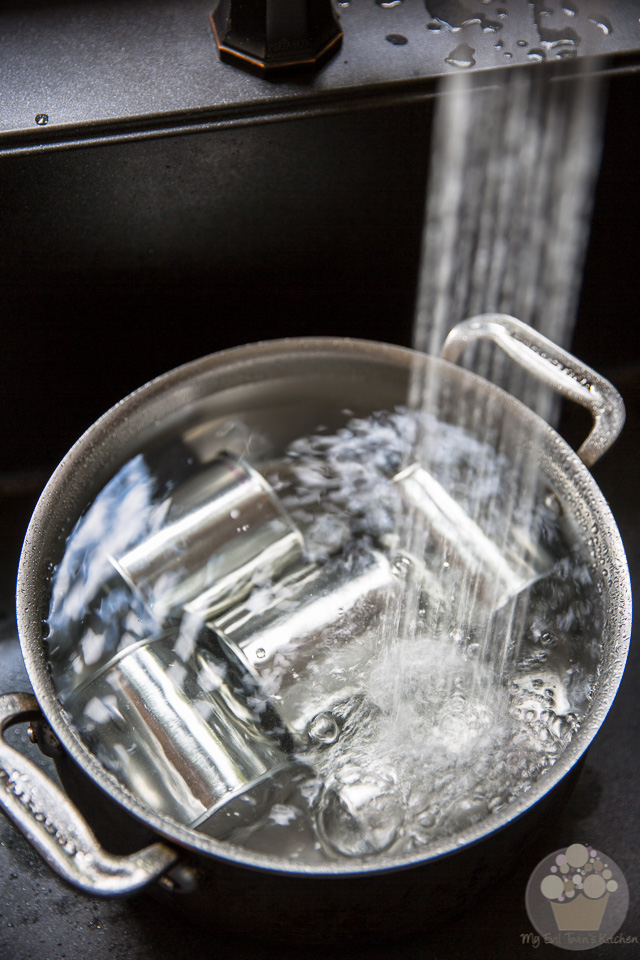
Now add plenty of cold water to the pot, until the cans are completely submerged;
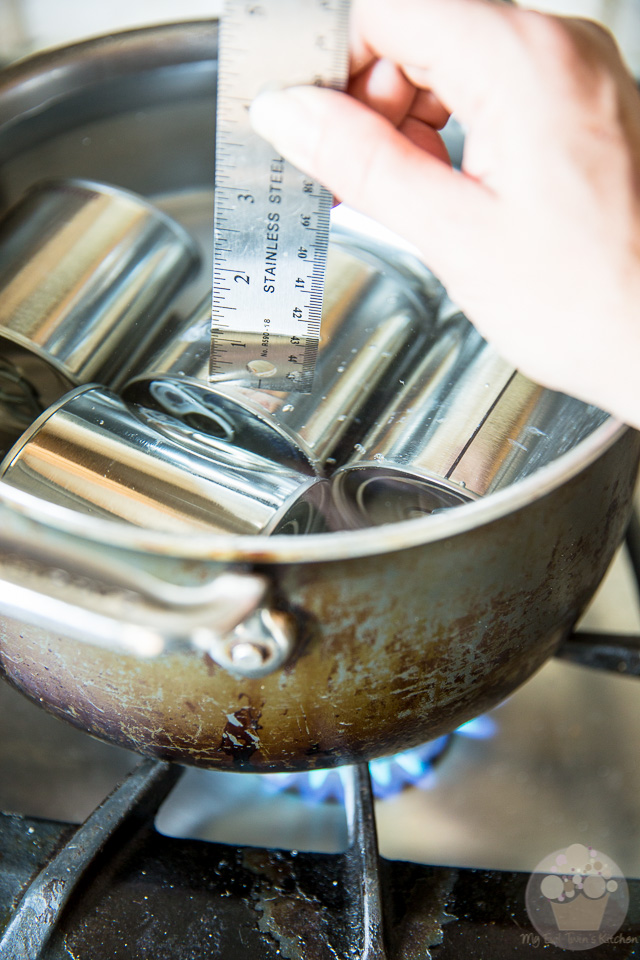
Ideally, you want there to be at least 1 inch of water above your cans. More is even better!
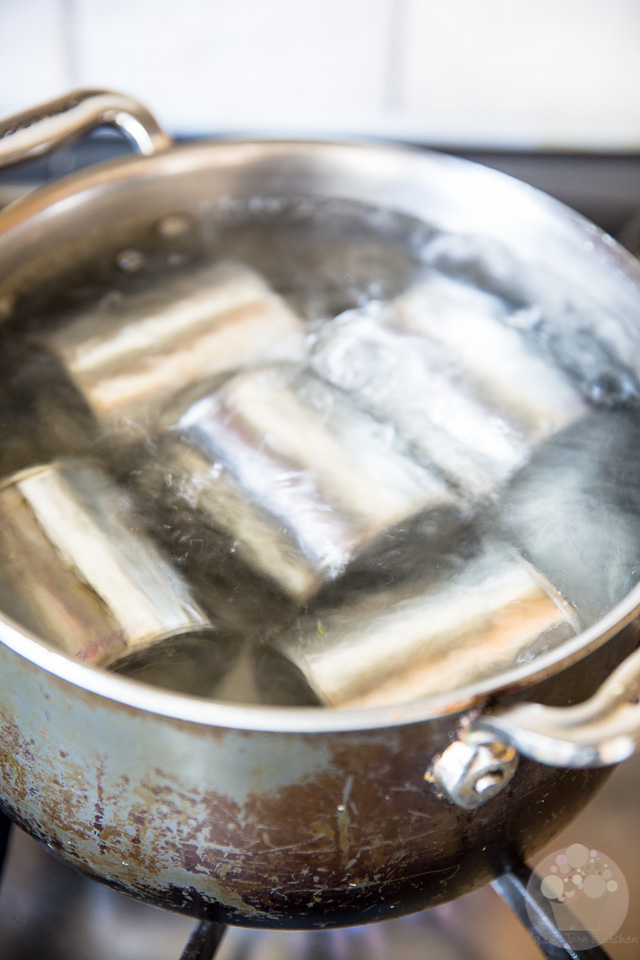
Place the pot over high heat and bring to the boil, then reduce the heat and simmer for 2½ to 3 hours, again, making sure that the cans are covered with water AT ALL TIMES.
Note that the water doesn’t need to boil violently: the more aggressively that water boils, the quicker it evaporates and the more it splatters all over the place. A gentle simmer is amply sufficient.
As for cooking time, the choice is entirely up to you: the longer you leave the cans in there, the darker and firmer your Dulce de Leche will be. I suggest anywhere between 2½ hours to 3 hours, because it’s what I find yields the best results in terms of taste and consistency, as well as for baking purposes.
Feel free to experiment and find your own personal preference.
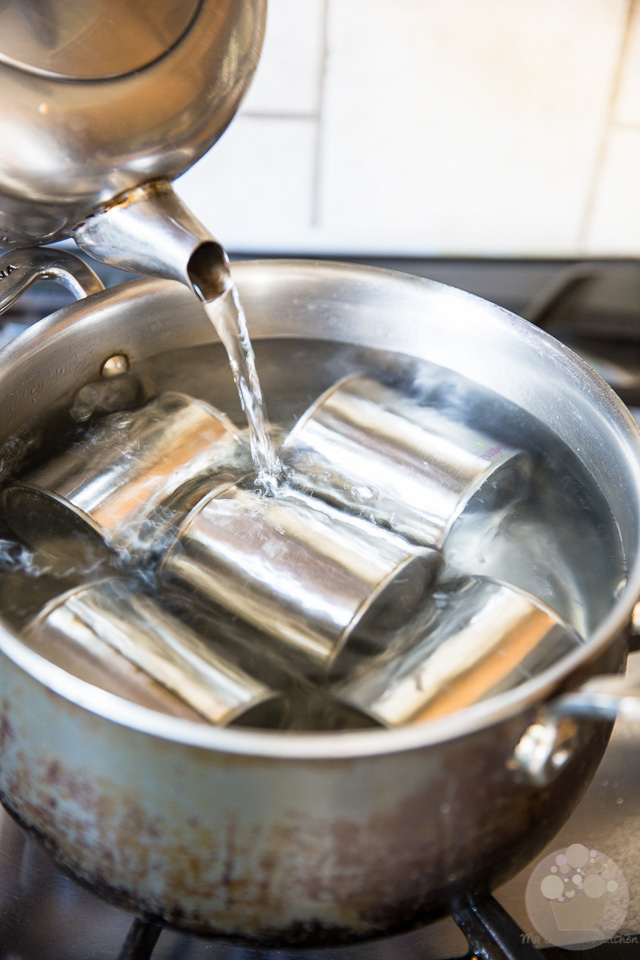
But whatever you do, make sure to keep a good eye on things and top with more boiling water as needed.
Now that doesn’t mean that you need to be watching that pot like a hawk; if you’re afraid that you might forget to check on it, you could set a timer to go off every half hour or so, just to remind you to check on that water level.
Oh, and as soon as you empty that kettle, fill it back up and boil some more water! That way you always have some hot water ready to top off that pot!
Once the total cooking time has elapsed, CAREFULLY remove the cans from the water with a pair of tongs (or a slotted spoon…)
Place the cans onto a tea towel to cool. Keep in mind that these cans will be extremely hot, so make sure that you place them on a heat resistant surface, too!
Now, remember the 2nd rule? Let the cans cool COMPLETELY to room temperature before you open them. Failure to do so will cause the Dulce de Leche to erupt like a volcano and may lead to serious injuries!
To be safe, I strongly suggest that you let your Dulce de Leche cool for a full day.
If you were in a real hurry, though, you COULD empty the water from the pot that you just used, return the cans to it, place it in the sink and then let a stream of cold water run into it and over the cans for a few minutes. Then, fill the pot with cold water and let the cans sit in that cold water for a while, replacing it as needed, until the cans get completely COLD to the touch. The caramel in the center will still be warm, so you’ll need to be extra careful when opening the cans and stirring the caramel.
And now, finally, the moment you’ve been eagerly waiting for…
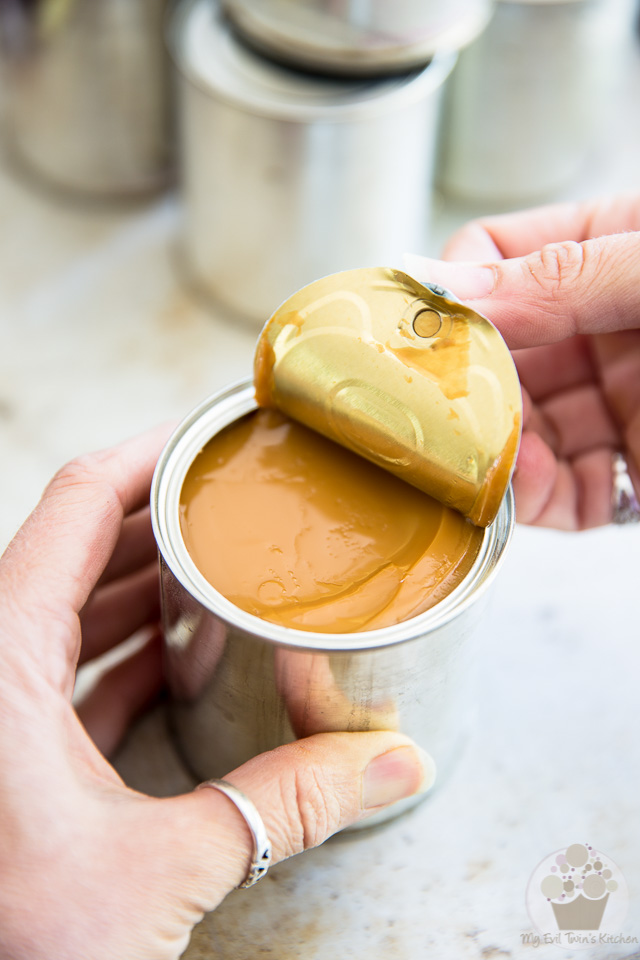
Now that they’ve had sufficient time to cool, the cans can safely be opened. Already looks delicious, doesn’t it?

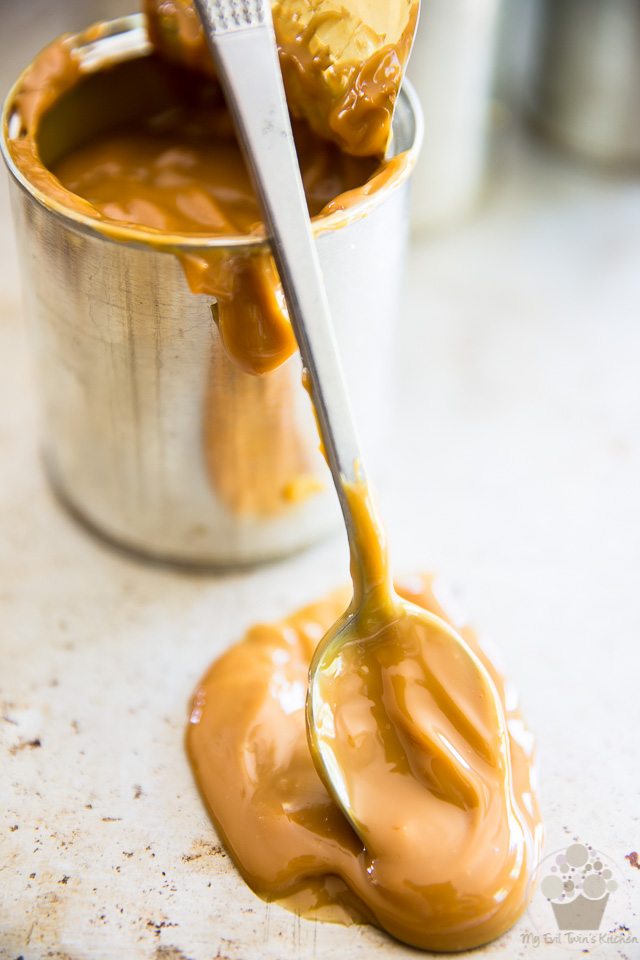
All that’s left to do is give the Dulce de Leche a good stir and ENJOY!
Any leftovers will keep in the refrigerator, in an airtight container, for up to a month.
As for unopened cans, they will keep in the cupboards practically indefinitely.

Ingredients
- Desired number of cans of sweetened condensed milk
- Sufficient amount of water to completely cover cans and keep them covered at all times
Instructions
- Remove the labels from your cans of sweetened condensed milk and place them on their side in a large enough stock pot to fit them all in on a single layer. If you placed the cans in an upright position, the boiling water would cause them to bounce around in the pot, making all kinds of annoying rattling metal sounds.
- Add cold water to the pot until the cans are completely submerged; ideally, there should be at least 1 inch of water over you cans.
- Place the pot over high heat and bring to the boil, then reduce the heat and simmer for 2½ to 3 hours, making sure that the cans are covered with water AT ALL TIMES. Keep a good eye on things and top with more boiling water as needed.
- Once the total cooking time has elapsed, CAREFULLY remove the cans from the water with a pair of tongs or slotted spoon and place them onto a tea towel to cool. Make sure that you place the cans on a heat resistant surface, too!
- Let the cans cool COMPLETELY to room temperature before you open them. Failure to do so will cause the Dulce de Leche to erupt like a volcano and may cause serious injuries!
- Once cooled, the cans can safely be opened. Stir well upon opening and store any leftovers in the refrigerator, in an airtight container, for up to a month.
- Unopened cans will keep in the cupboards practically indefinitely.
Crazy easy!!! This drizzled over cheesecake?? Salivating. Do I foresee the next recipe post incorporating this luscious dulce? 😉
Haha! Sounds like a great plan, don’t it? Ice cream sort of comes to mind… Cream Cheese Dulce de Leche Ice Cream. Oh yes! I shall get right on it! (‘cuz really, I haven’t done that yet. That opened can is STILL sitting in my fridge, believe it or not!)
That is a crime!! I can take care of that for you 😉 haha But seriously. That ice cream MUST happen. I will be (not so patiently) waiting!
I love dulce de leche but for fear of that exploding thing I always make it in the oven.. Where you just pour the milk into a ovendish and let it cook there for a few hours. Works too and saves me a headache but I do think the color is better in the can. I think I’ll just have to lose the fear and just do it. The only thing I am wondering: if you remove the can from the water once it has cooked long enough will it than not end up exploding too? You do take it out of the water so technically it is no longer submerged..? Hence exploding danger? Or am I overcomplicating things? Lol…
The danger of explosion comes from the can overheating, Simone. So long as it’s completely submerged while it’s cooking, the chances of a can exploding are extremely slim(that would only be likely to happen if the can was seriously flawed or damaged to start with). The water acts as a protective blanket that prevents the cans from absorbing too much heat. In fact, so long as a can is submerged, it won’t ever be able to get any hotter than the water itself. When you finally remove the can from the water, it will have already been removed from the heat source, so it no longer will be at risk of overheating.
I used to make it in the can, on my stove, in a pot of water, with timers set to check it/top off the water while it cooked. That took 2.5-3hours. I just did it in my sous vide for the first time, at 200F for 7 hours. I had transferred it into a tightly-closed glass jar (not a Mason type) with a metal lid. The jar floated in the water. Worked fine, just a longer wait.
Great instructions, so clear and illustrated. We used to make this using a pressure cooker, it’s a lot quicker (iirc, about 30mins only).